

Fixing chipped paint on a car bumper requires cleaning, sanding, matching paint, and sealing each repair.
A chipped bumper can look like a small problem, but exposed plastic, moisture, and road salt can make it spread. After working through many bumper touch-ups, I have found that careful surface prep matters more than expensive paint. This guide explains how to fix chipped paint on car bumper surfaces at home, when a DIY repair makes sense, and when professional paint work is the better choice.
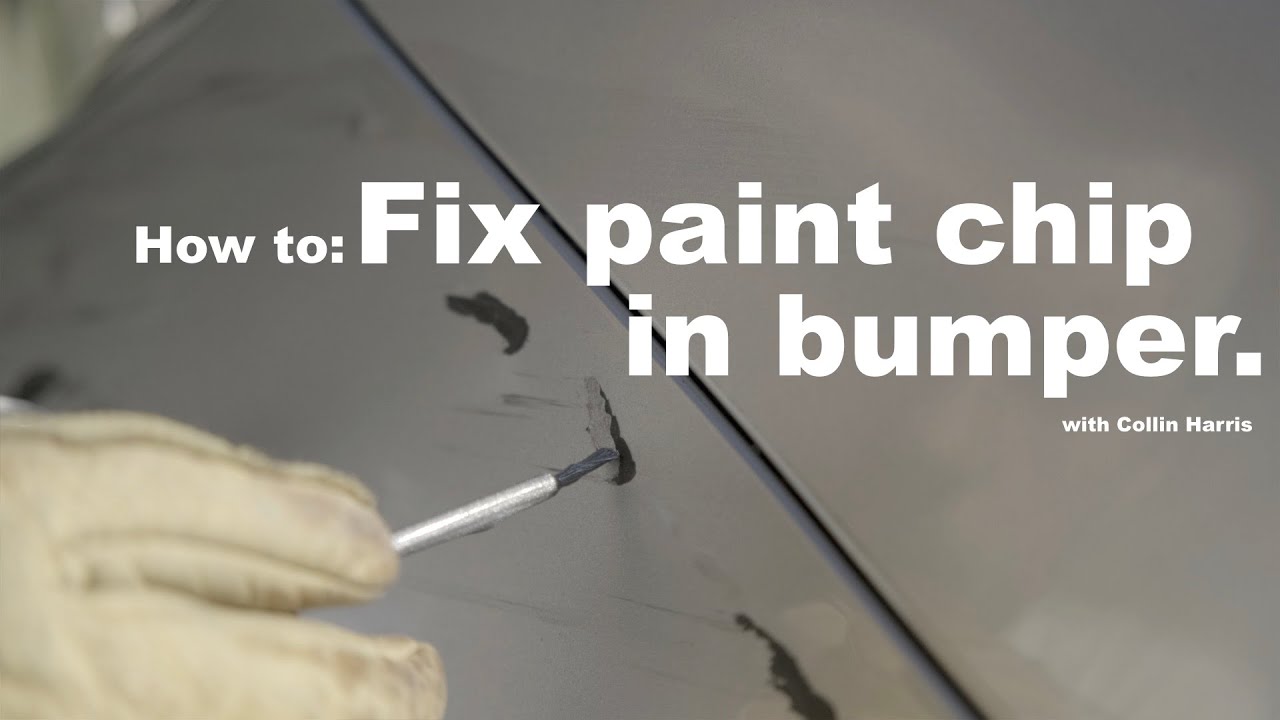
What Causes Chipped Paint on a Car Bumper?
Most bumper paint chips come from road debris. Small stones, gravel, sand, and loose pavement strike the bumper at high speed. Parking bumps, minor scrapes, car washes, and contact with shopping carts can also remove paint.
Many modern bumpers are made from flexible plastic. Unlike steel, plastic bends under light impact. This movement can weaken the bond between the primer, color coat, and clear coat.
Common causes include:
• Road debris hitting the front bumper
• Parking lot scrapes
• Minor collisions
• Pressure washing too close to the surface
• Poor paint adhesion from an earlier repair
• Sun exposure and weather changes
• Road salt and moisture reaching exposed material
A chip that reaches only the clear coat is simple to repair. A chip that reaches the color coat, primer, or bare plastic needs more work. If the bumper is cracked, bent, or pulling away from the vehicle, paint repair alone will not solve the problem.
Can You Fix Chipped Bumper Paint at Home?
You can fix small chips at home if the bumper is sound and the damaged area is limited. A DIY repair can improve the appearance and protect the exposed surface from dirt and moisture.
The finished repair may not be invisible. Factory paint is applied in controlled conditions with special spray tools, proper flash times, and exact color formulas. A touch-up brush can restore protection, but it may leave a slight edge or color difference.
DIY repair is usually suitable when:
• The chip is smaller than a quarter
• The bumper is not cracked
• The damaged area is not badly dented
• You want a practical, low-cost improvement
• The vehicle is an older daily driver
Consider a body shop when:
• The paint is peeling across a large area
• The bumper has deep scratches or cracks
• The color is difficult to match
• The damaged spot is on a highly visible area
• You need a near-perfect finish before selling the car
This honest assessment is important. A small touch-up can look great from a few feet away. It may not match the finish seen under bright shop lights.

Tools and Materials You Need
Before learning how to fix chipped paint on car bumper surfaces, gather the right materials. Most failed repairs begin with rushed cleaning or the wrong type of paint.
You will need:
• Automotive soap
• Clean microfiber towels
• Isopropyl alcohol or automotive wax and grease remover
• Fine-grit wet-and-dry sandpaper, such as 600, 800, and 1,000 grit
• Plastic-safe primer
• Automotive touch-up paint
• Automotive clear coat
• Small artist brushes or a fine touch-up applicator
• Masking tape
• Masking paper or plastic sheeting
• Nitrile gloves
• Safety glasses
• A clean, dust-free work area
Use paint made for automotive plastic. Household paint, craft paint, and some general spray paints may crack or peel when the bumper flexes.
Find the vehicle’s paint code before buying color paint. The code may appear on a door-jamb label, under the hood, inside the glove box, or in the owner’s documents. A paint code is more reliable than choosing a color by eye.
Check the paint maker’s instructions for drying time, temperature, surface preparation, and recoat limits. These details vary by product. Applying a second coat too soon can wrinkle the first coat.
How to Fix Chipped Paint on Car Bumper: Step-by-Step
1. Wash the Bumper
Start by washing the entire bumper with automotive soap and clean water. Remove road film, wax, bugs, and loose dirt.
Dry the area with a microfiber towel. Let the bumper dry fully before sanding. Water trapped around the chip can interfere with primer and paint adhesion.
2. Inspect the Damage
Look closely at the chip in good light. Check for cracks, loose plastic, lifted paint, and deep gouges.
Press gently around the edge. If the surrounding paint moves or feels loose, remove the unstable section. Do not paint over loose paint because the new coating will fail with it.
If the plastic is cracked, stop and consider plastic repair first. A flexible bumper repair compound may be needed before primer and paint.
3. Clean the Repair Area
Wipe the chip and the surrounding paint with a small amount of isopropyl alcohol or automotive surface cleaner. This removes oils that soap may leave behind.
Do not use strong household solvents without checking the label. Some solvents can soften plastic or damage nearby paint.
Wear gloves during this step. Finger oils can quickly return to a clean surface.
4. Sand the Chip Edges
Use fine sandpaper to smooth the sharp edge around the chip. Sand lightly until the edge feels gradual rather than raised.
For a small chip, 600- to 800-grit paper is often enough. Finish with 1,000-grit paper if you need a smoother transition.
Avoid making the damaged area larger than necessary. The goal is to create a stable, smooth edge, not to sand half the bumper.
Wipe away sanding dust with a clean, damp microfiber towel. Allow the surface to dry before moving on.
5. Apply Plastic Primer
If the chip exposes bare plastic, apply a light coat of plastic adhesion promoter or plastic primer. Follow the product instructions closely.
Use several light passes instead of one heavy coat. A thick primer layer can run, sag, or remain soft below the surface.
Primer helps the color coat bond to the bumper. It does not fill deep scratches or replace a proper plastic repair product.
6. Apply Matching Touch-Up Paint
Shake or stir the paint as directed. Apply a small amount with a fine brush or the applicator supplied with the product.
Dab the paint into the chip. Do not brush far beyond the damaged area. Slightly filling the chip is better than leaving a low spot, but avoid creating a large blob.
Let each coat dry according to the label. Two or three thin coats usually work better than one thick coat.
When learning how to fix chipped paint on car bumper surfaces, patience is the main skill. I once saw a repair fail because the owner added the second coat while the first still felt soft. The result wrinkled and had to be sanded back.
7. Blend the Paint Carefully
If the repair is larger than a small chip, you may need to soften the color into the surrounding area. Use very light coats that extend slightly beyond the previous coat.
Do not try to blend metallic or pearl paint with a tiny brush over a large area. These colors reflect light differently based on spray pattern, film thickness, and angle.
For a small spot, keeping the paint inside the repair is often cleaner. For a larger repair, aerosol paint and proper masking may provide a more even result.
8. Apply Clear Coat
After the color coat has flashed or dried as directed, apply automotive clear coat. Use light coats and maintain the recommended distance from the surface.
Clear coat protects the color from sunlight, water, and normal wear. It also adds gloss and helps the repaired area match the surrounding finish.
Do not apply clear coat over wet color paint unless the product specifically allows it. Follow the recoat window on the label.
9. Let the Repair Cure
Keep the vehicle dry and away from dust while the repair cures. Avoid washing, waxing, or touching the area during this time.
A surface may feel dry but remain soft below the top layer. Full cure time can range from several hours to several days, depending on the product, temperature, and humidity.
If the repair feels firm after curing, you can lightly polish the surrounding area. Avoid aggressive machine polishing on a fresh touch-up.
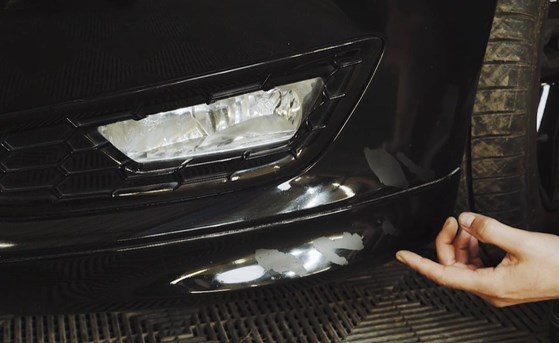
How to Match Bumper Paint Correctly
Color matching is one of the hardest parts of learning how to fix chipped paint on car bumper panels. The factory color code gives you the correct paint formula, but the result can still vary.
Paint fades over time. The bumper may also have a slightly different shade from the metal body panels because plastic and metal receive different heat and paint processes at the factory.
For the best match:
• Use the exact factory paint code
• Buy paint from a trusted automotive supplier
• Test the color on hidden plastic first
• Compare the test area in sunlight and shade
• Use the correct clear coat for the paint system
• Avoid mixing products from incompatible systems
A color that looks correct in a store may look different on the vehicle. Metallic particles can also settle in the bottle, so mix the paint thoroughly.
If the repair is highly visible, a paint supplier may scan the vehicle and create a closer color match. This costs more than basic touch-up paint but can reduce noticeable color variation.
Common Mistakes to Avoid
Many bumper paint repairs fail because of simple preparation errors. The paint itself is often not the main problem.
Avoid these mistakes:
• Painting over wax or silicone
• Skipping plastic primer
• Using thick coats
• Sanding with very coarse paper
• Applying paint in cold or damp weather
• Touching the surface with bare fingers
• Washing the vehicle before the paint cures
• Using a heat gun too close to plastic
• Spraying without protecting nearby panels
• Ignoring cracks beneath the paint
Temperature matters. Most automotive coatings work best within the range listed on the label, often around 60 to 80 degrees Fahrenheit. Cold air slows drying, while high heat can make paint dry before it levels.
Humidity can also affect the finish. Moisture may cause dullness, clouding, or poor adhesion. A clean garage with good airflow is usually safer than an open driveway beside a dusty road.
Never spray automotive coatings in a closed room without ventilation. Wear the recommended respiratory protection and keep the product away from flames, sparks, and heat sources.
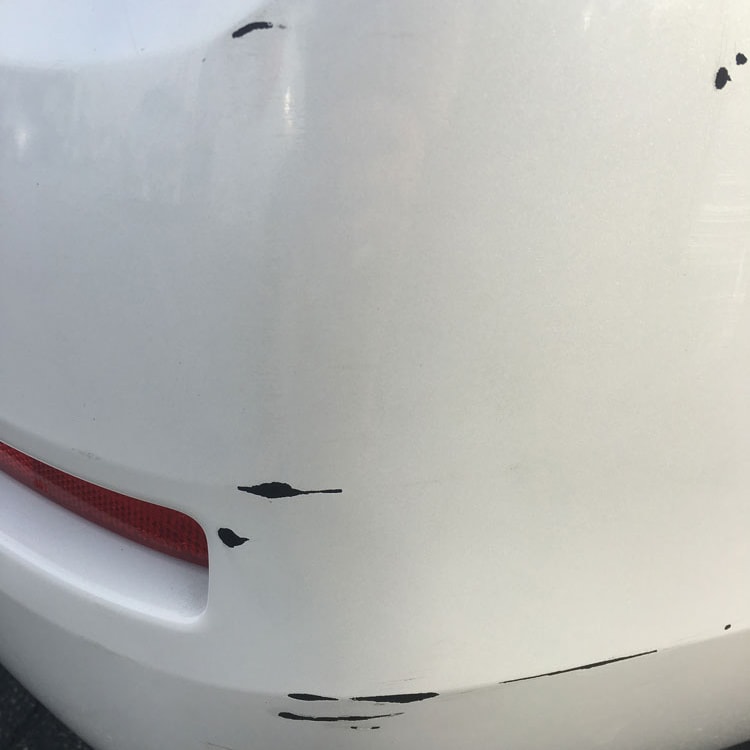
How Much Does It Cost to Repair Chipped Bumper Paint?
The cost depends on the size of the chip, the type of paint, and the level of finish you want.
A basic DIY repair may cost:
• $15 to $30 for touch-up paint
• $10 to $25 for primer
• $10 to $25 for clear coat
• $10 to $20 for sandpaper and cleaning supplies
A complete DIY kit may cost about $30 to $80. A professional bumper repair can range from roughly $150 to $600 for a localized repair. A full bumper repaint may cost more, especially with metallic, pearl, or special-effect paint.
Prices vary by region, vehicle, paint color, shop workload, and damage level. Ask the shop whether the estimate includes sanding, plastic repair, blending, clear coat, and reinstallation.
The cheapest quote is not always the best value. Ask to see examples of previous bumper work and confirm whether the shop provides a warranty.
How to Make the Repair Last
Once you understand how to fix chipped paint on car bumper surfaces, protect the repair with good care. Avoid harsh brushes and automatic car washes for the period recommended by the paint manufacturer.
After the paint fully cures:
• Wash with a mild automotive soap
• Use a clean microfiber mitt
• Avoid strong pressure directly on the repair
• Apply wax only when the product allows it
• Inspect new chips before moisture reaches the plastic
• Repair exposed areas early
Paint protection film can help protect a repaired or newly painted bumper from future stone chips. A ceramic coating may make cleaning easier, but it will not stop a sharp stone from damaging paint.
A front bumper takes constant abuse. Think of the paint as a raincoat and the clear coat as its outer shield. Once that shield is broken, early repair keeps a small weakness from becoming a larger problem.

When to Choose a Professional Repair
DIY touch-up paint works best for small, isolated chips. Professional work is more suitable when the damage covers a wide area or affects the bumper’s shape.
A professional technician can:
• Repair cracked plastic
• Reshape damaged areas
• Use a spray booth
• Match complex colors
• Blend paint into nearby panels
• Apply clear coat evenly
• Polish the finish after curing
Professional repair is also wise if the bumper contains sensors, cameras, or radar equipment. Removing or repainting parts near these systems may require special procedures and calibration.
Ask the shop whether the bumper must be removed. Sometimes removal gives better access and a cleaner repair. In other cases, a skilled technician can complete a localized repair without removing it.
Frequently Asked Questions About How to Fix Chipped Paint on Car Bumper
Can I fix a small bumper paint chip without sanding?
You can apply touch-up paint without sanding, but the repair may have raised edges and weaker adhesion. Light sanding helps remove loose paint and creates a smoother surface for primer and color.
Do I need primer for a chipped plastic bumper?
Use plastic primer or adhesion promoter when the chip exposes bare plastic. If only the clear coat is damaged, primer may not be necessary, but the surface still must be clean and stable.
How long does touch-up paint take to dry on a bumper?
Drying time depends on the product, temperature, humidity, and coat thickness. The surface may dry in minutes, but full curing often takes much longer, so follow the product label before washing or polishing.
Can I use spray paint to repair a chipped bumper?
You can use automotive spray paint designed for plastic, provided you mask the area well and use compatible primer and clear coat. Standard household spray paint may crack, peel, or react with the original finish.
How do I repair a deep chip that shows black plastic?
Sand the edges, clean the area, and apply plastic primer before adding color. If the chip is deep, use a compatible flexible filler first, then sand it smooth before painting.
Will touch-up paint hide a bumper chip completely?
A careful repair can make a small chip hard to notice, but it may not be invisible. Metallic colors, faded paint, and differences in application can make the repaired spot slightly visible.
Should I repair a bumper chip before winter?
Yes. Repairing exposed plastic before winter can limit moisture, salt, and dirt from reaching the damaged area. Clean and dry the chip fully before applying primer and paint.
Conclusion
Learning how to fix chipped paint on car bumper surfaces is mostly about careful preparation. Clean the area, remove loose paint, smooth the edges, use plastic-safe primer, apply thin color coats, and protect the repair with clear coat.
Small chips are often manageable at home, while cracks, large peeling areas, and complex colors deserve professional attention. Work slowly, follow the product instructions, and give every layer enough time to cure. If this guide helped, explore more vehicle care resources or share your bumper repair experience in the comments.