

Clean, repair, and condition the leather, then seal the cracks before they spread or expose the seat foam.
Learning how to fix cracked leather car seats starts with knowing the leather type, crack depth, and cause of the damage. With the right cleaner, filler, colorant, and protectant, many worn seats can look smooth again without the cost of full upholstery replacement. This guide explains the process used by experienced detailers, including what works, what fails, and when professional repair is the wiser choice.
Why leather car seats crack
Leather cracks when it loses moisture, flexibility, or surface protection. Repeated bending adds stress to the same areas, especially the driver’s seat bolster and lower cushion. Heat, sunlight, sweat, friction, and harsh cleaners can speed up this wear.
Modern automotive seats may use several materials. Some are genuine leather, while others use vinyl, polyurethane-coated leather, or leather sections mixed with synthetic panels. Before learning how to fix cracked leather car seats, check the vehicle manual or upholstery label if possible.
Common causes include:
• Direct sunlight through the windshield and side windows
• High cabin temperatures, especially in dark interiors
• Dry air and long periods without conditioning
• Body oils, sweat, sunscreen, and spilled drinks
• Rough clothing, rivets, keys, and pet claws
• Strong household cleaners or alcohol-based products
• Frequent sliding across the seat instead of lifting into it
• Poor-quality dye or a damaged protective coating
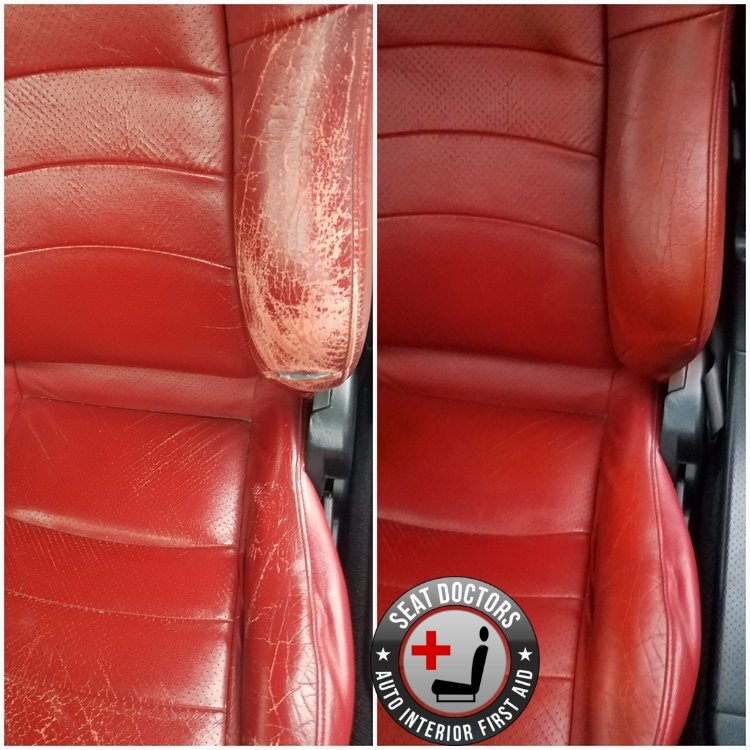
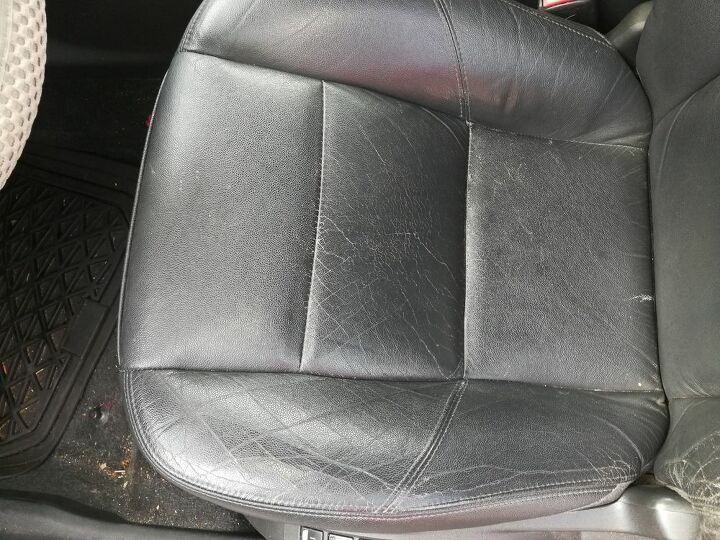
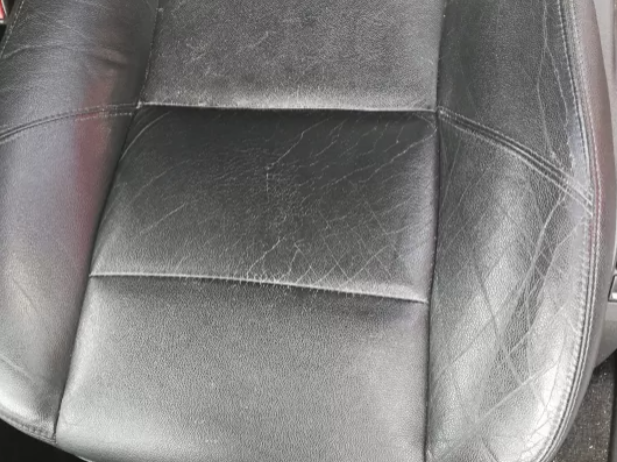
Small surface lines often affect only the finish. Deep cracks may cut through the color coat and expose the leather fibers beneath. If the seat feels hard, rough, or flaky, the material has likely lost more than its surface color.
Can cracked leather car seats be repaired?
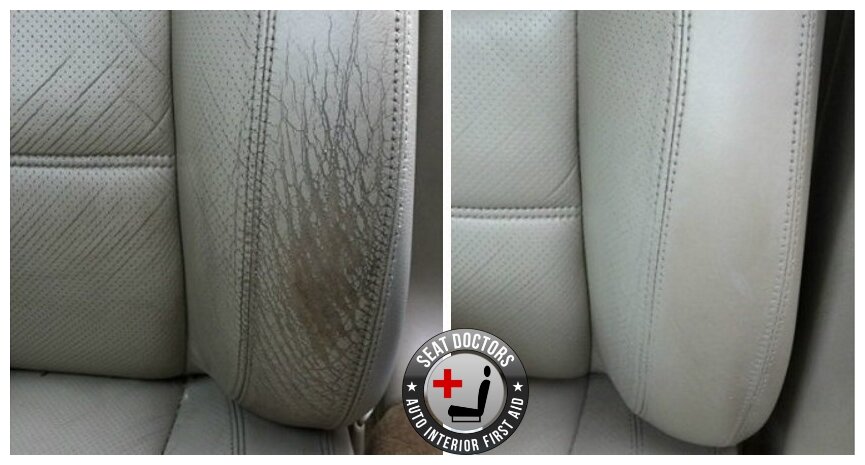
Yes, most shallow and medium cracks can be repaired at home. The repair usually involves cleaning, light sanding, applying flexible leather filler, matching the color, and protecting the finished surface.
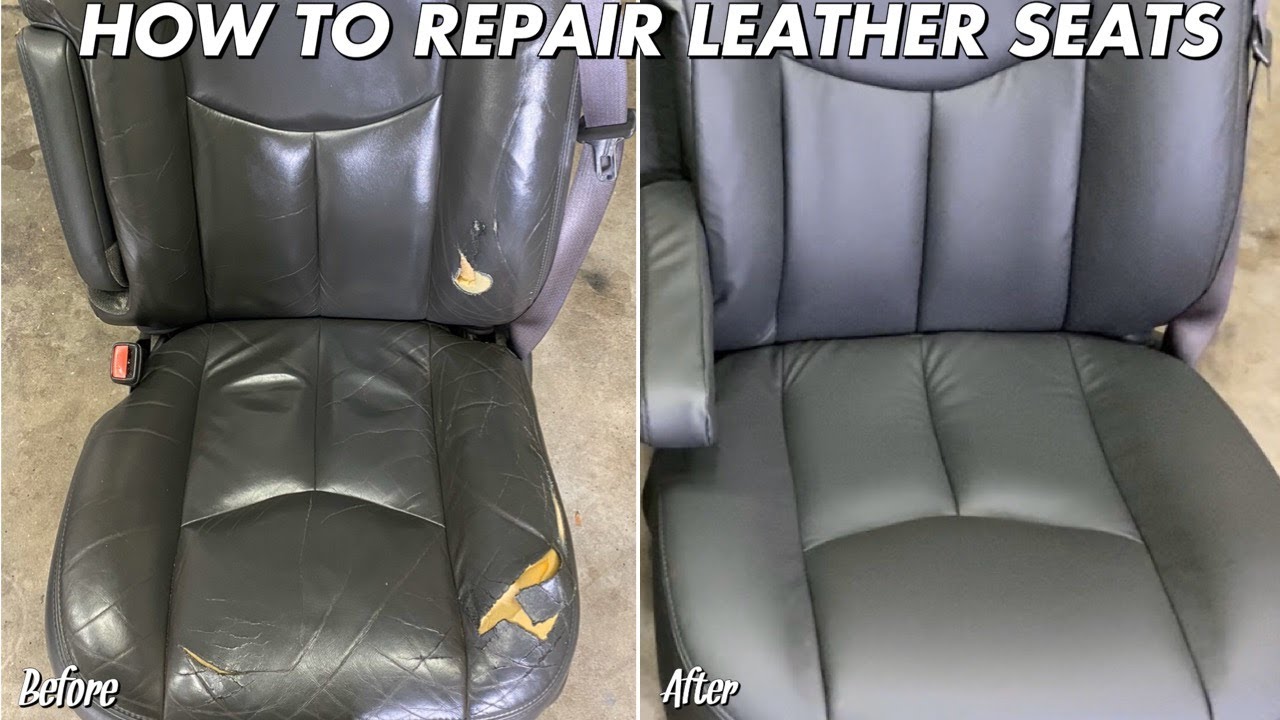
Learning how to fix cracked leather car seats does not mean making them look perfectly new in every case. A careful repair can greatly improve appearance and stop further damage, but it cannot restore leather that has completely split, shrunk, or lost its backing.
DIY repair works best when:
• The cracks are narrow and limited to the top surface
• The leather remains flexible
• The seat foam and stitching are still sound
• There are no large missing pieces
• The damaged area is easy to reach
Professional repair is better when the seat has a large tear, open seam, badly damaged bolster, or exposed foam. An upholstery specialist can replace leather panels and match factory grain more closely than most home kits.
I have seen many owners save money by repairing small cracks early. I have also seen a small crack become a wide split because the owner kept using the seat without sealing it. Leather damage is like a crack in a windshield: early action gives you far more control.
What you need for a leather seat repair
A basic leather repair kit can handle many common problems. Choose a kit made for automotive leather, not a general craft product. Car seats flex, heat up, and face constant friction, so the repair must remain flexible.
Gather these supplies:
• Vacuum or soft detailing brush
• Mild leather cleaner
• Two or three microfiber cloths
• Isopropyl alcohol for careful surface preparation
• Fine-grit sandpaper, such as 600 to 1,000 grit
• Flexible leather filler
• Leather colorant or automotive leather dye
• Small sponge, airbrush, or detail brush
• Leather sealant or protective topcoat
• Nitrile gloves
• Painter’s tape
• Hair dryer with a low-heat setting
Avoid using super glue, nail polish, shoe polish, or household caulk. These products may look effective at first, but they often become hard, shiny, or brittle. A stiff repair can crack again the moment the seat flexes.
Before applying any product, test it on a hidden area. Color and finish can vary between seat sections, even in the same vehicle. A test patch helps you avoid turning a small repair into a visible stain.
How to fix cracked leather car seats step by step
The best results come from preparation. Do not rush straight to the filler. Dirt, body oil, and loose coating can prevent new products from bonding to the surface.
1. Clean the seat gently
Vacuum the seat first. Use a soft brush around the seams, perforations, and edges. Then apply a small amount of leather cleaner to a cloth rather than soaking the seat.
Wipe in small sections. Remove cleaner residue with a separate damp cloth, then let the seat dry fully. Do not saturate ventilated seats because liquid can enter the perforations and affect the heating or cooling system.
2. Inspect the damage
Run your fingers over the area. Look for:
• Surface lines with no missing material
• Flaking color or clear coating
• Deep splits that show a darker backing
• Loose edges
• Torn stitching
• Collapsed or exposed foam
If the leather is only dry and dull, conditioning may be enough. If the surface has open cracks, continue with filler. If the seat is torn through, a patch or panel replacement may be needed.
3. Remove loose coating
Use a clean cloth and a small amount of suitable prep solution to remove loose color and finish. Work slowly. The goal is to remove flakes, not strip healthy material from the entire seat.
For stubborn rough spots, use very fine sandpaper with light pressure. Sand only until the edges feel smooth. Deep sanding can make the leather thinner and weaker.
4. Apply flexible leather filler
Press a thin layer of filler into each crack with a plastic spreader or fingertip covered by a glove. Push the filler into the opening, then wipe away excess from the surrounding surface.
Several thin layers are safer than one thick layer. Let each layer dry according to the product directions. A low-heat hair dryer can help, but keep it moving and use the lowest useful setting.
When people ask how to fix cracked leather car seats, this step often determines the final quality. Thick filler may shrink, show ridges, or split under pressure. Thin layers blend better and move more naturally with the seat.
5. Sand the repaired area
After the filler cures, lightly sand the area until it feels level. Use a soft cloth to remove dust. Do not press hard over seams, stitching, or perforations.
The repaired spot should feel smooth when you close your eyes and run a finger across it. If you can feel a ridge, apply another thin layer rather than hiding the problem with heavy dye.
6. Match and apply the color
Color matching takes patience. Apply a small amount of dye or colorant to the test area first. Let it dry before judging the shade because wet color often looks darker or glossier.
Use a sponge for broad areas and a fine brush for edges. Dab rather than brush heavily. Build the color with multiple light coats and allow each coat to dry.
For a factory-style look, the color must blend beyond the repair. Feather the outer edge so there is no hard circle around the repaired crack. Some kits allow custom color matching by combining several pigments.
7. Seal the repair
Apply a compatible leather topcoat after the color has cured. The topcoat adds resistance to rubbing, sunlight, moisture, and everyday dirt. Choose a finish that matches the original seat, such as matte, satin, or low gloss.
Do not apply conditioner before the colorant or sealant unless the product instructions specifically allow it. Oils can interfere with adhesion. Conditioning belongs near the end of the process.
8. Condition and protect the seat
Once the repair is fully dry, apply a small amount of quality leather conditioner. Spread it evenly and wipe off excess. Too much conditioner can leave the seat greasy and attract dust.
Use a sunshade, park in a garage when possible, and wipe spills quickly. These simple habits help explain how to fix cracked leather car seats for the long term: repair the damage, then remove the causes that created it.
How to repair deep cracks and small tears
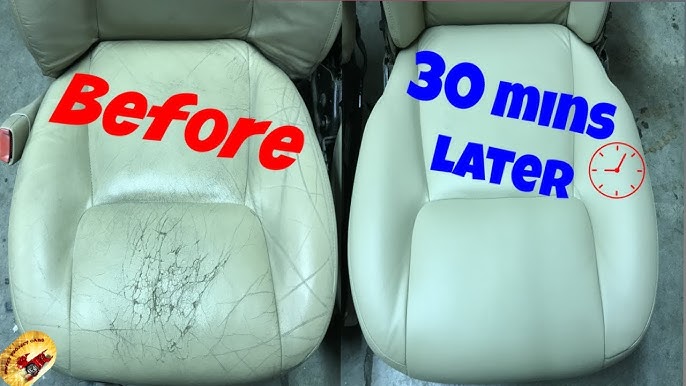
Deep cracks require more than surface color. If the crack opens when you press the seat, the leather may need a backing fabric. This backing supports the filler and prevents it from sinking into the foam.
For a deep crack:
Clean and dry the area completely.
Trim only loose, ragged fibers with small scissors.
Slide a thin repair fabric under the opening.
Apply adhesive suitable for automotive leather.
Add flexible filler in thin layers.
Smooth the surface after each layer dries.
Match the color and apply a protective topcoat.
A small tear can sometimes be repaired with a backing patch. The patch should extend beyond the tear on every side, but it must not create a hard lump beneath the leather. Keep adhesive away from seat controls, heating elements, and airbag seams.
Do not repair a seat-mounted airbag seam with filler or adhesive. These seams are designed to open during a collision. If damage is near an airbag label or deployment seam, have the seat inspected by a qualified automotive upholstery or safety professional.
How to restore cracked leather without making it worse
Many failed repairs come from using too much product. Leather is not a painted wall. It bends, stretches, and responds to heat. A thick layer may hide the crack today and fail after a few weeks of driving.
Avoid these common mistakes:
• Skipping the cleaning step
• Using coarse sandpaper
• Applying filler over loose flakes
• Drying the seat with high heat
• Covering the whole seat with a mismatched dye
• Using silicone products before color repair
• Applying too much conditioner
• Driving on the seat before the repair cures
• Ignoring the cause of the cracking
Another common mistake is treating coated leather like unfinished hide. Many car seats have a protective polyurethane finish. Heavy oil products may not soak in as expected and can leave a slippery film instead.
When learning how to fix cracked leather car seats, always follow the repair kit’s curing times. Touch-dry does not always mean fully cured. Friction from clothing can damage a repair before it has hardened enough.

How long does a leather seat repair last?
A quality repair may last for years, but its life depends on the damage, product quality, climate, and daily use. The driver’s outer bolster usually wears faster because people slide across it when entering and leaving the vehicle.
A repair lasts longer when you:
• Use a windshield sunshade
• Keep the cabin from overheating
• Clean the seat every few weeks
• Condition it lightly every few months
• Avoid sharp objects in pockets
• Lift yourself over the bolster
• Repair new cracks quickly
• Use a UV-resistant leather protectant
There is no universal conditioning schedule. A dry, hot climate may require more frequent care than a mild, humid one. However, more product is not always better. Follow the product label and stop if the surface becomes oily or slippery.
Leather care products also have limits. They cannot replace missing leather or reverse severe structural wear. If the surface repeatedly flakes after repair, the coating may be too damaged for a lasting DIY result.
When to replace the leather seat panel
Replacement is often the best choice when the damaged section is large or heavily stressed. A professional can remove the worn panel and sew in new automotive leather or matching vinyl.
Consider panel replacement when:
• More than one large area has split
• The leather is brittle across the seat
• Foam is exposed
• The seat has a large tear
• Stitching has failed
• The damage sits near a side airbag seam
• The repair would cover a major seating area
• Previous filler repairs keep failing
A replacement panel may cost more than a kit, but it often provides a cleaner and more durable result. Ask the shop whether it can match the grain, color, sheen, perforation pattern, and stitch style.
You can also compare repair cost with the vehicle’s age and value. A modest repair may make sense on an older car, while a quality panel replacement may be worthwhile on a newer vehicle. Get photos and a written estimate before approving the work.

My practical lessons from repairing leather seats
The most useful lesson is to repair the driver’s outer bolster first. It receives the most contact and often shows damage before the rest of the interior. Waiting until the crack reaches the seat seam makes the repair much harder.
I once tested a dark leather repair product that looked perfect under indoor lighting. In bright daylight, the sheen was slightly different, and the repaired area stood out. Since then, I always inspect color and gloss near a window before finishing the entire section.
Another lesson is to keep the repair kit simple. Good cleaning, thin filler layers, careful color blending, and a compatible topcoat matter more than buying a large collection of products. Patience beats speed every time.
For a daily driver, do not expect showroom perfection from a first repair. Aim for a smooth, stable, comfortable surface that does not draw attention. If the leather has major structural damage, honest assessment is better than forcing a home fix.
Frequently Asked Questions
Can you fix cracked leather car seats at home?
Yes, shallow and medium cracks are often suitable for DIY repair. Clean the surface, remove loose coating, apply flexible filler, match the color, and seal the repair.
What is the best product for cracked leather car seats?
A flexible automotive leather repair kit is usually the best option. It should include leather filler, colorant, and a compatible protective finish designed for heat and repeated flexing.
Can leather conditioner repair cracked car seats?
Conditioner can soften and protect leather that is dry, but it cannot close open cracks or replace missing material. Use filler and colorant for visible cracks, then condition the finished repair lightly.
How do you fix deep cracks in a leather car seat?
Deep cracks may need a backing fabric under the damaged area. Apply the backing, use thin layers of flexible filler, sand lightly, blend the color, and seal the surface after it cures.
Is it better to repair or replace a cracked leather seat?
Repair small or limited cracks when the leather is still strong. Replace the panel when the seat has widespread brittleness, exposed foam, large tears, failed stitching, or damage near an airbag seam.
How can you stop leather car seats from cracking again?
Protect the seat from sun and heat, clean spills quickly, use a suitable leather protectant, and avoid sliding across the bolster. Early repairs also stop small cracks from becoming major tears.
Conclusion
Learning how to fix cracked leather car seats is mainly about careful preparation and controlled repair. Clean the leather, smooth loose edges, use flexible filler in thin layers, blend the color, and protect the finished surface. For deep tears, damaged stitching, or airbag-area problems, professional upholstery work is the safer choice.
Start with a hidden test spot and repair the smallest damaged area first. With patience and regular care, you can improve the look and comfort of your car’s interior while slowing future wear. Share your repair experience or explore more automotive detailing guides for practical ways to keep your vehicle looking its best.