

Remove surface rust by cleaning, sanding to bright metal, treating corrosion, priming, painting, and sealing the panel.
Small orange spots on a car can look harmless, but rust spreads beneath paint like a stain under wallpaper. I have repaired many rust spots on car body panels, and the key lesson is simple: act early, remove every trace of corrosion, and seal the bare metal before moisture returns. This guide explains how to remove rust spots from car body panels safely, neatly, and with results that can last.
What Causes Rust Spots on Car Body Panels?
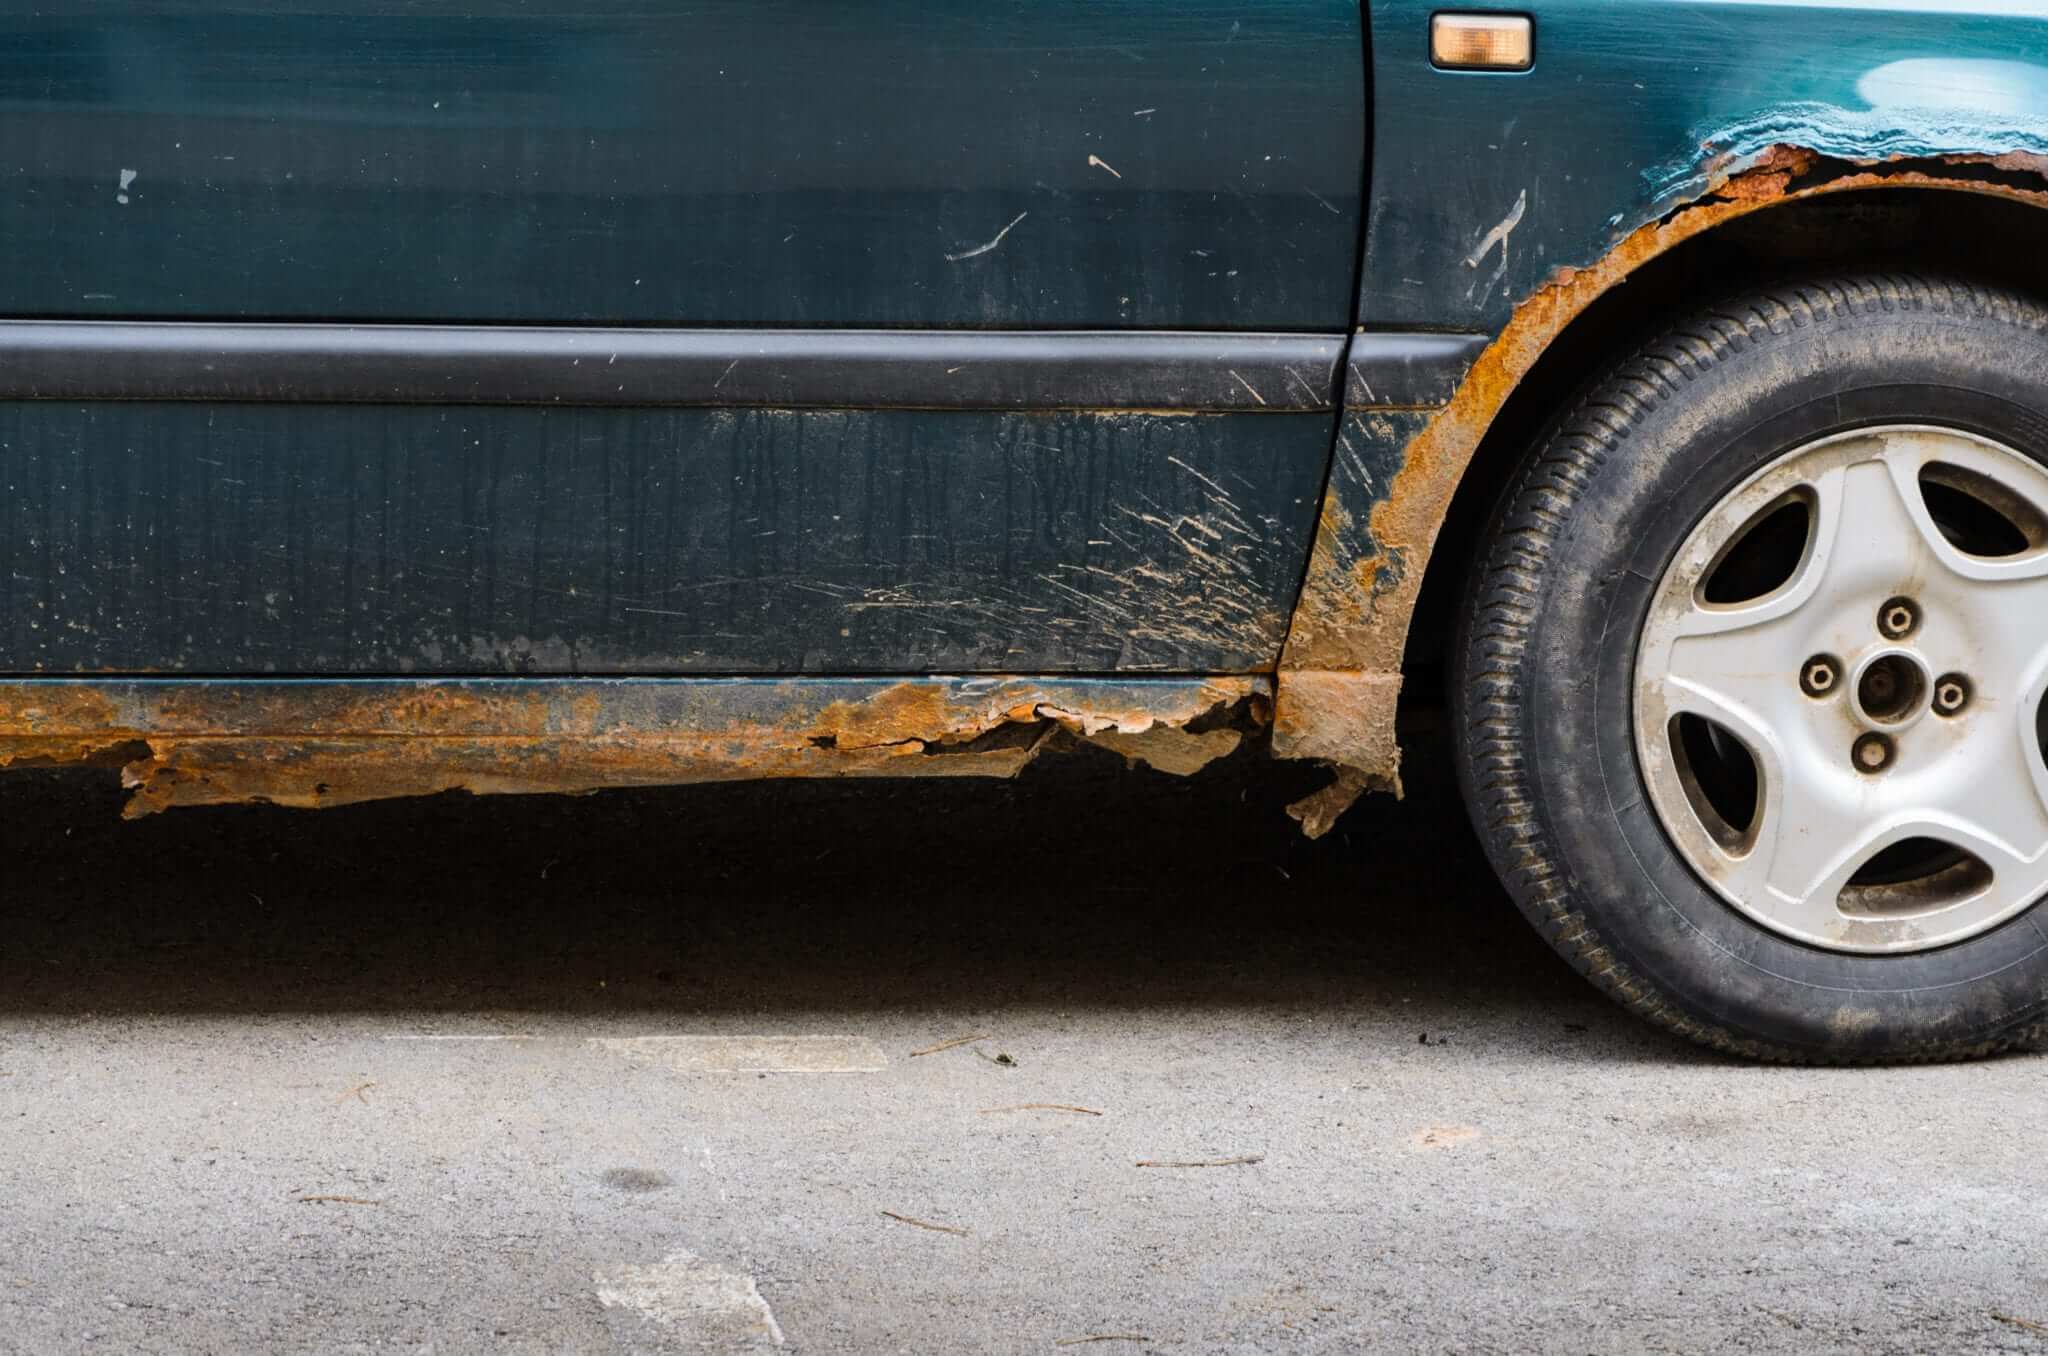
Rust forms when iron or steel meets water and oxygen. Road salt, winter grime, humidity, stone chips, and damaged paint all speed up this process. Once paint is chipped, moisture can reach the metal underneath.
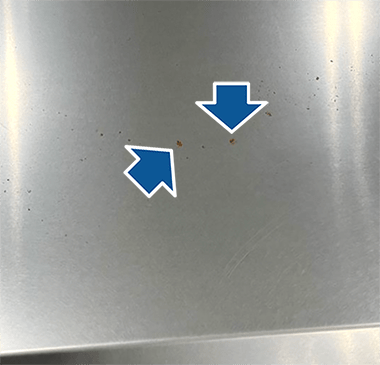
Rust often begins as a tiny brown dot. It may then spread under the paint, causing bubbles, flakes, or rough edges. This is why simply wiping the surface or painting over the spot rarely works.
Common causes include:
• Stone chips on the hood, roof, and front fenders
• Scratches that expose bare metal
• Road salt trapped near wheel arches
• Poor paint repairs that allow water under the finish
• Water collecting inside seams and door edges
• Galvanic corrosion between different metals
• Damaged plastic trim rubbing against painted metal
There are three common levels of rust:
• Surface rust: A thin orange layer with no deep pitting or holes.
• Scale rust: Flaking corrosion with rough, uneven metal below the paint.
• Penetrating rust: Corrosion that has created holes or weakened the panel.
Surface rust is often suitable for a careful DIY repair. Scale rust may need more sanding, filler, or professional bodywork. Penetrating rust usually requires cutting, welding, or replacing part of the panel.
How to Tell If Rust Is Safe to Repair at Home
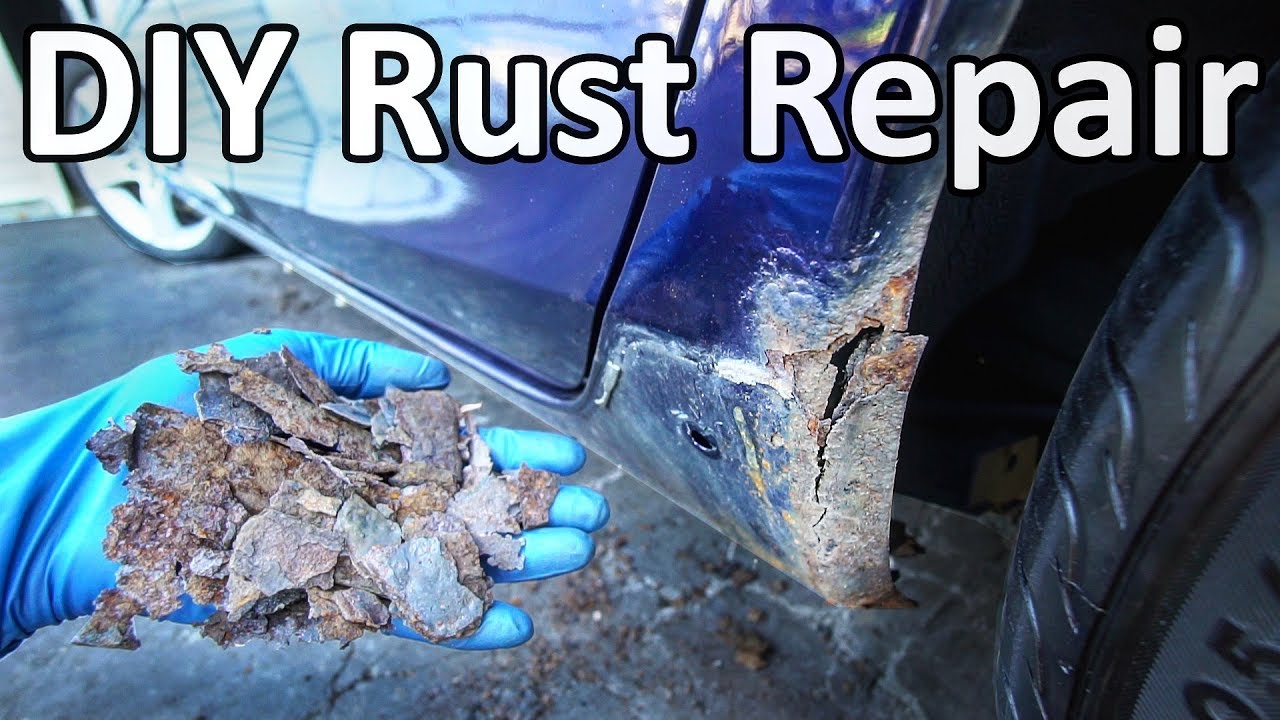
Before learning how to remove rust spots from car body panels, inspect the damage closely. Good lighting helps, but gently pressing the area also reveals problems. Do not push hard, since badly weakened metal can break.
A rust spot may be suitable for home repair if:
• The area is smaller than a few inches
• The metal remains firm
• There are no holes
• Rust has not spread across a seam
• The surrounding paint is still stable
• The damage is not on a structural part
Be more cautious when you see bubbling paint. Bubbles often mean rust has spread under the paint, even if the visible spot looks small. In my experience, a one-inch bubble can hide a much larger corroded area.
Professional repair is the safer choice when:
• The panel has holes or soft metal
• Rust is located around a windshield or sunroof
• Corrosion affects a door hinge or suspension mount
• Rust runs along a welded seam
• The repair requires color blending across a large panel
• You cannot match or apply automotive paint properly
A body shop can measure paint thickness, inspect hidden corrosion, and weld new metal where needed. That can cost more than a small DIY repair, but it prevents a weak patch from returning.

Tools and Materials for Rust Removal
The right tools make rust repair easier and reduce the chance of damaging good paint. You do not need a full body shop, but you should use products made for automotive finishes.
Gather these items:
• Car wash soap and clean water
• Microfiber towels
• Masking tape and automotive masking paper
• Safety glasses and chemical-resistant gloves
• Dust mask or suitable respirator
• Sandpaper from about 80 to 2,000 grit
• Sanding block or small random orbital sander
• Wire brush or abrasive wheel
• Wax and grease remover
• Rust remover or phosphoric acid treatment
• Automotive etch primer or epoxy primer
• Automotive body filler, if needed
• Automotive base coat
• Automotive clear coat
• Tack cloth
• Plastic spreader
• Small paint brush or spray cans
• Rubbing compound and polishing pads
Choose the primer based on the product instructions. Etch primer helps bond to clean bare metal, while epoxy primer creates a strong moisture barrier. Some products are not designed to be layered together, so check drying times and compatibility.
Avoid household paint, wall primer, and generic spray paint. They may look acceptable at first, but they often fade, crack, or react with automotive paint.
How to Remove Rust Spots From Car Body Panels
The following process works best for small surface rust spots and light scale rust. Work indoors if possible, or choose a dry day with low humidity. Never paint on a wet, dusty, or very cold panel.
1. Wash and dry the panel
Wash the whole area with car shampoo. Remove road film, salt, wax, and dirt from around the rust. Rinse well and dry with a clean microfiber towel.
A clean surface prevents grit from becoming trapped under the sandpaper. It also helps you see the true size of the rust.
2. Mark and protect the work area
Use masking tape to create a repair zone around the spot. Leave enough room to feather the paint edges, but do not mask directly against loose rust.
Cover nearby glass, trim, wheels, and plastic parts. Fine rust dust can settle everywhere, and paint overspray can travel farther than expected.
3. Remove loose paint and rust
Start with 80 or 120 grit sandpaper if the paint is badly bubbled. A sanding block keeps the surface flatter than using your fingers alone.
Sand until the loose paint is gone and the metal feels firm. Continue until you reach clean, bright metal around the entire rust spot. If brown discoloration remains in pits, the corrosion is not fully removed.
For larger areas, a wire wheel can save time. Use light pressure, since an aggressive wheel can thin the metal or create deep scratches.
4. Feather the paint edges
Move to 180 or 220 grit sandpaper. Smooth the border between bare metal and the original paint. The edge should feel gradual, not like a sharp step.
Run your fingertips over the area after cleaning away dust. Your fingers can detect a ridge that your eyes may miss. A smooth edge makes the final paint repair much less noticeable.
5. Treat remaining microscopic corrosion
After sanding, apply a suitable rust remover or rust treatment if the product allows it. Phosphoric acid products can convert small amounts of remaining iron oxide into a more stable compound.
Follow the label closely. Some treatments need to be rinsed, while others must dry fully before primer. Never mix rust chemicals, and keep them away from skin, eyes, rubber, and undamaged paint.
Rust converter is useful for tiny pits that cannot be cleaned easily. It is not a substitute for removing thick scale rust. If loose corrosion remains, the rust can continue beneath the converter.
6. Clean the bare metal
Wipe the repair area with wax and grease remover. Use a clean section of the cloth for each pass. Allow the surface to dry completely.
Do not touch the prepared metal with bare fingers. Skin oil can interfere with primer adhesion. If you touch it, clean it again.
7. Apply primer
Apply thin, even coats of automotive primer. Several light coats are better than one heavy coat, which can sag or trap solvent.
Use etch primer only as directed. Many systems require epoxy primer over or under it, while others do not. Let each coat flash and cure according to the label.
Primer is not just a color layer. It seals the metal from moisture and provides a stable base for filler and paint.
8. Level the repair
If sanding left shallow dents or pits, apply a thin layer of automotive body filler. Do not use household filler or thick layers of putty.
Once cured, sand the filler with 180 or 220 grit. Finish with 320 or 400 grit so the surface is smooth enough for primer. Avoid spreading filler over thick, active rust.
Apply another primer coat after leveling the repair. Lightly sand it with 600 grit or the product’s recommended paper.
9. Match and apply the paint
Find the vehicle’s paint code on the door jamb, glove box, trunk area, or manufacturer information. The code is more reliable than guessing from the car’s color.
Shake the paint well and spray several light coats. Start slightly beyond the repair and extend each coat gradually to blend the color. Keep the can or spray gun moving at a steady speed.
Metallic and pearl colors need extra care. Their appearance changes with spray distance, pressure, and the direction of the particles. A small test spray on cardboard can reveal whether the color looks close.
10. Apply clear coat
After the base coat flashes, apply automotive clear coat as instructed. Use two or three light coats rather than one thick coat.
Clear coat adds gloss and helps protect the color from weather and ultraviolet light. It does not repair rust by itself, so the metal must already be clean and primed.
11. Cure, wet sand, and polish
Let the repair cure for the full time on the product label. Do not rush this step. Fresh paint may feel dry but remain soft underneath.
If the finish has slight texture, wet sand carefully with 1,500 to 2,000 grit. Then polish with a fine compound. Stop if you begin cutting through the clear coat.
This process is the most reliable answer to how to remove rust spots from car body panels when the damage is small and shallow. The quality of the final result depends more on preparation than on the paint itself.

How to Repair Rust Around Wheel Arches and Seams
Wheel arches are difficult because they receive water, mud, salt, and small stones. Rust often starts on the inner lip and moves toward the visible outer surface.
Remove the wheel and inner fender liner if needed. Clean both sides of the panel and inspect the folded edge. Treating only the visible side may leave corrosion hidden behind the lip.
For light rust:
• Sand the outer and inner edges
• Remove loose scale with a wire brush
• Treat remaining surface corrosion
• Prime both sides of the repaired area
• Apply matching paint and clear coat
• Add suitable cavity wax or corrosion protection inside the lip
For rust that has eaten through the metal, sanding is not enough. A patch placed over a rusty hole may trap moisture and make the problem worse. The damaged metal should be cut back to solid steel, then repaired with a correctly shaped metal patch.
Seams require extra care. Do not fill a moving seam with ordinary body filler. Use a compatible automotive seam sealer after primer, following the manufacturer’s directions.
Mistakes That Make Rust Return
Many failed repairs look good for a few weeks. The problem is usually hidden corrosion, poor cleaning, or moisture trapped beneath the new paint.
Avoid these common mistakes:
• Painting over rust: Paint hides rust but does not stop it.
• Sanding only the orange center: Corrosion often extends under nearby paint.
• Skipping primer: Bare steel needs a protective, bonded base.
• Using too much body filler: Thick filler can crack and absorb moisture.
• Painting in damp weather: Moisture can affect adhesion and curing.
• Applying heavy coats: Thick coats may run, wrinkle, or trap solvent.
• Mixing incompatible products: Chemical reactions can cause lifting or cracking.
• Washing too soon: Fresh paint needs time to cure.
• Waxing too soon: Some finishes need several weeks before wax or sealant.
• Ignoring the back of the panel: Rust may continue from the hidden side.
One mistake I learned early was trusting a smooth-looking surface too soon. A repair can feel flat after sanding, yet still contain tiny dark pits. Those pits are like seeds. If you leave them untreated, rust can grow back through the new finish.
How to Protect Repaired Car Body Panels
Rust prevention starts after the repair is complete. Keep the panel clean, especially during winter or after driving on treated roads.
Use these habits:
• Wash road salt from the car as soon as practical
• Clean inside wheel arches and door edges
• Repair stone chips before bare metal is exposed
• Inspect seams, drain holes, and lower doors twice a year
• Keep drain holes open
• Apply cavity wax inside suitable enclosed panels
• Avoid parking on wet grass for long periods
• Use a quality paint sealant after the finish has cured
Do not spray oil or thick undercoating over visible rust. These products may slow moisture contact, but they can also hide corrosion. The surface still needs cleaning and proper preparation.
If you live in a snowy state, inspect the car after winter. Salt can remain in seams even after the outside looks clean. A rinse beneath the car and behind the wheel arches can prevent many future repairs.

DIY Rust Repair Versus Professional Bodywork
DIY repair makes sense when the rust is small, shallow, and easy to access. It can save money and teach you useful maintenance skills. It also lets you repair chips before they become expensive panel damage.
Professional work is usually better when:
• Rust has created a hole
• The panel is badly warped
• Corrosion is inside a structural area
• The repair is near a windshield or roof seam
• You need a factory-level color blend
• The vehicle has a valuable original finish
• The panel contains aluminum or high-strength steel
Aluminum corrosion looks different from steel rust and requires different preparation. High-strength steel can also require special repair methods. When in doubt, ask a qualified collision repair technician to inspect the area.
A small touch-up repair may not be invisible. Paint can fade over time, and metallic colors are hard to blend perfectly. The goal is to stop corrosion and create a durable repair, not to promise a factory finish from a spray can.
Safety Tips for Rust Removal and Automotive Painting
Protect yourself and the car while you work. Sanding rust creates fine particles, and spray products release vapors that should not be inhaled.
Follow these safety rules:
• Wear safety glasses during sanding and wire brushing
• Use gloves when handling rust chemicals and solvents
• Wear a suitable respirator for sanding dust and paint vapor
• Work with strong ventilation
• Keep products away from flames and sparks
• Read every product safety label
• Do not use compressed air to blow rust dust toward your face
• Dispose of solvent cloths and sanding dust properly
• Keep children and pets away from the work area
Automotive paint products can contain solvents that irritate the lungs and skin. A garage door being open may not provide enough ventilation. Use the safety information supplied with each product, since formulas vary.
How Long Does a Rust Repair Last?
A small rust repair can last for years when the corrosion is fully removed and the metal is sealed correctly. No repair lasts forever if the original cause remains, such as a leaking seam, blocked drain, or repeated stone damage.
Durability depends on:
• How deeply the rust penetrated
• Whether all corrosion was removed
• The quality of the primer and paint
• The amount of moisture and salt exposure
• The quality of the color and clear coat application
• Whether the back of the panel was protected
A quick brush-on touch-up may slow rust for a while. A properly sanded, primed, painted, and sealed repair offers much stronger protection.
Inspect the area after one month, then again at the start and end of winter. Early inspection helps you catch lifting paint or new discoloration before the repair becomes a larger job.
Frequently Asked Questions About How to Remove Rust Spots From Car Body Panels
Can I remove rust spots from car body panels without sanding?
You can use a rust remover or converter on very light surface rust, but sanding is usually the most dependable method. The metal must be free of loose scale, damaged paint, and active corrosion before primer and paint are applied.
Does WD-40 remove rust from car body panels?
WD-40 can help loosen light surface residue and protect exposed metal for a short time, but it is not a complete rust repair product. It does not replace sanding, rust treatment, primer, or automotive paint.
Should I use a rust converter before painting a car?
A rust converter can help with small pits that remain after careful cleaning. Use it only when the label says it is suitable for automotive metal, and allow it to cure fully before applying compatible primer.
Can I paint directly over surface rust?
Painting directly over rust usually leads to peeling, bubbling, and renewed corrosion. Remove the rust first, clean the metal, apply the correct primer, and then use automotive color and clear coat.
How do I remove rust spots from car body panels with holes?
Holes mean the metal has lost strength, so sanding alone will not solve the problem. A professional should cut away the weak metal and weld or properly attach a replacement patch before refinishing.
What grit sandpaper removes rust from a car?
Begin with about 80 or 120 grit for heavy scale or damaged paint, then move to 180, 220, 320, and finer paper as the surface becomes smooth. Use the least aggressive grit that removes the corrosion without thinning good metal.
How soon can I wash a car after rust repair?
Follow the paint product’s cure instructions, because drying times vary with temperature and humidity. Avoid pressure washing, strong chemicals, and wax until the repair has fully cured.
Conclusion
Learning how to remove rust spots from car body panels can save a small repair from becoming a major bodywork problem. Wash the area, sand beyond the visible rust, treat any remaining corrosion, prime the bare metal, and apply compatible automotive paint and clear coat.
If the panel is soft, perforated, or affected along a structural seam, choose professional repair instead of covering the damage. Start with one small spot, work slowly, and inspect the repair through every stage. For more practical car care guides, explore related repair resources and share your results or questions in the comments.