

Most light scratches near a car door handle can be removed with cleaning, polishing, and careful touch-up work.
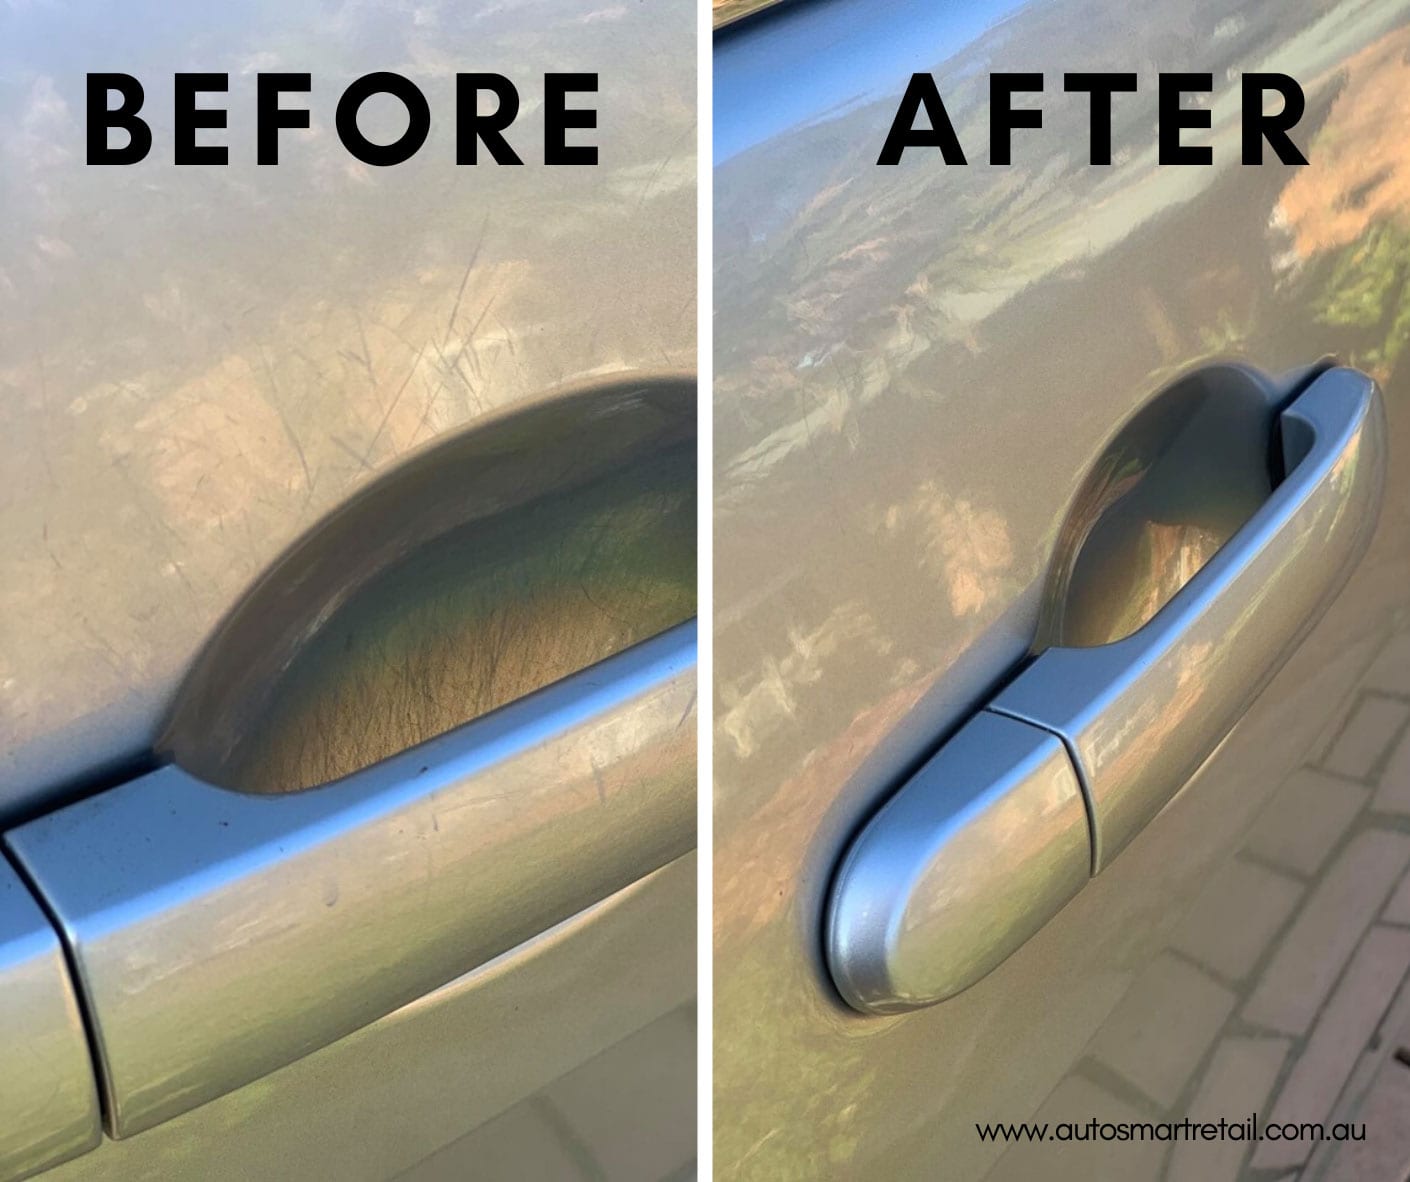
Scratches around a door handle are common. Fingernails, rings, keys, bags, and dirt can slowly mark the paint each time the door opens. Knowing how to remove scratches from car door handle area starts with identifying how deep the damage is. Light clear-coat marks often respond well to polish, while deep scratches may need touch-up paint or professional repair. This guide explains the safest process, the tools to use, and the mistakes that can make the damage worse.
What Causes Scratches Around a Car Door Handle?
The area behind and below a door handle receives more contact than most parts of a car. Your fingers may drag across the paint when you reach for the handle. Rings and keys can also leave thin lines in the clear coat.
Common causes include:
• Fingernails scraping the paint while opening the door
• Rings, watches, and bracelets touching the panel
• Keys or key fobs rubbing against the handle area
• Dirt trapped between a hand and the paint
• Shopping bags, backpacks, and purses brushing the door
• Automatic car washes using dirty brushes
• Poor washing methods, such as dry wiping dusty paint
Most modern cars have a base color protected by a clear coat. Many small scratches only affect this clear layer. That is good news because clear-coat marks can often be reduced without repainting the panel.
However, a scratch that reaches the color coat or bare metal needs more care. Once the metal is exposed, rust can begin, especially in wet or salty climates.
How to Tell How Deep the Scratch Is
Before learning how to remove scratches from car door handle area, inspect the damage in bright daylight. Wash the area first, because dirt can look like a scratch and may cause more damage during testing.
Use this simple check:
Clean the panel with car wash soap and a soft microfiber towel.
Dry it fully with a separate clean towel.
Run a clean fingernail gently across the scratch.
Look at the mark from several angles.
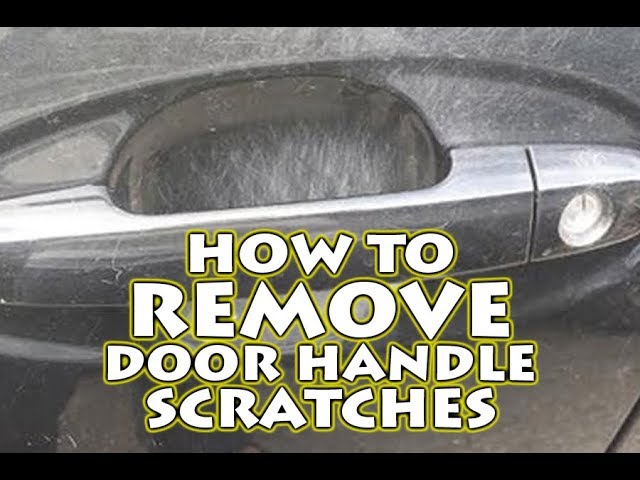
A scratch that does not catch your fingernail is usually a clear-coat scratch. It may look white, gray, or dull but still show the original color beneath it.
A scratch that catches your fingernail may have entered the color coat. If you can see a different color, primer, or shiny metal, polishing alone will not fully repair it.
You can also place a small amount of water over the mark. If the scratch seems to disappear while wet, it is often shallow. This test is not perfect, but it gives you a useful first clue.
Do not press hard with your fingernail. The goal is to inspect the mark, not create a new one.
What You Need to Remove Light Scratches
The right products make a major difference. You do not need a large professional detailing kit, but you do need clean materials.
Gather these items:
• Car wash soap
• Two buckets, if available
• Soft microfiber wash mitt
• Several clean microfiber towels
• Automotive clay bar and lubricant, if the paint feels rough
• Fine automotive polish or scratch remover
• Foam or microfiber applicator pad
• Painter’s tape
• Isopropyl alcohol diluted with water for final inspection
• Car wax or paint sealant
For deeper marks, you may also need:
• Factory matched touch-up paint
• Automotive primer, if bare metal is visible
• Fine wet sandpaper, usually 2,000 to 3,000 grit
• Clear coat touch-up product
Avoid household products such as toothpaste, powdered cleaners, kitchen sponges, and abrasive bathroom products. Some may create a temporary shine, but they can also add haze or remove too much clear coat.
A mild automotive polish is safer because it is made for painted vehicle surfaces. Product labels still matter. Always follow the instructions and test the product in a hidden spot first.
How to Remove Scratches From Car Door Handle Area
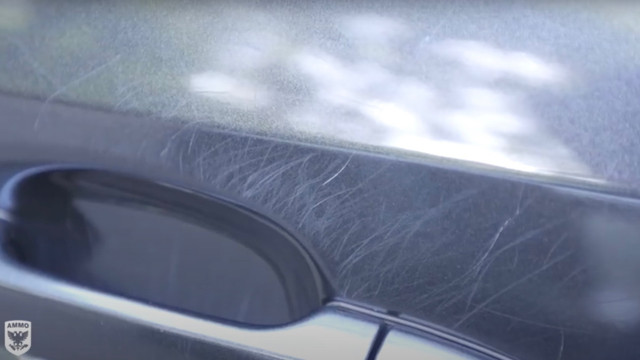
This process works best for light scratches that stay within the clear coat. Work in the shade, on a cool panel, and away from wind-blown dust.
1. Wash the area carefully
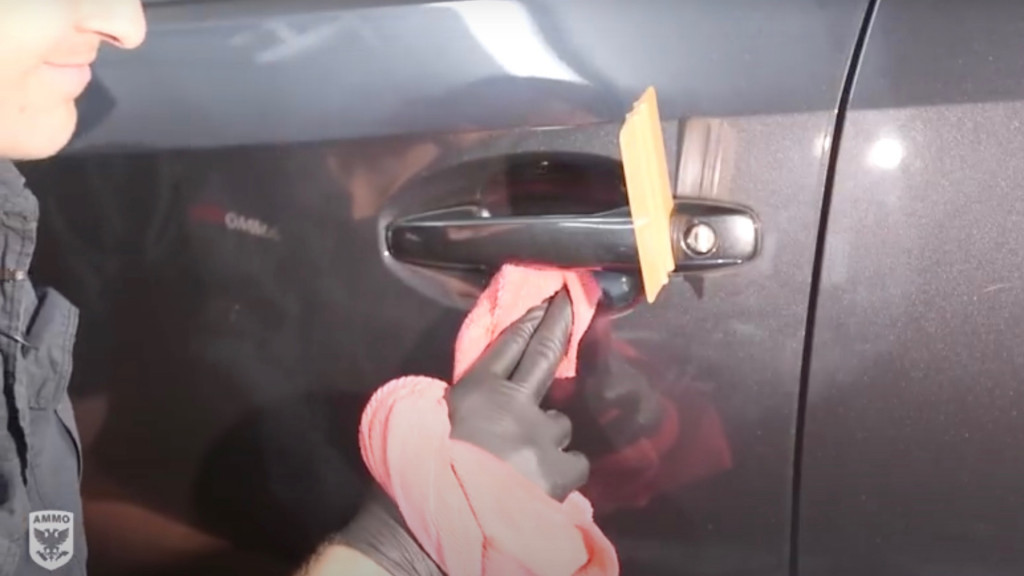
Rinse loose dirt from the door. Mix car wash soap with water according to the label. Use a clean microfiber mitt and light pressure.
Rinse the mitt often. A dirty mitt can drag grit across the paint like sandpaper. Dry the area by patting it with a clean microfiber towel instead of rubbing hard.
2. Remove bonded dirt
Run your clean hand over the dry paint while wearing a thin plastic bag. If the surface feels gritty, bonded contamination may remain.
Use automotive clay lubricant and a clay bar to remove that contamination. Move the clay gently in straight passes. Stop if the surface becomes dry or the clay picks up heavy dirt.
This step is useful because polishing over trapped grit can create more scratches.
3. Mask nearby areas
Place painter’s tape around rubber seals, textured plastic, and the edge of the door handle. Polish can leave white residue on porous trim.
Do not cover the scratch itself. Keep the tape close enough to protect nearby parts while leaving room to work.
4. Apply a small amount of polish
Put a small drop of automotive scratch remover or fine polish on a foam applicator. Start with less product than you think you need.
Work in a small area of about 6 by 6 inches. Use light to medium pressure and slow, overlapping passes. Work for about 30 to 60 seconds, then wipe the area with a clean microfiber towel.
The goal is to level the edges of the scratch and restore clarity. It is not to grind away a large amount of paint.
5. Inspect the result
Use bright light to inspect the panel from different angles. If the mark is less visible but still present, repeat the process once or twice.
Do not keep polishing endlessly. Clear coat is thin, and repeated aggressive work can create a dull spot or expose the color coat. Stop if the area becomes hot, hazy, or uneven.
6. Protect the repaired area
Once the scratch looks better, apply a wax or paint sealant. Follow the product’s cure time and application instructions.
Protection does not repair the scratch, but it helps guard the polished surface against water, dirt, and future rubbing. This completes the basic process for how to remove scratches from car door handle area safely.

How to Repair Deeper Scratches
Polishing cannot replace missing paint. If the scratch catches your fingernail or shows primer or metal, use touch-up paint or seek professional help.
For a small deep scratch, follow these steps:
Wash and dry the area completely.
Clean the scratch with a suitable automotive surface cleaner.
Mask the surrounding paint with painter’s tape.
Apply a very small amount of primer only if bare metal is visible and the product requires it.
Let the primer dry according to the label.
Apply factory matched touch-up paint in thin layers.
Allow each layer to dry before adding another.
Add clear coat if the touch-up system includes it.
Let the repair cure fully before polishing or waxing.
Find the paint code on the vehicle identification label or in the owner’s information. The code may be located inside the driver’s door, under the hood, or in another manufacturer approved location.
Touch-up paint rarely becomes invisible from close range. It is best for stopping further damage and improving the appearance of a small mark. If the scratch is long, wide, dented, or spread across the handle and door edge, a body shop can blend the paint more evenly.
Never wet sand a deep scratch before adding paint. Sanding cannot restore missing color. It can make the repair area larger and thinner.

A Safer Method for Plastic Door Handle Cups
Some vehicles have a textured plastic insert behind the handle. Others have painted handle cups. These surfaces need different care.
For painted handle cups, use the same mild wash and polish method described above. Test first because the shape may trap polish around the handle.
For textured black plastic, do not use regular paint polish. Abrasive polish can create shiny patches and make the texture look uneven. Instead:
• Wash the plastic with mild car soap
• Use a soft detailing brush for dirt in the edges
• Dry it with a microfiber towel
• Apply a trim protectant made for exterior plastic
If the plastic is deeply scratched, a trim repair product may help. Heat based plastic repair should be left to a trained technician because excess heat can warp the handle cup or damage nearby paint.
This distinction is important when deciding how to remove scratches from car door handle area. The best product depends on whether the surface is painted, clear coated, or textured plastic.

Mistakes That Can Make Scratches Worse
Many failed repairs come from using too much force. Paint correction is a controlled process, not a muscle test.
Avoid these common mistakes:
• Polishing a dirty or dusty panel
• Using a rough towel or old cotton shirt
• Working under direct, hot sunlight
• Applying heavy pressure for a long time
• Using a rotary buffer without training
• Starting with an aggressive compound
• Using household cleaners or abrasive powders
• Sanding before checking scratch depth
• Skipping a small test area
• Waxing over dirt or moisture
In my experience, the most common mistake is trying to fix the mark in one long session. A few gentle polishing passes are safer than one forceful pass. If the scratch does not improve after careful testing, it may be deeper than it first appeared.
Another lesson is to inspect the surface after cleaning. What looks like a scratch may be paint transfer from another object. Paint transfer can sometimes be removed with a mild cleaner or clay bar, without polishing at all.

When to Use a Professional Detailer or Body Shop
DIY repair is reasonable when the damage is small, shallow, and easy to reach. Professional help makes more sense when the scratch exposes metal, includes a dent, or covers a large area.
Consider a professional if:
• Bare metal is visible
• Rust has started
• The door handle is loose or damaged
• The scratch reaches the door edge
• Paint is peeling or bubbling
• The panel has a dent
• You own a newer or high value vehicle
• You cannot match the paint color
A professional detailer can use a paint depth gauge, machine polishers, and controlled lighting. A body shop can repair dents, apply matched paint, and blend the finish into the surrounding panel.
Ask for an inspection and written estimate before approving work. A small clear-coat correction and a full panel repaint are very different services.
Manufacturers and refinishing professionals also warn against removing excessive clear coat. The clear layer protects the color coat from sunlight and environmental damage. Once too much is removed, repainting may be the only reliable solution.
How to Prevent New Scratches Around the Handle
Prevention is easier than repeated correction. The door handle area gets touched many times each day, so small habits can protect it.
Try these simple steps:
• Keep fingernails trimmed if they often touch the paint
• Remove rings before washing or detailing the car
• Hold keys away from the door panel
• Clean dirt from your hands before opening the door
• Wash the vehicle with a clean microfiber mitt
• Use a separate towel for wheels and painted panels
• Add a clear protective film to the handle cup
• Apply a quality sealant or ceramic coating
Clear protective film is especially useful behind recessed door handles. It acts like a transparent shield against fingernails and jewelry. The film may cost more than wax, but it offers stronger protection in a high contact area.
A ceramic coating can make cleaning easier and improve resistance to light contamination. It does not make paint scratch proof. A sharp key, ring, or rough object can still damage the coating and the paint beneath it.

How Long Does the Repair Take?
A light scratch repair may take 30 to 60 minutes, not counting product curing time. Washing, drying, testing, polishing, and protecting the surface all take time.
A deeper touch-up can take several days because primer, paint, and clear coat need time to cure. The exact time depends on the product, temperature, humidity, and scratch size.
Do not judge a touch-up repair while it is still wet. Some paints shrink slightly as they dry, and the final color may change. Follow the label instead of adding layers too quickly.
If you are new to detailing, set aside extra time. Rushing near a door handle can cause polish to collect in seams or make the repair look uneven.
Frequently Asked Questions About How to Remove Scratches From Car Door Handle Area
Can toothpaste remove scratches from a car door handle area?
Toothpaste may reduce the look of an extremely light mark because it contains mild abrasives. However, it is not designed for automotive paint and can leave haze or uneven results. Use a fine automotive polish instead.
Will car wax remove scratches around a door handle?
Wax can hide very fine marks for a short time, but it does not remove scratches. Polish corrects shallow clear-coat damage, while touch-up paint is needed when color or metal is exposed.
How do I know if a door handle scratch needs paint?
If the scratch catches your fingernail, shows primer, or reveals bare metal, it likely needs touch-up paint or professional repair. A mark that does not catch your fingernail may improve with careful polishing.
Can I use sandpaper to remove scratches near a door handle?
Wet sanding can help level a properly prepared repair, but it is risky on factory paint. Do not sand unless you understand paint thickness, use very fine automotive paper, and plan to polish the area afterward.
Is it safe to use a machine polisher on the door handle area?
A machine polisher can work, but the small shape and nearby edges make it easy to remove too much paint. Beginners should start by hand or ask an experienced detailer to handle the area.
How can I stop fingernail scratches behind the door handle?
A clear protective film made for door handle cups offers the strongest everyday protection. Keeping the area clean and avoiding rings or keys against the paint also helps.
Can a ceramic coating prevent door handle scratches?
A ceramic coating can improve resistance to dirt and very light marks, but it does not make the paint scratch proof. Physical protection, such as clear film, is better for repeated contact from fingernails and jewelry.
Conclusion
Learning how to remove scratches from car door handle area begins with a careful inspection. Clean the paint, determine whether the damage is in the clear coat, and start with the mildest safe method. Light marks often improve with automotive polish, while deep scratches need matched touch-up paint or professional repair.
Work slowly, use clean microfiber tools, and stop before you remove too much clear coat. Once the area looks better, protect it with a sealant or clear film to prevent repeat damage. Try the process on a small test spot first, and share your results or explore more car care guides for practical detailing advice.