

You can remove swirl marks from car paint by cleaning safely, polishing away defects, and protecting the finish.
Swirl marks are fine, circular scratches in the clear coat. They often appear under sunlight or a garage light after rough washing, drying, or wiping. The good news is that most light swirls can be corrected at home with careful cleaning, the right polish, and a clean microfiber towel.
I have seen many owners make these marks worse by polishing a dirty car or using one towel for every job. This guide explains how to remove swirl marks from car paint safely, when to use hand polishing or a machine, and how to keep the finish glossy after correction.
What Are Swirl Marks?
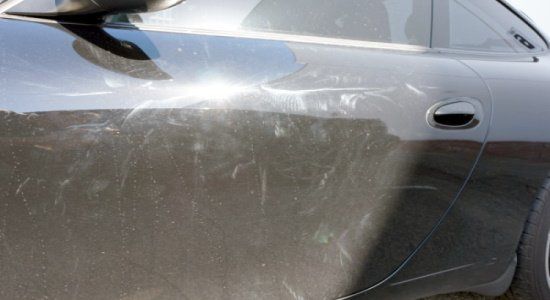
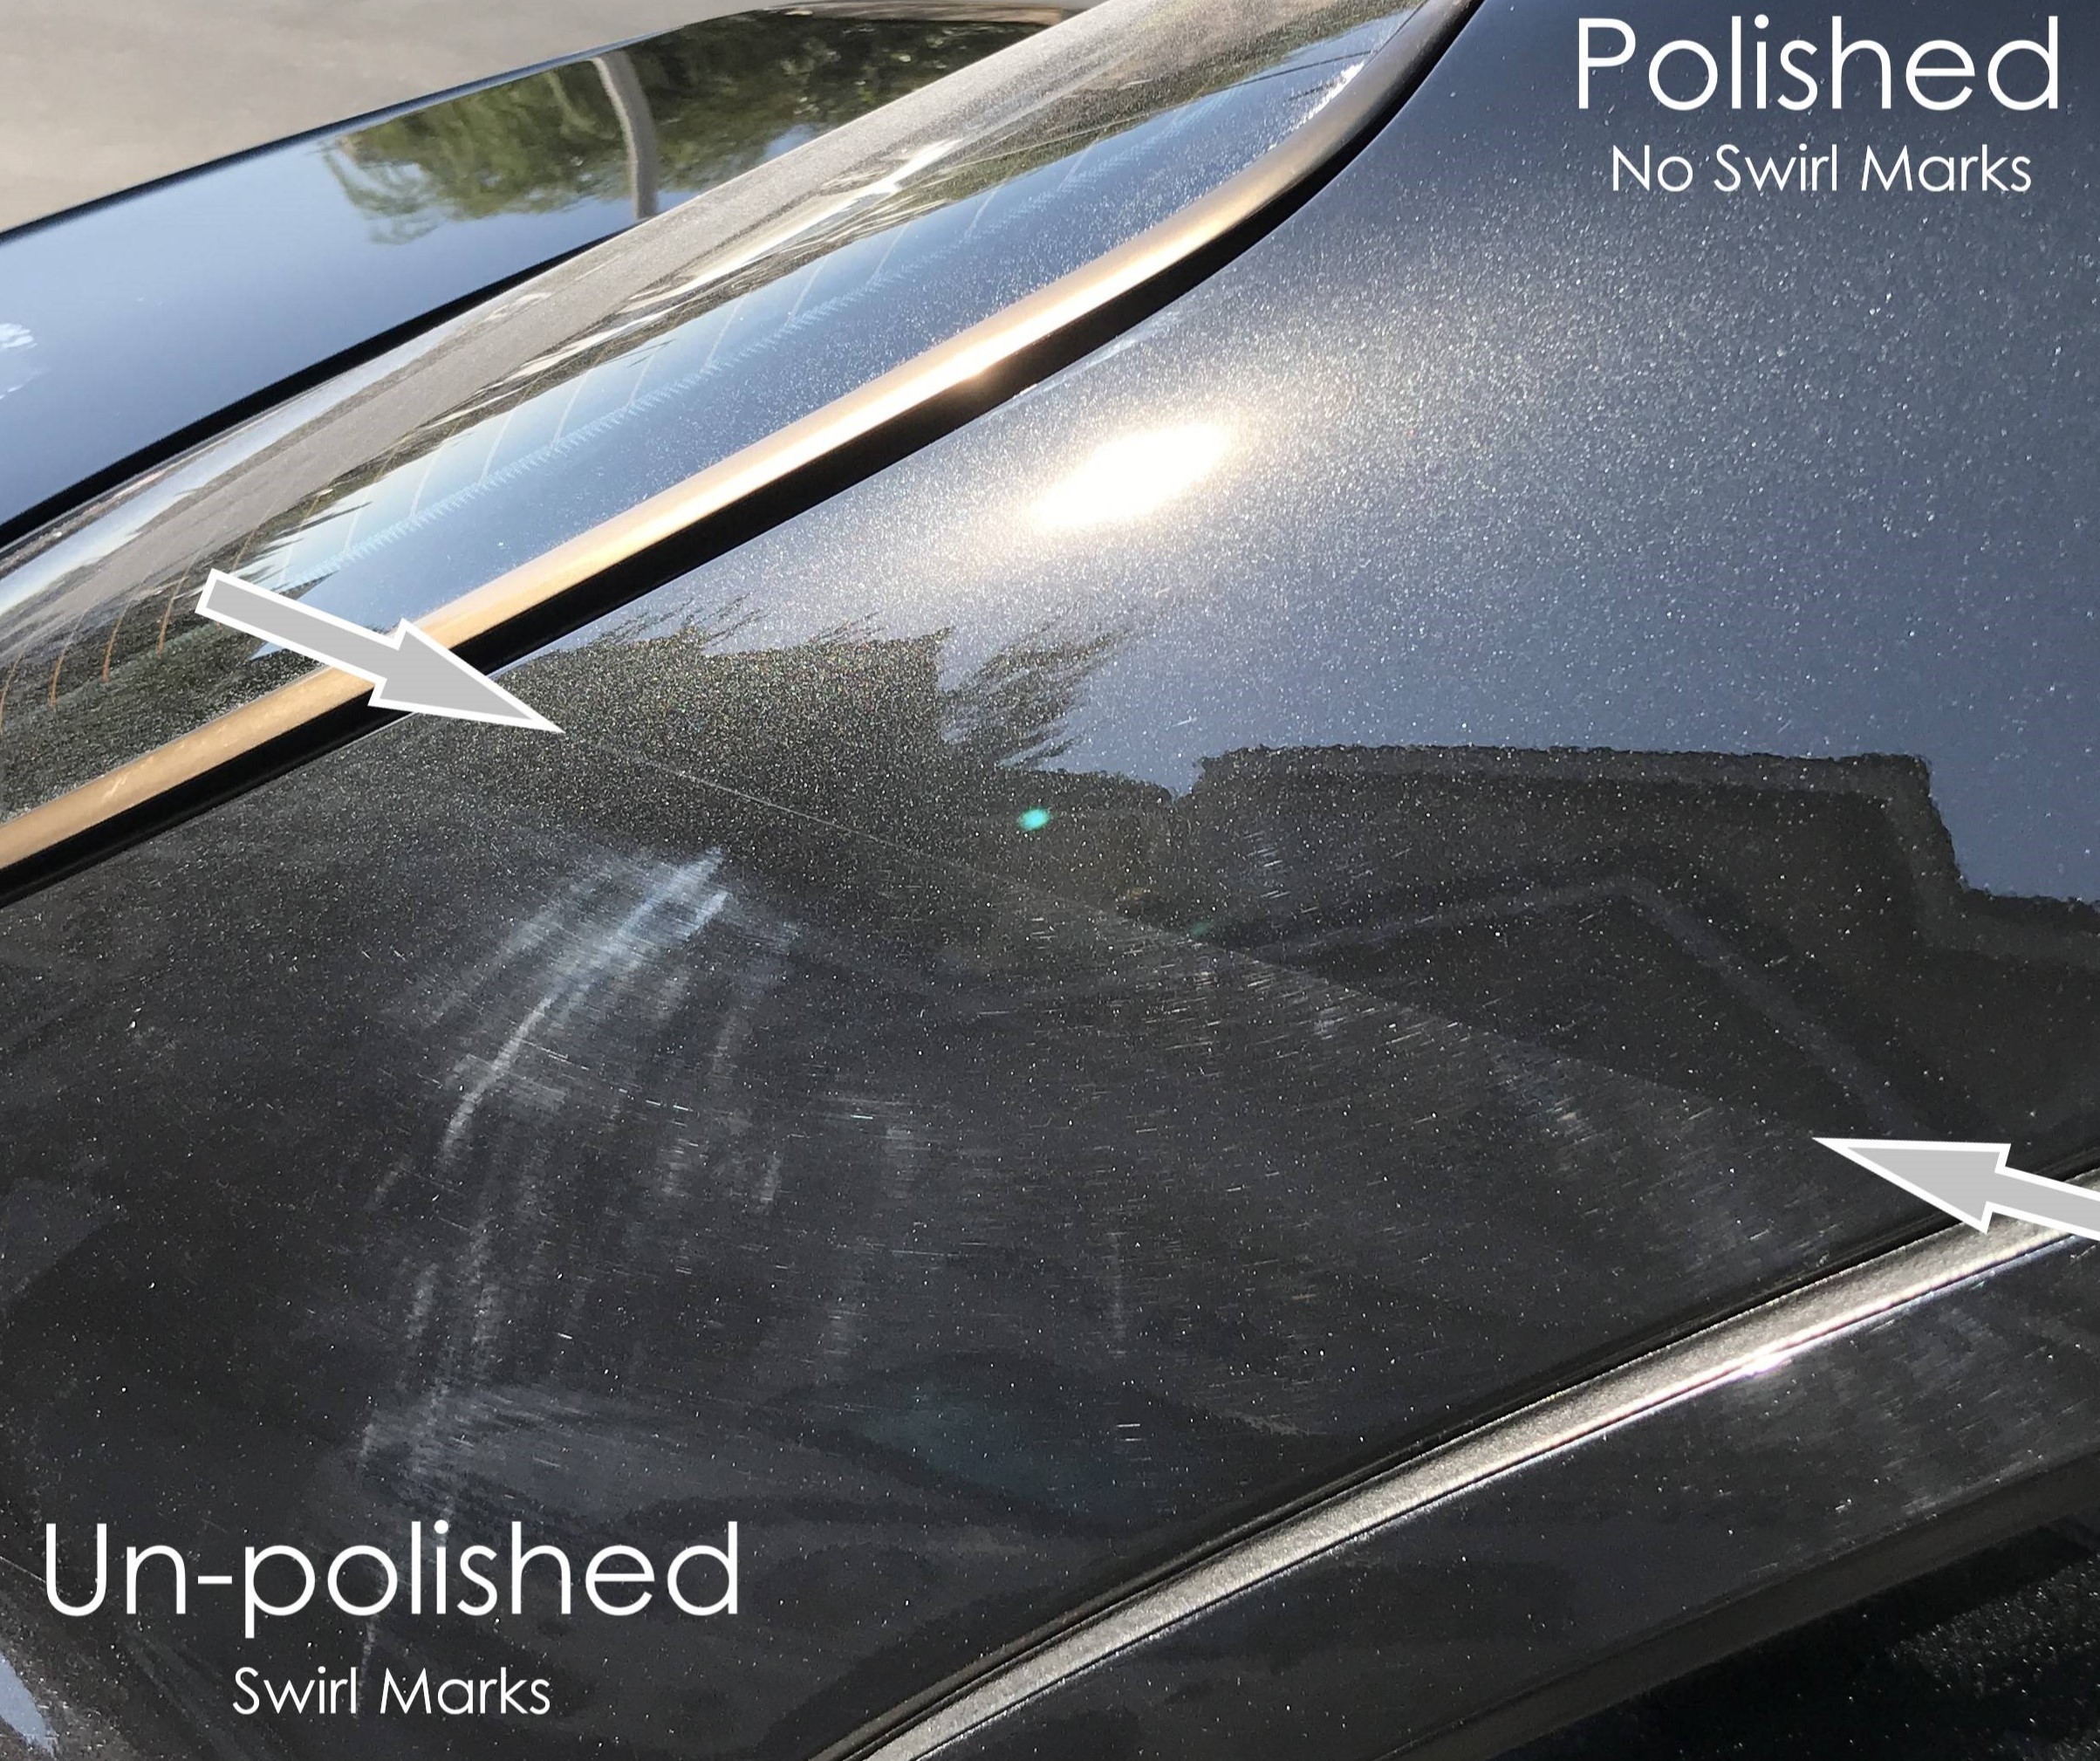
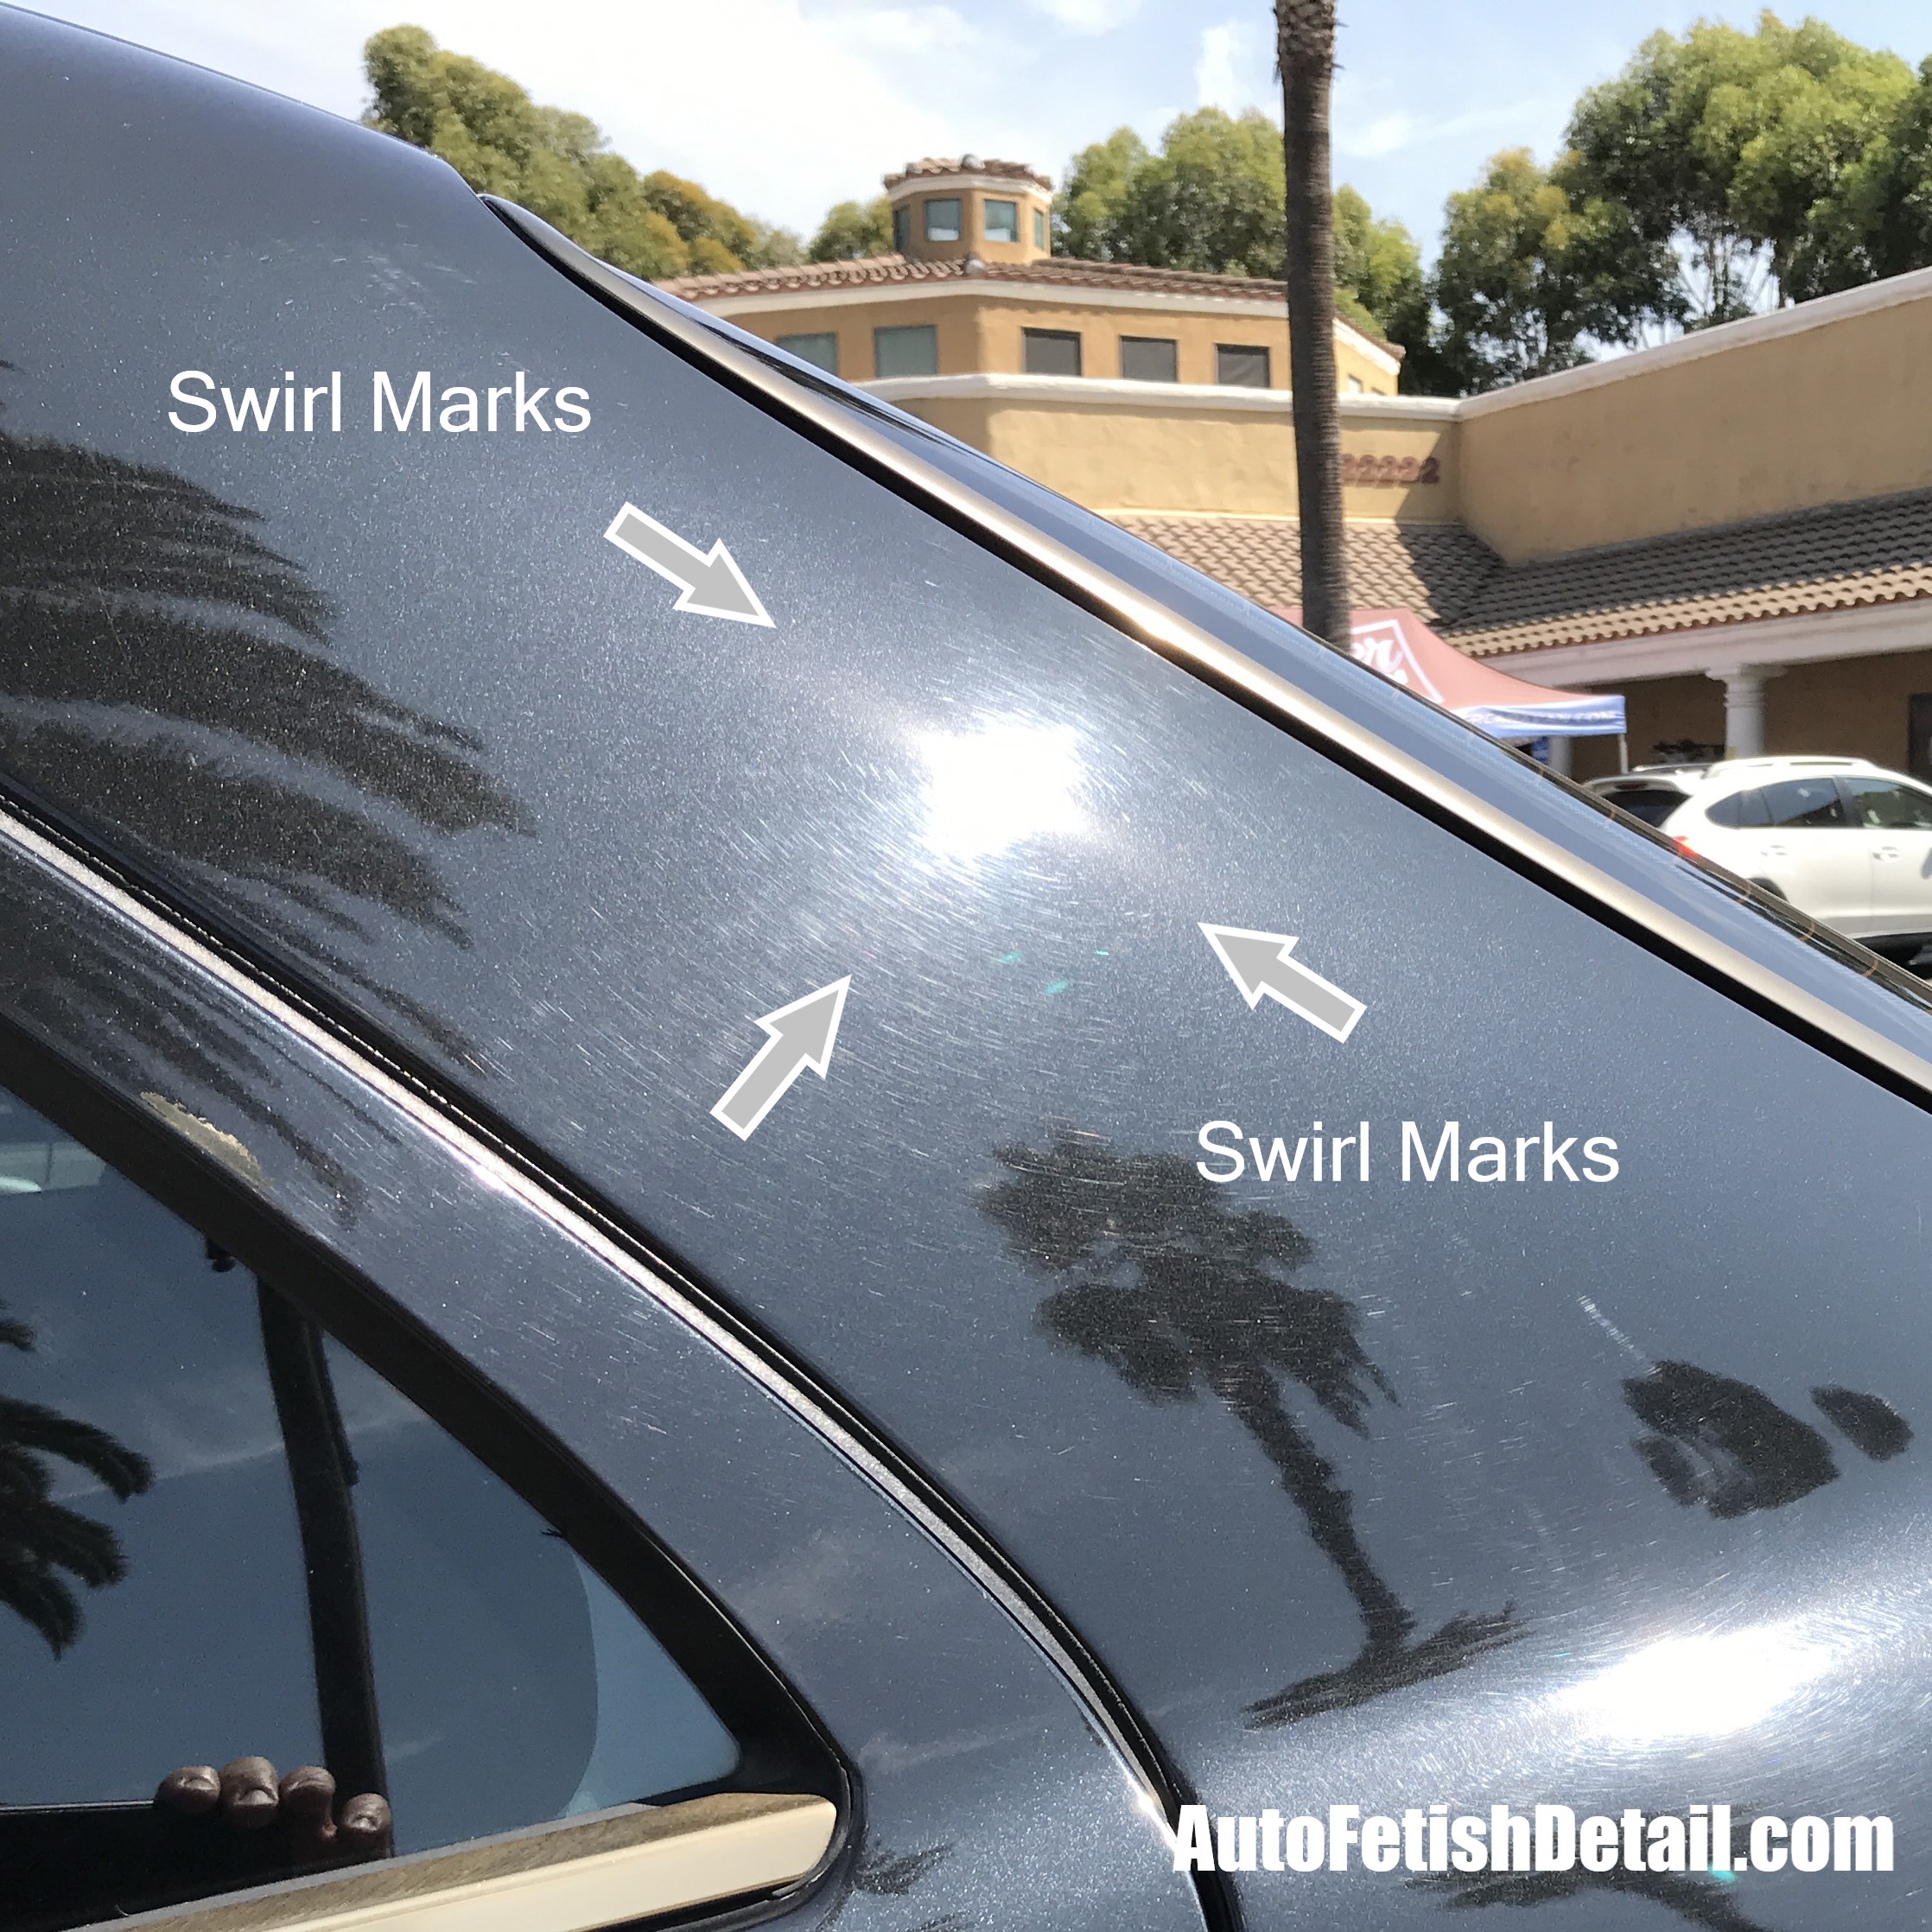
Swirl marks are small scratches that sit in the clear coat, the transparent layer above the colored paint. They look like circles, spider webs, or fine lines that catch light from one direction.
Despite the name, these marks are not always true circles. They form in random patterns as dirt moves across the paint. Dark cars show them most clearly, but white and silver cars can have them too.
Swirl marks are usually shallow. They do not mean the whole paint system is ruined. In many cases, polishing removes a very thin layer around the scratch and levels the surface so light reflects evenly again.
How Swirl Marks Differ From Deep Scratches
A simple test can help you judge the damage. Wash and dry the panel first, then run a clean fingernail across the mark.
• If your nail does not catch, the defect is likely shallow and may respond well to polishing.
• If your nail catches slightly, the scratch may need stronger correction or professional help.
• If you see a different color, bare metal, or primer, polishing will not fully repair it.
This test is only a guide. Clear coat thickness varies, and aggressive polishing can cause damage. When in doubt, start with the least abrasive method.
What Causes Swirl Marks on Car Paint?
Most swirl marks come from friction. A towel, sponge, brush, or wash mitt can drag tiny grit across the clear coat. Each grain acts like a small piece of sandpaper.
Common causes include:
• Washing with a household sponge
• Using one bucket without a grit guard
• Drying with an old bath towel
• Wiping dust from dry paint
• Using automatic tunnel car washes
• Reusing dirty microfiber towels
• Pressing hard while cleaning
• Applying wax over a dirty surface
• Using a dirty clay bar or clay towel
Road film makes the problem worse. It can contain sand, brake dust, salt, and metal particles. If you rub that film into the paint, you create hundreds of tiny scratches in a short time.
In my detailing work, the most common mistake is not the polish. It is poor washing before the polish. A car can look clean while still carrying a thin layer of gritty traffic film.
What You Need to Remove Swirl Marks
The right tools make the job safer and faster. You do not need the most expensive products, but every item must be clean and suitable for automotive paint.
Basic Supplies
• pH balanced car shampoo
• Two clean wash buckets
• Grit guards for the buckets
• A soft microfiber wash mitt
• Several high quality microfiber towels
• A plush drying towel or air blower
• Clay bar or synthetic clay towel
• Automotive polish
• Foam or microfiber applicator pads
• Painter’s tape
• Inspection light or bright LED lamp
• Car wax, paint sealant, or ceramic coating
Use separate towels for washing, drying, polishing, glass, wheels, and door jambs. This simple habit prevents many new scratches.
For light defects, use a finishing polish. For moderate defects, use a light or medium cutting polish. Always check the product label because abrasive strength differs between brands.
How to Remove Swirl Marks From Car Paint by Hand
Hand polishing works well for small areas, light marks, and beginners who want maximum control. It takes more time than machine polishing, but it has a low risk of removing too much clear coat.
Step 1: Wash the Car Safely
Park the car in shade. The paint should be cool to the touch.
Rinse the car from top to bottom. This removes loose grit before you touch the surface. Wash one panel at a time with a clean mitt and plenty of shampoo.
Use the two bucket method:
Fill one bucket with car shampoo and water.
Fill the second bucket with clean water.
Dip the mitt into the shampoo bucket.
Wash a small section with straight, gentle passes.
Rinse the mitt in the clean water bucket.
Reload the mitt with shampoo.
Work from the cleanest areas to the dirtiest areas. Save the lower doors, bumpers, and rocker panels for last.
Step 2: Dry Without Scrubbing
Rinse away all soap. Use a clean drying towel and lay it flat on the panel. Pull it gently across the surface or blot the water.
Do not wipe dry paint with a towel. Even a soft towel can create more swirl marks when grit sits between the fabric and the clear coat.
Step 3: Remove Bonded Contamination
Feel the paint with your fingertips inside a thin plastic bag. If the surface feels rough, use a clay bar or synthetic clay towel with plenty of lubricant.
Move the clay in straight lines. Do not use force. Fold the clay often so clean material touches the paint.
Clay does not polish away swirl marks. It removes bonded dirt so the polishing pad does not drag contamination across the panel.
Step 4: Test a Small Area
Tape off a small section on the hood or door. Apply a small amount of polish to a foam applicator.
Work the polish in a crosshatch pattern. Use light to medium pressure and make several slow passes. Wipe away the residue with a clean microfiber towel.
Inspect the test spot under strong light. If the marks improve, repeat the same process across the rest of the car. If they do not improve, you may need a stronger polish or a machine polisher.
Step 5: Polish the Paint
Work on an area about 12 by 12 inches. A small area keeps the polish active and gives you better control.
Use three or four drops of polish. Too much product can reduce cutting power and make removal messy. Keep the pad flat, and use steady movements rather than fast scrubbing.
After each section, wipe the residue and check your progress. Do not keep polishing blindly. Your goal is to improve the finish while preserving clear coat.
Step 6: Protect the Corrected Finish
After polishing, remove the remaining oils with a paint-safe panel wipe if the product instructions allow it. Then apply a wax, sealant, or ceramic coating.
Protection does not remove swirl marks. It helps shield the surface from water, dirt, and some light contamination. Follow the cure time on the product label.

How to Remove Swirl Marks With a Dual Action Polisher
A dual action, or DA, polisher moves the pad in two ways. It spins and oscillates at the same time. This motion spreads heat and reduces the risk of burning through the paint compared with a rotary polisher.
For most beginners, a DA polisher is the best machine choice. It can correct more paint than hand polishing while remaining forgiving when used correctly.
Safe Machine Polishing Steps
Wash, dry, and decontaminate the car.
Inspect the paint under bright light.
Tape rubber trim, badges, sharp edges, and porous plastic.
Choose a polishing pad and mild polish.
Prime the pad with a small amount of product.
Place the pad flat on the paint before turning on the machine.
Work a small section with slow, overlapping passes.
Use moderate pressure and keep the machine moving.
Wipe the section clean and inspect it.
Increase pad or polish strength only if the test area needs it.
Machine speed depends on the tool, pad, and polish. Follow the manufacturer’s instructions rather than copying a random speed setting online.
Do not hold the machine on one edge or sharp body line. Do not run a dry pad. Stop if the panel becomes hot. Clear coat is thin, and paint correction is controlled removal, not magic.
Choosing a Pad and Polish
A foam finishing pad and fine polish are a good starting point for mild swirls. A polishing pad with a stronger compound can address moderate defects.
Avoid jumping straight to a heavy cutting compound. Strong products may remove defects faster, but they can leave haze, micromarring, or a dull finish. A two-step process may be needed:
• Cutting step: Removes or reduces deeper defects.
• Finishing step: Refines the surface and increases gloss.
After each step, inspect the paint from several angles. A finish that looks perfect under one light may show haze under direct sunlight.
How to Choose Between Polishing and Other Repairs
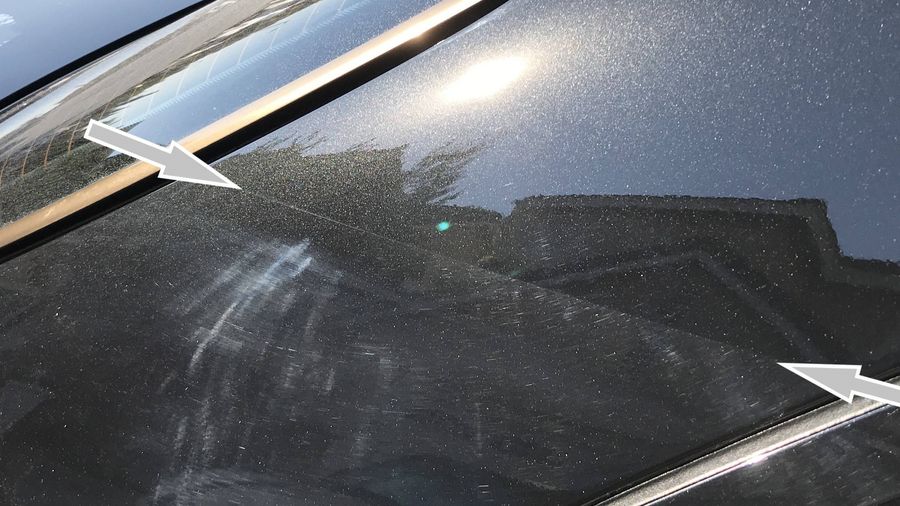
Polishing is not the right answer for every mark. It works by leveling the paint around a defect. If the scratch is deeper than the available clear coat, polishing can only reduce its appearance.
Polishing
Use polishing for:
• Light swirl marks
• Fine wash scratches
• Holograms
• Dull or hazy clear coat
Touch Up Paint
Use touch up paint when the scratch reaches the base coat or metal. The repair may still need sanding, blending, and clear coat work.
Wet Sanding
Wet sanding can level severe defects, but it removes more paint than normal polishing. It requires experience, accurate inspection, and careful finishing. It is usually best left to a trained professional.
Repainting
Repainting may be needed for widespread clear coat failure, peeling, deep scratches, or exposed metal. No polish can restore missing paint.
Clear coat thickness gauges can help a professional measure paint depth. However, a gauge does not always show the thickness of every layer separately. It supports good judgment but does not replace experience.
Mistakes That Make Swirl Marks Worse
The fastest way to create more swirl marks is to rush. Paint correction rewards patience.
Avoid these common errors:
• Washing in direct sun while the panels are hot
• Using dish soap as a regular car wash
• Using a dry towel to remove dust
• Pressing hard with a dirty mitt
• Dropping a clay bar and using it again
• Using one towel for the whole vehicle
• Letting polishing pads become clogged
• Working on panels that still hold grit
• Using a rotary polisher without training
• Applying too much compound
• Skipping the test spot
• Expecting one pass to remove every defect
I once corrected a dark vehicle where the owner had used a household towel after every light rain. The polish worked well, but the marks returned within weeks. The real fix was a better wash routine, not a more aggressive compound.

How to Prevent Swirl Marks After Paint Correction
Once you remove swirl marks from car paint, prevention becomes the main goal. Think of the clear coat as a thin layer of glass. It stays clear when you keep grit away from the surface.
Follow these habits:
• Wash every one to two weeks, or when the car is visibly dirty.
• Rinse loose dirt before touching the paint.
• Use the two bucket method.
• Use a clean microfiber mitt.
• Wash from top to bottom.
• Rinse the mitt often.
• Dry with a clean plush towel.
• Use a drying aid or spray sealant when suitable.
• Store towels in a clean, closed container.
• Wash microfiber towels separately from cotton fabrics.
• Never place a towel on the ground and reuse it.
• Use a car cover only on a clean, dry vehicle.
Automatic brush washes are a major source of paint marring. Touchless washes are usually gentler, but strong chemicals and high pressure can affect wax, trim, or old paint. A careful hand wash remains the most controlled option.
A wax or sealant can make washing easier by reducing how strongly dirt sticks. It cannot make paint scratch-proof. Ceramic coatings also have limits. They add chemical and water resistance, but poor washing can still mark the surface.

How Much Does Paint Correction Cost?
The cost depends on the car’s size, paint condition, location, and correction level.
A careful DIY job may cost about $50 to $250 for shampoo, towels, pads, polish, protection, and basic tools. A quality DA polisher increases the initial cost but can serve you for many future details.
Professional paint correction often costs several hundred dollars. A one-step polish may be enough for mild swirls, while a multi-step correction can cost much more.
Ask a detailer what level of correction they promise. A responsible professional should explain that removing every scratch may not be safe or realistic. The best result is not always a flawless surface. It is a clear, glossy finish with enough paint left for future care.

Frequently Asked Questions About How to Remove Swirl Marks From Car Paint
Can I remove swirl marks from car paint without a machine?
Yes. Hand polishing can reduce light swirl marks, especially on small areas. It takes longer and may not correct moderate or heavy defects as evenly as a dual action polisher.
Does wax remove swirl marks?
Wax can hide very fine marks for a short time, but it does not level scratched clear coat. To remove swirl marks from car paint, you need a suitable polish or compound followed by paint protection.
Is a rotary polisher safe for beginners?
A rotary polisher can correct paint quickly, but it creates more heat and can leave visible holograms or burn marks when used incorrectly. Beginners should usually start with a dual action polisher and a mild test combination.
How often should I polish my car?
Polish only when the paint needs correction. Frequent polishing removes small amounts of clear coat, so safe washing and regular protection are better for long term maintenance.
Can ceramic coating prevent swirl marks?
Ceramic coating can improve chemical resistance and make cleaning easier, but it does not make paint scratch-proof. You can still create swirl marks through poor washing, dirty towels, or automatic brushes.
Should I remove every swirl mark?
No. Removing every defect may require removing too much clear coat. A safer goal is to achieve strong gloss and reduce noticeable marks while preserving the paint.
Conclusion
Learning how to remove swirl marks from car paint starts with understanding the clear coat and working in a controlled way. Wash without dragging grit, decontaminate carefully, test a mild polish, and use a dual action machine when you need more correction.
The best finish is not created by the strongest compound. It comes from clean tools, small work areas, patient inspection, and good washing habits after the job. Start with one panel, measure your results, and protect the paint when you are done.
Give your car the gentle care it deserves, and explore more paint care guides to keep that gloss looking sharp.