
How To Clean Car Door Jambs Properly: Quick Guide
Keep jambs clean by using mild cleaner, microfiber, soft brush, and protectant regularly.
I’ve cleaned hundreds of cars and taught owners how to clean car door jambs properly. This guide gives clear steps, tool lists, safety tips, and tricks I use in my shop so you can get spotless results fast. Read on to master cleaning door jambs with confidence and protect your car from rust and grime.
Why cleaning door jambs matters
Door jambs are the hidden edges of your car where dirt, road salt, and grime collect. Left unchecked, they trap moisture and speed up paint corrosion and rubber degradation. Regular cleaning keeps seals working, prevents rust, and makes the car feel cared for inside and out. Learning how to clean car door jambs properly protects value and prevents costly repairs later.

Tools and supplies you’ll need
Gather tools before you start. Good tools make the job quick and safe.
- Microfiber towels for wiping and drying.
- Soft detailing brush or toothbrush for crevices.
- All-purpose cleaner (APC) or dedicated trim cleaner.
- Spray bottle with diluted cleaner for controlled use.
- Plastic or wooden picks for stubborn dirt in seams.
- Rubber protectant or silicone-free dressing for seals.
- Nitrile gloves and eyewear for safety.
- Small foam applicator or Q-tips for tight spots.
- Bucket of water and a hose for rinsing if available.
Using the right supplies is key to learning how to clean car door jambs properly. Cheap rags or harsh chemicals will damage paint and seals.

Quick questions (short answers people ask)
What is the best cleaner for door jambs?
A mild all-purpose cleaner or a pH-neutral car cleaner works best. Avoid strong acids or bleach.
Can I use a pressure washer for jambs?
Low-pressure rinse is okay, but avoid directing high-pressure jets into seams or around electrical connectors. High pressure can force water into door electronics.
How often should I clean jambs?
Every time you wash the car or at least every 1–3 months in normal conditions. More often in winter or salty regions.

Step-by-step: how to clean car door jambs properly
Follow these steps for a safe, thorough clean.
- Prep the area
- Park in shade and open the doors fully.
- Remove loose debris with a soft brush or compressed air.
- Lay towels on the ground to catch drips.
- Apply cleaner
- Spray APC or trim cleaner onto a microfiber or directly onto the jamb.
- Let sit 20–30 seconds to break down grime, but don’t let it dry.
- Agitate grime
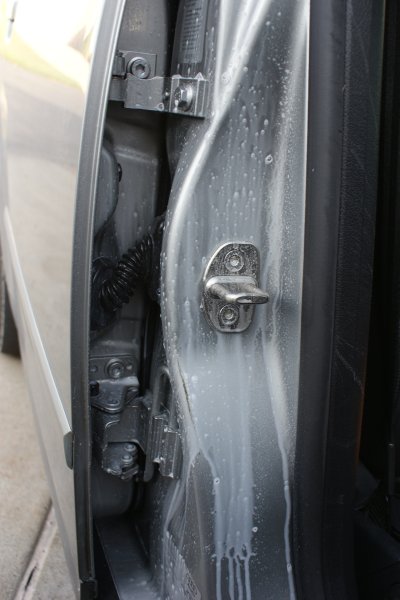
- Use a soft detailing brush or toothbrush on seams, hinges, and latch areas.
- Work in short strokes and re-spray as needed to loosen dirt.
- Rinse and wipe
- Wipe with a clean microfiber towel to lift dirt.
- Rinse with water or a damp towel to remove residue.
- Dry completely
- Use a fresh microfiber to dry all surfaces and crevices.
- Open and close the door a few times to help evaporate trapped moisture.
- Protect seals and painted areas
- Apply a rubber protectant to door seals with a foam applicator.
- Use a light layer of spray sealant or wax on painted jambs for extra protection.
Practicing these steps will teach you how to clean car door jambs properly and make the process fast and repeatable.
Dealing with heavy grime, grease, and rust
Stubborn buildup needs stronger tactics but stay gentle.
- Grease and tar: Use a tar and grease remover or an APC rated for heavy soils. Apply sparingly and work with a brush.
- Road salt: Rinse thoroughly, then neutralize with a mild car wash soap to prevent corrosion.
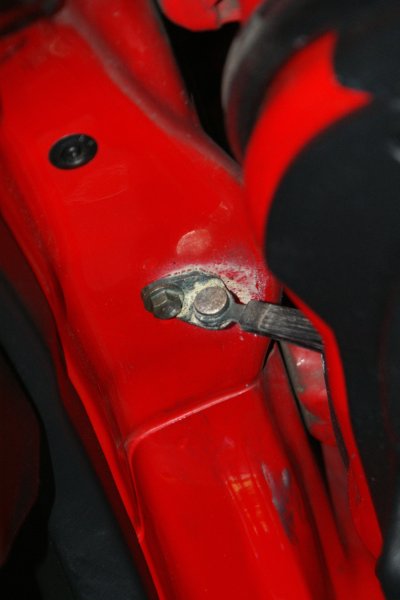
- Surface rust: Use a fine-grade rust remover or rust-eraser carefully. Touch up paint chips if metal is exposed.
- Paint stains: Use a clay bar on painted jambs for embedded contaminants. Keep pressure light.
When deep-cleaning, test products on an inconspicuous area first. This is important when learning how to clean car door jambs properly without harming finishes.

Protecting door jambs after cleaning
Protection extends the life of your work and reduces future cleaning.
- Paint protection: Apply a thin coat of spray sealant or wax to jambs to block contaminants.
- Rubber care: Use silicone-free rubber dressing to keep seals flexible and prevent cracking.
- Lubricate moving parts: Apply small amounts of white lithium grease to hinges and latch mechanisms.
- Inspect often: Check for new chips, rust, or seal damage during regular cleans.
Regular protection steps are a core part of how to clean car door jambs properly and prevent repeat problems.

Maintenance schedule and tips
A simple routine makes upkeep painless.
- After every wash: Quick wipe of door jambs with a damp microfiber.
- Monthly: Full clean, dry, and protect the jambs.
- Winter: Clean and inspect every 2–4 weeks to remove salt and moisture.
- Before long storage: Deep clean and apply a thicker protective layer to painted surfaces.
Small habits cut down on work and help you keep learning how to clean car door jambs properly with less effort.

Common mistakes to avoid
Avoiding these errors saves time and damage.
- Using harsh chemicals that strip paint or degrade rubber.
- Scrubbing with abrasive pads that scratch paint.
- Forgetting to dry pockets and seams where water hides.
- Over-applying protectants that attract dirt and create buildup.
- Using a pressure washer too close to seals and electronics.
Learning from these mistakes is part of mastering how to clean car door jambs properly.

Safety and environmental considerations
Be safe and kind to the environment while cleaning.
- Wear gloves and eye protection when using chemicals.
- Use biodegradable, low-VOC cleaners when possible.
- Collect dirty runoff and rinse onto gravel or a grassy area, not storm drains.
- Follow local rules for chemical disposal and runoff management.
Responsible practices matter when teaching others how to clean car door jambs properly.
My personal experience and lessons learned
I started as a weekend detailer and quickly learned door jambs tell the real story of a car’s care. Once I began cleaning jambs on every job, I noticed fewer rust claims and happier buyers. My biggest lesson: small, regular care beats rare, intense fixes. I now keep a small kit in the trunk so cleaning door jambs properly becomes part of every wash.
PAA-style extra questions
How long does a door jamb cleaning take?
A full clean and protect cycle usually takes 15–30 minutes per door depending on grime. Quick wipes take only a few minutes.
Will cleaning jambs remove rust?
Cleaning removes surface contamination but not deep rust. Use rust remover and touch-up paint for metal that’s already corroded.
Frequently Asked Questions of How to clean car door jambs properly
How often should I deep-clean door jambs?
Deep-clean door jambs every 1–3 months, or more often in winter. Frequent light maintenance reduces the need for deep cleans.
Can I use household cleaners on jambs?
Some mild household cleaners work, but avoid bleach, ammonia, and strong acids. Use car-safe products when possible.
Is it OK to use a toothbrush on hinges?
Yes. A soft toothbrush is ideal for getting into crevices without scratching. Replace with a detailing brush for larger jobs.
Will wax affect door seals?
Wax on painted jambs is fine, but avoid wax on rubber seals. Use a dedicated rubber protectant to keep seals supple.
What if water gets inside the door?
Open and close the door to help drain water and leave doors ajar until fully dry. If electrical issues appear, consult a technician.
Can door jamb cleaning increase my car’s resale value?
Yes. Clean jambs show care and can improve buyer impressions during inspections. It supports a higher perceived value.
Should I remove door trim to clean jambs?
No, removal usually isn’t needed. Clean accessible surfaces and seek professional help for deep internal cleaning.
Conclusion
Cleaning door jambs is a small habit with big payoff. Follow the simple tools, step-by-step method, and protection tips above to keep your car healthier and more attractive. Start today by cleaning one door jamb and make it part of your regular wash routine. If you found this helpful, try the method on your next wash, subscribe for more detailing tips, or leave a comment with your questions or experiences.