
A car seat is installed correctly when it fits the child, fits the vehicle, faces the right way, and stays secure at the correct belt path. In the United States, the safest check is to follow both the car seat manual and the vehicle owner’s manual. The seat should move no more than 1 inch from side to side or front to back when tested at the belt path. The harness should lie flat and snug, with the chest clip at armpit level.
Introduction
Car seat rules in the United States can vary by state, but safe installation follows the same basic process. You need to check the seat’s direction, recline angle, attachment method, movement, harness fit, and use of the top tether when required.
This guide explains how to check a rear-facing infant seat, convertible seat, all-in-one seat, and forward-facing seat. It also explains what to do when the seat moves too much, sits at the wrong angle, or seems difficult to install.

The quick test: Is the car seat secure?
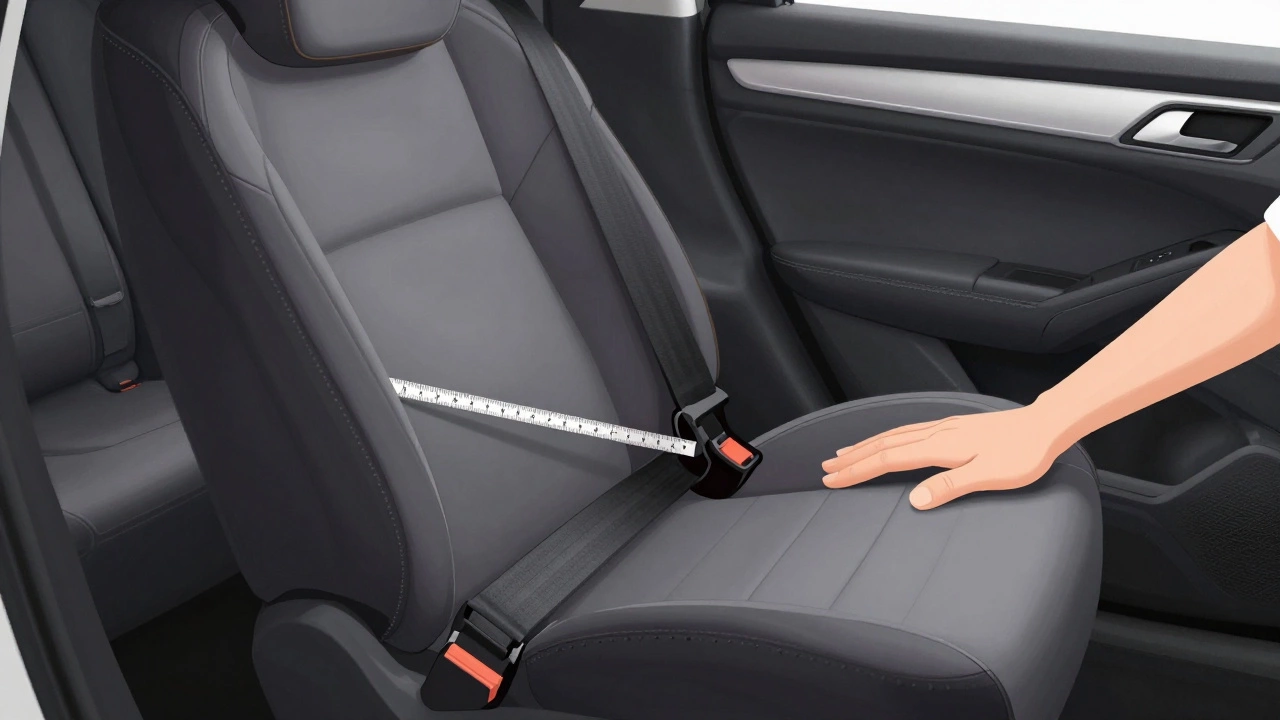
Start by checking the seat at the exact place where the vehicle belt or lower-anchor strap holds it. This is called the belt path.
Hold the car seat near the belt path with your non-dominant hand. Push and pull it from side to side and front to back.
- Movement of 1 inch or less is generally acceptable.
- Test the seat at the belt path, not at the top of the shell or headrest.
- A little flex in the car seat shell is not the same as a loose installation.
- If the seat shifts more than 1 inch, reinstall it before riding.
This test does not replace the full installation check. A seat can pass the movement test and still have the wrong recline angle, a loose harness, an unfastened tether, or an incorrect belt route.
The seven signs of a correct car seat installation
A properly installed seat usually meets all of these conditions:
The seat is approved for the child’s size.
The child is within the seat’s rear-facing or forward-facing height and weight limits.The seat faces the correct direction.
Children should ride rear-facing until they reach the seat’s rear-facing height or weight limit. Then they can use a forward-facing harness, if they meet the seat’s requirements.The seat uses the correct belt path.
Rear-facing and forward-facing belt paths are often different. Using the wrong one can make the seat unsafe.The seat moves no more than 1 inch at the belt path.
The recline indicator is within the allowed range.
The indicator may be a line, bubble, ball, or numbered marker. It must match the child’s age or installation direction when the manual gives separate settings.The harness is snug and correctly placed.
You should not be able to pinch extra webbing at the child’s shoulder.The forward-facing top tether is attached when required or allowed by the instructions.
The top tether helps limit forward movement in a crash.
If even one of these checks fails, stop and correct that part before driving.

How to check the car seat step by step
Use this order so you find the most important problems first.
1. Read both manuals
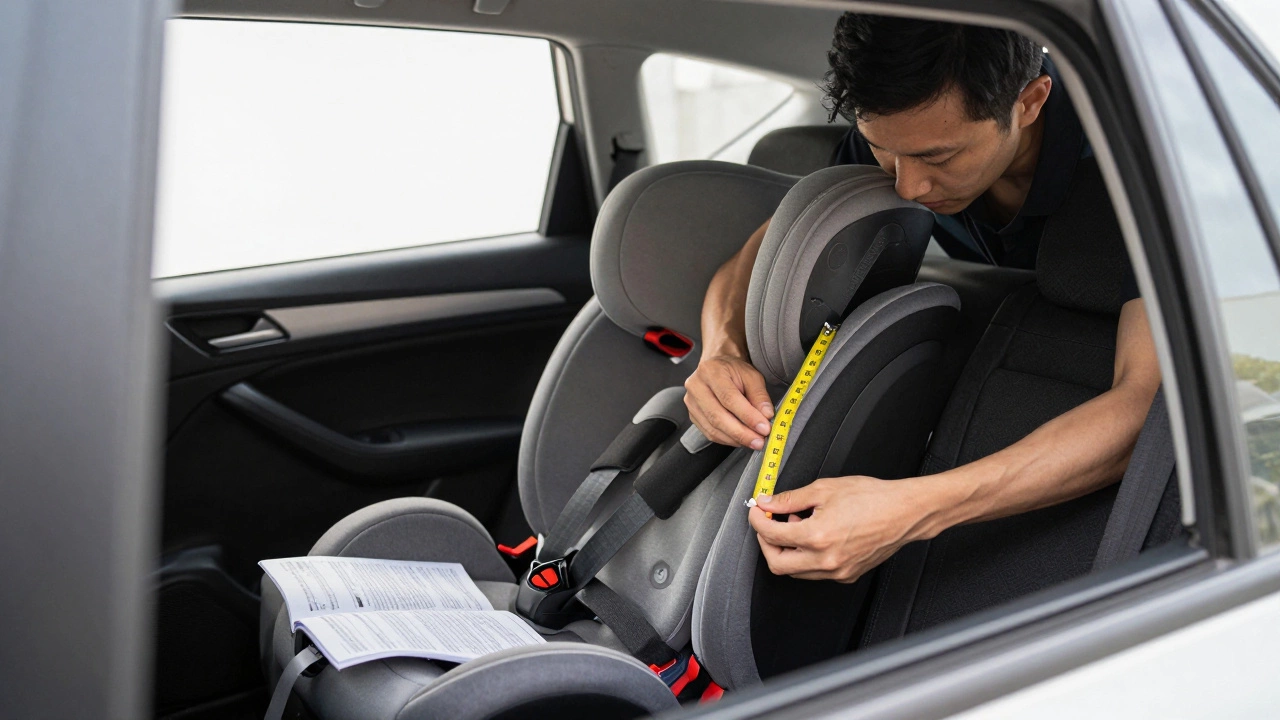
Keep the car seat manual and vehicle owner’s manual beside you. The car seat manual explains the approved belt paths, recline settings, harness rules, and weight limits. The vehicle manual explains where lower anchors, tether anchors, airbags, and seat belts are located.
Do not rely only on a general video. Different seats and vehicles can have different rules.
2. Choose the safest usable seating position
The back seat is usually the safest place for a child. Never place a rear-facing car seat in front of an active passenger air bag.
Check the vehicle manual before using:
- A center seating position
- Lower anchors in the center
- A third-row seat
- A seat with a fold-down or removable head restraint
- A seating position with a very short seat belt
The center position is not automatically the safest if the seat cannot be installed tightly there.
3. Set the seat’s direction and recline
Place the seat rear-facing or forward-facing as directed by the child’s size and the seat manual. Then set the recline angle before tightening the installation.
For a rear-facing seat:
- Make sure the recline indicator is in the correct range.
- Keep the infant’s head from falling forward.
- Do not add an unapproved insert, towel, wedge, or padding under the seat.
For a forward-facing seat:
- Use the forward-facing recline position listed in the manual.
- Confirm that the seat rests correctly against the vehicle seat.
- Use the top tether according to the car seat and vehicle instructions.
A seat that is too upright or too reclined may not protect the child as intended.
4. Pick one approved attachment method
Most car seats can be installed with either:
- The vehicle seat belt, or
- Lower anchors, often called LATCH
Use only an approved method for that seating position. Do not use the seat belt and lower anchors together unless the car seat manufacturer specifically permits it.
The seat belt must be routed through the correct belt path. If the seat has a built-in lock-off, use it as shown in the manual. If it does not, the vehicle seat belt must be locked by a method allowed by the vehicle and car seat instructions.
Many modern vehicle belts can lock when you pull the shoulder belt all the way out and let it retract. Some use a locking latch plate instead. Check the vehicle manual if you are not sure.
5. Remove slack from the belt or lower-anchor strap
Press down on the car seat near the belt path while pulling the strap tight. Work from the belt path, not from the far end of the seat.
For a seat belt installation:
- Remove slack from the lap portion first.
- Keep the belt flat and untwisted.
- Lock the belt or use the approved lock-off.
- Make sure the buckle is not resting inside the belt path unless the manual allows it.
For a lower-anchor installation:
- Confirm that each connector is attached to an approved anchor.
- Make sure the connectors face the correct direction.
- Tighten the strap until the seat is secure.
- Check the lower-anchor weight limit in the car seat manual.
6. Attach the top tether for forward-facing use
A forward-facing harnessed seat often has a top tether strap. Attach it to the vehicle’s designated tether anchor, not to a cargo hook or another nearby loop.
The top tether anchor may be behind the seat, on the vehicle floor, on the back of the seat, or near the cargo area. The vehicle manual identifies the correct anchor.
Do not use a tether strap for a rear-facing installation unless the car seat manufacturer specifically allows it.
7. Perform the movement test
Hold the seat at the belt path and test it in both directions.
If it moves more than 1 inch:
- Loosen the installation.
- Check that the belt or lower-anchor strap follows the correct route.
- Move the vehicle seat to a position that gives you room to tighten.
- Press down directly above the belt path.
- Remove slack again.
- Lock the belt or strap.
- Retest.
If the seat still moves too much, try an approved seating position or the other approved installation method.
How to check the child’s harness fit
A secure car seat is not enough. The child must also be secured correctly.
Rear-facing harness position
For rear-facing use, the harness straps should usually come from at or below the child’s shoulders. Follow the exact car seat manual because designs differ.
Forward-facing harness position
For forward-facing use, the harness straps should usually come from at or above the child’s shoulders. Again, use the seat manual as the final authority.
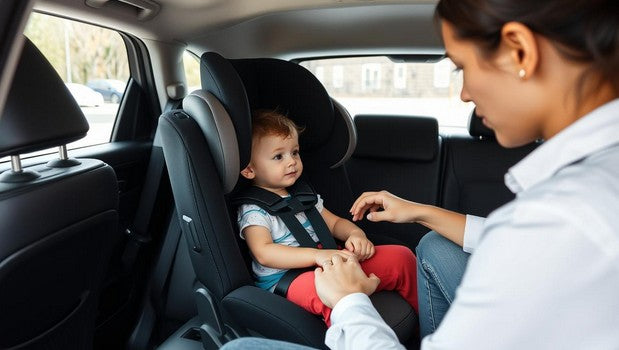
Check the harness with the pinch test
After buckling the child:
- Place the harness buckle at the child’s hips or lower abdomen, as designed.
- Put the chest clip at armpit level.
- Pull the harness snug.
- Try to pinch the webbing at the child’s shoulder.
If you can pinch a fold of webbing, the harness is too loose. Tighten it and test again.
The chest clip does not replace a tight harness. It helps keep the shoulder straps in the correct position.
Remove bulky coats
Do not buckle a child into a harness while wearing a thick winter coat or snowsuit. The material can compress in a crash and leave the harness too loose.
Instead, buckle the child in regular clothing and place a blanket over the harness. Never put a blanket under the child or behind the child’s back unless the car seat manufacturer approves it.
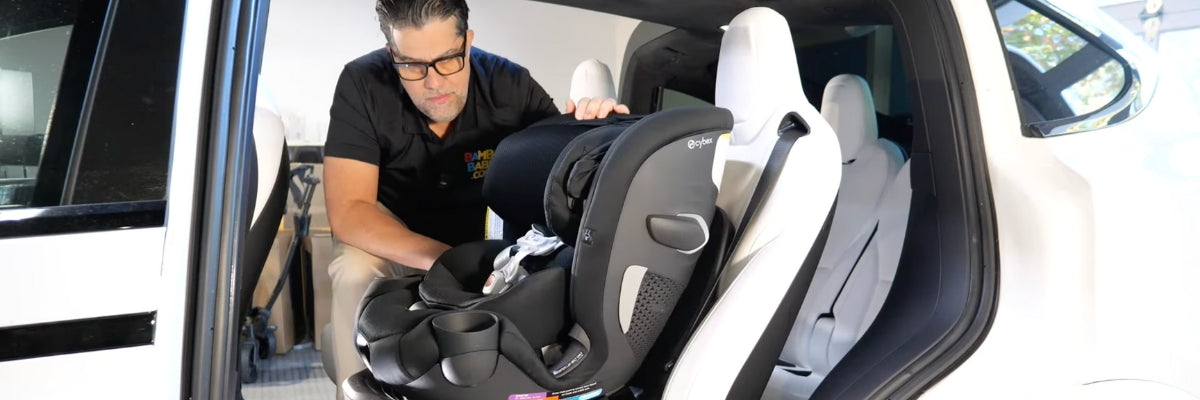
What to check for rear-facing car seats
Rear-facing travel is recommended for as long as the child remains within the seat’s rear-facing limits. This position supports the child’s head, neck, and spine during a frontal crash.
Check these points:
- The seat is not in front of an active air bag.
- The recline indicator is correct.
- The infant’s head does not fall forward.
- The harness is snug.
- The harness straps are at or below the shoulders when required by the manual.
- The child’s head is below the seat’s stated height limit.
- The seat does not press against the vehicle seat in a way the manual forbids.
- The handle is in the approved position for travel.
Some infant seats allow the carry handle to remain in different positions. Do not assume that a handle position is safe based on another brand or model. Check the manual for that specific seat.
Newborn inserts and head supports should be used only when supplied with the seat or specifically approved by its manufacturer. Aftermarket cushions can change the harness fit or the child’s position.

What to check for forward-facing car seats
A forward-facing seat should be used only after the child outgrows the rear-facing limits of the seat. The child must still meet the forward-facing height and weight limits.
Check these points:
- The seat uses the correct forward-facing belt path.
- The top tether is attached to the vehicle’s tether anchor.
- The harness straps are at or above the child’s shoulders when required.
- The harness is snug.
- The child’s ears remain within the seat’s stated height limit.
- The seat is not being used as a booster before the child is ready.
- The vehicle seat belt or lower-anchor strap is tight and locked.
A forward-facing seat may feel less stable at the top than at the belt path. The correct test is still the 1-inch movement check at the belt path. Do not try to eliminate every small movement at the headrest.

Seat belt installation or LATCH: Which is better?
Neither method is automatically safer when both are installed correctly. The best method is the one that the car seat and vehicle manuals allow and that you can install tightly every time.
| Installation method | What to check | Common concern |
|---|---|---|
| Vehicle seat belt | Correct belt path, locked belt, tight fit | Belt may be routed incorrectly or left unlocked |
| Lower anchors | Approved anchors, correct connector, weight limit | Lower-anchor limits may be reached before the seat’s full weight limit |
| Seat belt with top tether | Locked belt, correct path, tether attached for forward-facing use | Tether anchor may be confused with a cargo hook |
Lower anchors are not always available in the center seat. Do not connect to anchors from two different seating positions.
When a child reaches the lower-anchor weight limit, switch to the vehicle seat belt if the car seat manual allows it. The weight limit often includes the child’s weight and may differ by seat model.
Common signs that the installation is wrong
These problems are common and usually correctable.
The seat moves more than 1 inch
Possible causes include a loose belt, an unlocked retractor, a twisted strap, the wrong belt path, or a buckle that prevents the seat from tightening.
Reinstall the seat while pressing down directly above the belt path. If it still fails, use the other approved installation method or ask a certified Child Passenger Safety Technician for help.
The seat tilts to one side
A tilted seat may result from an uneven vehicle seat, a twisted belt, an incorrect recline setting, or uneven tightening.
Check the recline indicator and belt route. Do not use towels, pool noodles, or other items unless the car seat manual specifically allows them.
The seat slowly loosens during trips
This can happen when the belt is not locked, the lower-anchor strap is routed incorrectly, or the seat is being pulled from the wrong place.
Recheck the belt-locking method. Test the seat each time you install it, especially after moving it between vehicles.
The harness passes the pinch test but the child slouches
The seat may have the wrong recline angle, or the child may not be positioned fully back in the seat.
Set the recline as directed. Place the child’s bottom and back against the seat before tightening the harness. Do not add padding behind the child unless the manufacturer approves it.
The buckle or chest clip sits in the wrong place
The buckle should rest in the position designed for the child’s size. The chest clip should sit at armpit level.
If the buckle is too high, too low, or difficult to use, check whether the buckle slot or harness setting is correct. Do not add a buckle pad unless it came with the seat or is approved by the manufacturer.

When to get a professional car seat check
Ask for help if you cannot get the seat tight, cannot understand the manual, or are unsure whether the vehicle has a tether anchor.
In the United States, you can search for a certified Child Passenger Safety Technician through the National Highway Traffic Safety Administration’s child passenger safety resources. Many hospitals, fire departments, police departments, and local health agencies also offer checks, but services and fees vary.
A technician can help with installation and teach you how to repeat it. A check is especially useful when:
- You have a new car seat or vehicle.
- You are moving the seat between vehicles.
- The car seat is installed in a third row.
- The seat belt does not seem to lock.
- The child has outgrown one harness setting.
- You are switching from rear-facing to forward-facing.
- The seat has been involved in a crash.
- A recalled or damaged part is suspected.
A technician cannot override the car seat or vehicle manufacturer’s instructions. If the manuals conflict, contact the manufacturer before using the seat.

Car seat safety limits and exceptions
A correct installation does not make every situation safe. Keep these boundaries in mind:
- Do not use an expired seat. Check the expiration date and manufacturer’s instructions.
- Do not use a seat with unknown crash history. Damage may not be visible.
- Do not use a recalled seat without confirming the remedy.
- Do not use an aftermarket head support, insert, harness pad, or strap adjuster unless approved.
- Do not place a rear-facing seat in front of an active air bag.
- Do not assume every seat fits every vehicle. The manuals control.
- Do not leave a child unattended in a car seat outside the vehicle.
- Do not use a booster with a lap-only belt. A booster generally requires a lap-and-shoulder belt.
- Do not turn a child forward-facing just because the child’s legs touch the vehicle seat. Bent legs are usually not a reason to stop rear-facing if the child remains within the seat limits.
State laws set minimum requirements. They may not match the best-practice guidance in the car seat manual or from NHTSA. Follow the stricter safe-use requirement when the rules differ, and check your own state’s current law.
A simple final checklist before driving
Use this checklist after every new installation:
- Is the child in the correct seat for their height and weight?
- Is the seat facing the correct direction?
- Is the recline indicator correct?
- Is the seat in an approved vehicle seating position?
- Is the belt or lower-anchor strap in the correct path?
- Is the belt or strap locked and tight?
- Does the seat move no more than 1 inch at the belt path?
- Is the top tether attached for forward-facing use?
- Are the harness straps at the correct height?
- Is the harness snug enough to pass the pinch test?
- Is the chest clip at armpit level?
- Is the child free of bulky clothing under the harness?
- Are no unapproved accessories being used?
If the answer to every question is yes, the installation is likely set up correctly. When you are unsure, stop and get a hands-on check before the next trip.

FAQs
How much should a car seat move when installed?
The car seat should move no more than 1 inch from side to side or front to back when you test it at the belt path. Movement at the top of the seat is not the correct test point.
Should I use the seat belt and LATCH at the same time?
Usually, no. Use one approved installation method unless the car seat manufacturer specifically says that both may be used together. The manual for your exact seat controls.
Is a car seat safe if it is tight but the recline angle is wrong?
No. A tight seat can still be incorrectly installed if the recline angle is outside the allowed range. Check the indicator and correct the angle before use.
Does the chest clip need to be at the child’s chest?
No. It should sit at the child’s armpit level. The harness buckle holds the child in place; the chest clip helps keep the shoulder straps positioned correctly.
Can I use a towel under a car seat?
Only if the car seat manufacturer permits it. Some manufacturers allow a tightly rolled towel or approved item to correct the angle, while others do not. Never add padding based only on general advice.
When should I turn my child forward-facing?
Keep the child rear-facing until the child reaches the car seat’s rear-facing height or weight limit. Then use a forward-facing harnessed seat within its stated limits. The exact timing depends on the child and the seat.
Official U.S. guidance
- National Highway Traffic Safety Administration: Car Seats and Booster Seats
- NHTSA: Find a Child Passenger Safety Technician
- American Academy of Pediatrics: Car Seats and Booster Seats
- National Child Passenger Safety Certification: Find a Technician
Conclusion
To tell if a car seat is installed correctly, check more than whether it feels tight. Confirm the correct direction, recline, belt path, attachment method, movement, tether, and harness fit.
The most useful hands-on test is simple: grip the seat at the belt path and check that it moves no more than 1 inch. Then make sure the harness is snug, the chest clip is at armpit level, and the child remains within the seat’s limits. If the seat fails any check, follow the manuals again or contact a certified Child Passenger Safety Technician before driving.