

Installing a car seat base in a U.S. vehicle starts with two manuals: the car seat manual and the vehicle owner’s manual. In most cases, you can install an infant car seat base with either the vehicle seat belt or the lower anchors, but you should use only one method unless the manufacturer clearly allows both. The base should sit flat, face the correct direction, have the right recline angle, and move less than 1 inch from side to side at the belt path.

Before You Install the Car Seat Base
Check the car seat manual first. Car seat bases differ by model, and the approved belt path, recline settings, lower-anchor rules, and belt-locking method may not be the same.
Also check the vehicle owner’s manual. It may limit which seating positions you can use, explain how to access the lower anchors, or warn against placing a child seat in certain positions.
You will need:
- The car seat base and its instruction manual
- The vehicle owner’s manual
- The infant carrier that clicks into the base
- A firm vehicle seat
- A clean belt path
- Enough time to check the installation twice
Confirm that the base fits your car seat
A base must be made for the infant carrier that attaches to it. Do not assume that bases from the same brand work with every model.
Check that:
- The carrier locks into the base with a clear click.
- The carrier’s release handle works correctly.
- The base is approved for your infant seat model.
- The base is not cracked, damaged, recalled, or missing parts.
- The expiration date has not passed, if the manufacturer lists one.
Never use a secondhand base if you cannot confirm its history. A base may have hidden damage from a crash, missing parts, or an unknown recall status.
Choose the safest seating position available
For most families, the back seat is the safest place for a child restraint. The center position is not automatically best. It is useful only if the base can be installed tightly and correctly there.
A side seating position may be the better choice if:
- The center position has no usable seat belt.
- The center position has lower anchors that are too far apart or not approved for that location.
- The vehicle seat is uneven.
- The base does not sit securely in the center.
- Another passenger or car seat needs the available space.
Do not install a rear-facing infant seat in front of an active passenger air bag. If the vehicle has only one seating row, follow the vehicle and car seat manuals closely and have the installation checked by a certified child passenger safety technician.
Understand the two main installation methods
You will usually choose one of these methods:
| Method | What secures the base | Common benefit | Main caution |
|---|---|---|---|
| Vehicle seat belt | The lap-and-shoulder belt or lap belt | Works in nearly every seating position | You must use the correct belt path and locking method |
| Lower anchors | Built-in anchors between the vehicle seat cushions | Can be simple to connect | Anchor weight limits and seating positions vary |
Lower anchors are not automatically safer than a seat belt. A correct installation with either approved method can be effective. The best method is the one allowed by both manuals that gives a tight, stable fit.

How to Install a Car Seat Base With a Seat Belt
A seat belt installation is often the most flexible option. Use the belt path marked on the base, not a nearby opening that looks convenient.
1. Place the base rear-facing on the vehicle seat
Put the base on the vehicle seat so the infant carrier will face the rear of the car. The base should rest on the vehicle cushion without twisting or rocking.
Keep the base away from the front seat if the infant carrier or base would press against it. Follow the car seat manual for any approved contact with the front seat.
2. Set the correct recline angle
Adjust the base’s recline foot or recline position. Use the level indicator on the base as directed by the manufacturer.
The correct angle depends on the child’s size, the seat model, and the indicator design. Do not level the base by guessing or by making the infant carrier look perfectly upright.
A rear-facing infant seat that reclines too far may allow a young baby’s head to fall forward. A seat that is too upright may not provide the angle required by the manufacturer.
If the level line is difficult to read:
- Park on level ground.
- Make sure the base is not sitting on a loose cover.
- Check the indicator from the viewing angle shown in the manual.
- Adjust the recline foot before tightening the belt.
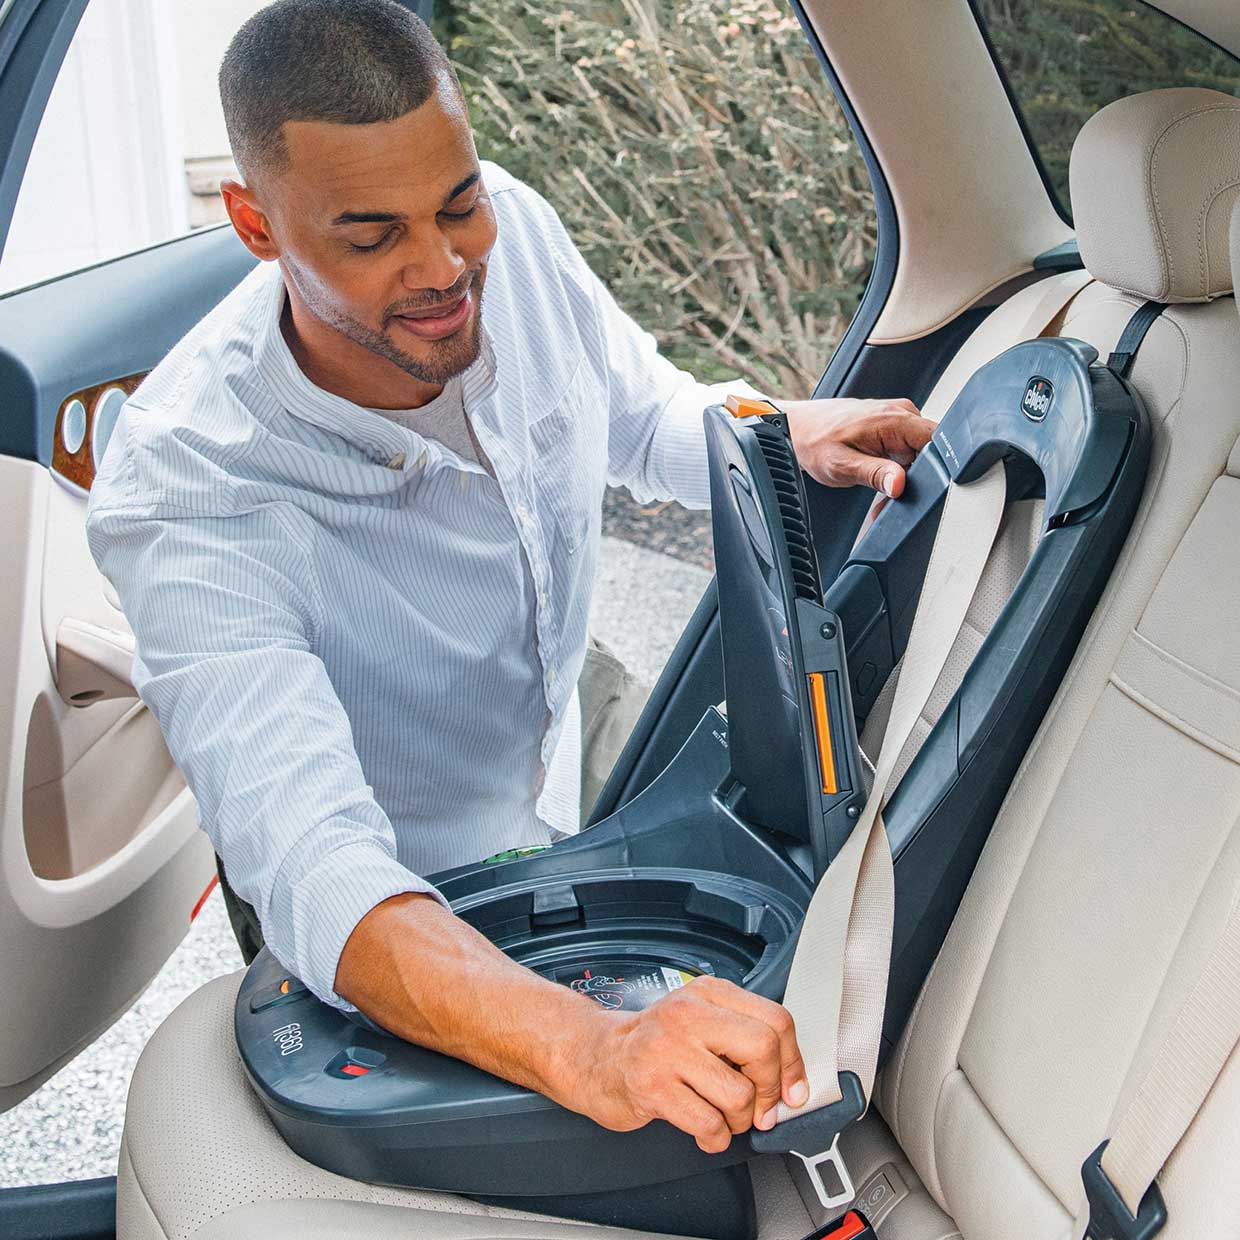
3. Route the seat belt through the correct belt path
Open or expose the belt path shown in the manual. Thread the vehicle belt through the rear-facing belt path.
Make sure:
- The belt is not twisted.
- The lap portion lies flat across the base.
- The shoulder portion follows the approved route.
- The buckle is outside the belt path unless the manual says otherwise.
- The belt does not pass over a part of the base that is not designed to hold it.
Some bases have separate paths for a lap-and-shoulder belt and a lap-only belt. Use the path that matches your vehicle belt system.
4. Lock the vehicle belt
The vehicle belt must stay tight after you remove slack. The correct locking method depends on the car and the base.
Possible methods include:
- A built-in lock-off on the car seat base
- A switchable retractor
- A locking latch plate
- A separate locking clip, if specifically required and allowed
A built-in lock-off is often easiest. Follow the manual to close it over the belt. If the base does not have a lock-off, read the vehicle manual to learn how the belt locks for child restraint use.
Do not add a locking clip unless the instructions call for one. A locking clip placed in the wrong position can make the installation less secure.
5. Remove slack near the belt path
Press down on the base near the belt path while pulling the belt tight. Pull the shoulder belt in the direction allowed by the base design.
Do not pull from far away and assume the slack has been removed. Slack can remain hidden in the belt path.
A helpful method is:
- Push the base down and toward the vehicle seat back.
- Pull the belt near the belt path.
- Feed the extra belt through the lock-off or retractor.
- Keep pressure on the base while securing the belt.
Avoid using your full body weight. A tight installation comes from removing slack, not from crushing the vehicle seat cushion.
6. Close the lock-off or finish locking the belt
If the base has a lock-off, close it only after the belt is tight. Check that the lock-off is fully shut and that the belt remains in its channel.
If you use the vehicle retractor, follow the vehicle manual. Some systems require pulling the shoulder belt all the way out and letting it retract. Others lock at the latch plate or use a different procedure.
Do not combine several locking methods unless the manufacturer approves the combination.
7. Test the base at the belt path
Hold the base with your non-dominant hand at the belt path. Push it side to side and front to back.
The base should move less than 1 inch in any direction at the belt path. A little movement at the far end of the base may be normal. The test should focus on the place where the belt or lower-anchor strap holds the base.
If the base moves more than 1 inch:
- Remove the carrier from the base.
- Loosen the belt.
- Recheck the belt route.
- Place the base in the correct recline position.
- Remove slack close to the belt path.
- Lock the belt again.
- Retest.

How to Install a Car Seat Base With Lower Anchors
Lower anchors are metal bars built into many vehicles. They are usually found in the gap between the seat back and seat cushion. A small button, label, or child-seat symbol may identify their location.
Lower anchors are not the same as the top tether anchor. A rear-facing infant base usually uses the lower anchors, not the top tether, unless the manufacturer provides different instructions.
1. Confirm that lower anchors are approved for that seating position
Do not connect to anchors simply because you can reach them. The vehicle manual identifies which seating positions have approved lower anchors.
Some vehicles have lower anchors only in the two outer rear seats. Some have anchors in the center. Some allow a center installation only with a seat belt, even when the inner anchors from two side positions appear close enough to use.
Never borrow anchors from two different seating positions unless the vehicle and car seat manuals specifically permit it.
2. Set the base on the vehicle seat
Place the base rear-facing on the seat. Adjust the recline foot so the level indicator shows the correct angle.
Keep the anchor straps flat. If the strap is twisted, straighten it before connecting it.
3. Attach each lower-anchor connector
Connect the right connector to the right anchor and the left connector to the left anchor. Many connectors make a click when attached.
Check each connection by pulling gently. The connector should stay attached and should not be clipped to a non-anchor part of the vehicle seat.
4. Tighten the lower-anchor strap
Press the base into the vehicle seat while pulling the adjustment strap. Remove slack from both sides as directed by the manual.
Some bases use one central strap. Others have separate straps. Do not assume that pulling one strap tightens the other.
Keep the adjustment tail accessible if the manual requires it. Do not tuck it under the base if doing so could loosen or damage the strap.
5. Check for less than 1 inch of movement
Grip the base at the lower-anchor belt path. Test it from side to side and front to back.
The base should move less than 1 inch at that point. If it moves too much, loosen the strap and start again rather than pulling harder on a poorly routed strap.
6. Check the lower-anchor weight limit
Lower anchors have a combined weight limit based on the child’s weight and the car seat’s weight. The limit varies by vehicle and car seat.
Once the child and car seat reach the limit in the applicable manual, switch to the vehicle seat belt if the seat allows it. Do not guess the limit or assume that the lower anchors can hold the seat throughout its entire use.
A seat belt installation may be the better long-term choice if the child is close to the lower-anchor limit.
How to Attach the Infant Carrier to the Base
The base is not ready for use until the carrier locks into it correctly.
Hold the carrier by the approved handle or grip area. Place it into the base according to the car seat manual. Press down until you hear or feel the carrier click into place.
Then check:
- The carrier is facing the rear.
- The indicator shows that it is attached.
- The carrier cannot lift out of the base.
- The release handle is in the position required for travel.
- The carrier does not sit at an unusual angle.
- No part of the carrier is resting on the vehicle door or another hard object.
Lift the carrier gently without pressing the release lever. It should remain attached. Do not drive if the carrier does not lock, even if it appears to be sitting in the base.
The carrier harness is a separate safety system. After placing the child in the carrier, tighten the harness so the straps lie flat and pass through the correct slots. The chest clip should sit at armpit level, and bulky coats should not be worn under the harness.

How to Know the Installation Is Correct
Use this quick check before every trip:
The base passes the movement test
The base moves less than 1 inch side to side and front to back when tested at the belt path or lower-anchor path.
The recline indicator is correct
The level line, bubble, or marker is within the range shown in the manual. Check it again if the vehicle is parked on a steep slope or if the base has been moved.
The belt or lower-anchor strap is tight
The belt or strap has no loose section near the belt path. It is not twisted, trapped under the base, or routed through the wrong opening.
The carrier locks securely
The carrier clicks into the base and stays attached when lifted without using the release lever.
The base sits in an approved position
The seating position is allowed by the vehicle manual and the car seat manual. The base is not blocking another passenger’s safe seating position.
The child’s harness is adjusted correctly
The harness is snug, flat, and routed through the correct slots. The chest clip is at armpit height.
The National Highway Traffic Safety Administration recommends having a certified Child Passenger Safety Technician check the installation if you are unsure. You can find inspection resources through the NHTSA child passenger safety pages and Safe Kids Worldwide inspection station directory.

What to Do If the Car Seat Base Will Not Tighten
A loose base usually has a correctable cause. Work through the checks in order.
The base moves more than 1 inch
Possible causes include:
- The belt is routed through the wrong path.
- The belt has slack hidden inside the belt path.
- The lock-off is not fully closed.
- The lower-anchor connector is attached incorrectly.
- The vehicle seat cushion is unusually soft or sloped.
- The base is resting on a cover or other material.
- The seating position is not approved for that installation method.
Remove the base and start again. Repeating the same pull with the same belt route rarely fixes the problem.
The buckle is inside the belt path
A buckle that sits inside the belt path may prevent the belt from tightening. Do not twist the buckle stalk unless the car seat manual allows it. A better seating position or a different approved installation method may solve the issue.
The base tips or rocks
A small amount of movement at the end of the base can be normal. Excessive rocking often means the recline angle is wrong, the vehicle cushion is uneven, or the belt is not tight at the correct point.
Do not place towels, pool noodles, or other items under the base unless the car seat manufacturer specifically allows them. Some manufacturers permit a tightly rolled towel for angle adjustment, but the manual must approve the method.
The lower anchors are hard to reach
Use the vehicle manual to locate them. Do not connect to seat-frame hardware, cargo hooks, or other metal bars that are not marked as lower anchors.
If the anchors are difficult to use, the seat belt may provide a simpler installation. It is not necessary to use lower anchors when the belt gives a correct installation.
The infant carrier does not click into the base
Check that:
- The carrier matches the base.
- The base is installed in the correct direction.
- Nothing is blocking the attachment points.
- The carrier is fully seated.
- The base and carrier are not damaged.
- The release handle is not being held during attachment.
Stop using the system if it still does not lock. Contact the manufacturer or a certified technician.

Common Mistakes to Avoid
Using both the seat belt and lower anchors without approval
Using two methods may seem safer, but the combination can change how the base responds in a crash. Use one approved method unless the manufacturer clearly permits both.
Installing the base on top of a thick seat cover
Thick covers can change the fit and create slack. Use the vehicle seat directly unless the car seat and vehicle instructions allow a specific protector.
Assuming the center seat is always safest
The center is useful only when the base fits correctly there. A properly installed side position is better than a loose center installation.
Adding unapproved accessories
Avoid aftermarket head supports, strap covers, inserts, mirrors, toys, and padding unless they came with the seat or are approved by the manufacturer. Accessories can change harness fit or interfere with the carrier.
Using a seat after a crash without checking its status
Many manufacturers advise replacing a child restraint after a moderate or severe crash. NHTSA provides criteria for when a minor crash may meet all five conditions for continued use, but the car seat manufacturer may have stricter rules. Check both sources.
Turning the seat forward too soon
Infants should ride rear-facing. The American Academy of Pediatrics recommends that children ride rear-facing as long as possible, until they reach the highest weight or height allowed by the seat manufacturer. Follow the seat’s limits rather than turning the child based only on age or leg position.

Seat Belt or Lower Anchors: Which Should You Use?
Choose the method that produces the most secure installation in your vehicle and is approved by both manuals.
A seat belt may be the better choice when:
- The vehicle has no lower anchors in the preferred position.
- The lower-anchor limit is near.
- The belt path is easy to route and lock.
- You plan to move the base between vehicles.
- The lower anchors are hard to access.
Lower anchors may be useful when:
- The vehicle and base clearly approve that position.
- The connectors are easy to attach.
- The strap tightens without twisting.
- The installation passes the movement test.
- The child and seat remain under the anchor limit.
There is no universal winner. Installation quality matters more than the label on the method.

When to Get Professional Help
Get an in-person check if:
- The base still moves more than 1 inch.
- The belt or anchor strap will not stay tight.
- You are unsure which seating position is approved.
- The carrier does not lock correctly.
- The seat has been in a crash.
- The child has special medical or positioning needs.
- You are installing a seat in an older vehicle with unusual belts.
- You need to install more than one child restraint and space is limited.
Certified Child Passenger Safety Technicians can inspect the setup and teach you how to repeat it. Many inspection stations offer free or low-cost checks, but availability varies by location and appointment rules.
Bring the car seat manual and vehicle manual when possible. The technician can check the exact model and seating position instead of relying on general advice.

Key Takeaways
- Read the car seat and vehicle manuals before installing the base.
- Install the infant base rear-facing in an approved seating position.
- Use either the seat belt or lower anchors unless both manuals allow both.
- Set the correct recline angle before tightening.
- Test movement at the belt path; it should be less than 1 inch.
- Confirm that the infant carrier clicks into the base and stays attached.
- Do not use unapproved accessories, padding, or belt routes.
- Ask a certified Child Passenger Safety Technician to check the installation if anything feels uncertain.
FAQs
Can I put a car seat base in the front seat?
Usually, the back seat is preferred. Never use a rear-facing child restraint in front of an active passenger air bag. If the vehicle has no back seat, follow the vehicle and car seat manuals and disable the air bag only as directed by the vehicle manufacturer.
Should the car seat base touch the vehicle seat back?
The base should sit as directed by its manual. Some bases may contact the vehicle seat back, while others need space or have specific contact limits. Do not force the base against the front seat.
Can I use a rolled towel under the car seat base?
Only if the car seat manufacturer allows it. Some manuals permit a tightly rolled towel to correct the recline angle. Do not use a towel or pool noodle simply to stop movement or fill a gap.
Why does my car seat base move at the front?
Movement at the far end may be normal. Test the base at the belt path or lower-anchor path. If it moves more than 1 inch at that location, reinstall it.
Can I install the base without the carrier attached?
Yes. The base is installed first, then the carrier is attached. Always test the carrier connection before driving.
Do I need to use the top tether with an infant car seat base?
Most rear-facing infant bases do not use a top tether. Follow the specific car seat manual. Do not attach the tether to a cargo hook or another point that is not an approved tether anchor.
How often should I check the installation?
Check it after moving the base, changing vehicles, adjusting the recline, or noticing new movement. A quick movement and carrier-lock check before trips can catch a loose installation.
Conclusion
To put a car seat base in a car, place it rear-facing in an approved seating position, set the correct recline angle, secure it with one approved method, and test for less than 1 inch of movement at the belt path. Then attach the infant carrier and confirm that it locks firmly.
If the base will not tighten or the instructions conflict, stop and use the car seat manual, vehicle manual, manufacturer support line, or a certified Child Passenger Safety Technician. A correct installation is more important than choosing a particular seat position or attachment method.