

Wash, clean, polish, and protect every part of the car so it looks cared for and ready to drive.
Learning how to detail a car before selling it can help you make a stronger first impression and support a better asking price. A clean car does not hide major defects, but it can show buyers that you maintained the vehicle with care. This guide explains the best order, tools, products, and techniques for getting professional-looking results without wasting money.
Why detailing matters before you sell
A clean car feels more valuable than a dirty one, even when both vehicles have the same age and mileage. Buyers notice the smell, paint finish, glass, tires, seats, and small areas such as door jambs and cup holders.
Knowing how to detail a car before selling it also helps you present the vehicle with confidence. A buyer may still inspect the engine, check the vehicle history, and arrange a mechanical inspection. However, a clean and organized car creates a better setting for those checks.
Detailing can help you:
• Make the paint look brighter
• Remove stains and loose dirt
• Reduce unpleasant odors
• Improve the look of worn trim and tires
• Make photos look more appealing
• Show that you took reasonable care of the vehicle
Keep your expectations realistic. Detailing can improve appearance, but it cannot repair rust, deep scratches, cracked dashboards, bad odors from water damage, or mechanical problems. Be honest about defects. Trust is often more valuable than a temporary shine.

Gather the right car detailing supplies
You do not need a full professional shop to detail a car before selling it. A small set of safe products can handle most cleaning work.
Use separate supplies for the wheels, paint, glass, and interior. Brake dust and road grit can scratch paint if you use the same towel or brush in every area.
Exterior detailing supplies
• Two or three clean buckets
• A pH-neutral car wash soap
• A soft wash mitt
• Microfiber drying towels
• A soft wheel brush
• A tire brush
• A safe wheel cleaner
• Glass cleaner
• Bug and tar remover
• Clay bar or clay mitt
• Spray wax or paint sealant
• Tire dressing
• Painter’s tape
Interior detailing supplies
• A vacuum with narrow attachments
• Interior-safe cleaner
• Microfiber towels
• Soft detailing brushes
• Upholstery or carpet cleaner
• Leather cleaner and conditioner, if needed
• Plastic and vinyl protectant
• Cotton swabs for small gaps
• An odor-neutralizing product
Avoid household dish soap for regular car washing. It can remove protective wax and may dry some exterior surfaces. Also avoid products that leave a greasy film on the steering wheel, pedals, shifter, or seat. Those areas must remain safe to touch.
Before using any product, read the label and test it in a hidden area. Different materials can react in different ways, especially older leather, dyed fabric, soft-touch plastic, and aftermarket window tint.

Inspect the car before you start
The best way to detail a car before selling it is to inspect it first. Walk around the vehicle in daylight and write down the problems you notice.
Look for:
• Deep scratches
• Paint chips
• Door dings
• Peeling clear coat
• Rust bubbles
• Cracked lights
• Damaged trim
• Curb rash on wheels
• Torn seats
• Stains and odors
• Warning lights
• Low tire pressure
Taking photos before cleaning can help you remember the car’s original condition. It also keeps you from confusing dirt with permanent damage.
Open the hood, trunk, doors, and fuel door. Dirt often collects in these hidden areas. Check the spare tire compartment for moisture, leaves, or mold. If you find standing water, solve the leak before adding fresh interior products.
This inspection also helps you choose where to spend your time. A car with clean paint but a dirty interior may need more cabin work. A vehicle with a good interior but dull paint may benefit from a careful wash, clay treatment, and light polish.
Clean the interior first
Many detailers prefer to clean the interior before washing the outside. This keeps dust, crumbs, and cleaner residue from landing on freshly washed paint.
Remove everything from the cabin, trunk, door pockets, and center console. Do not forget old registration papers, tools, sports gear, child seats, and personal items. Buyers often open storage areas, so empty compartments make the car feel more organized.
Use this order:
Remove floor mats and shake them outside.
Vacuum the seats, carpets, trunk, and floor mats.
Use a brush to loosen dirt from seams and vents.
Clean the dashboard, console, doors, and cup holders.
Clean the windows from the inside.
Treat stains based on the material.
Replace the mats and inspect the cabin again.
Start at the top and work down. Dust from the dashboard can fall onto the seats or floor, so cleaning the floor first creates extra work.
Clean fabric seats and carpets
Vacuum fabric before using liquid cleaner. Too much moisture can push dirt deeper and create a musty smell. Apply a small amount of upholstery cleaner to a towel or soft brush, work in a small area, and remove the residue with a clean microfiber towel.
Do not soak the carpet. Allow the doors or windows to remain open in a safe, dry place until the fabric is fully dry. A wet cabin can develop odor and mold, which may hurt buyer confidence.
Clean leather seats
Use a leather-safe cleaner, not a harsh household degreaser. Wipe gently and focus on seams, bolsters, and areas touched often.
After cleaning, use a small amount of leather conditioner if the manufacturer permits it. Avoid making the seats glossy or slippery. Natural-looking leather usually looks better than a wet, oily finish.
Clean plastic, vinyl, and screens
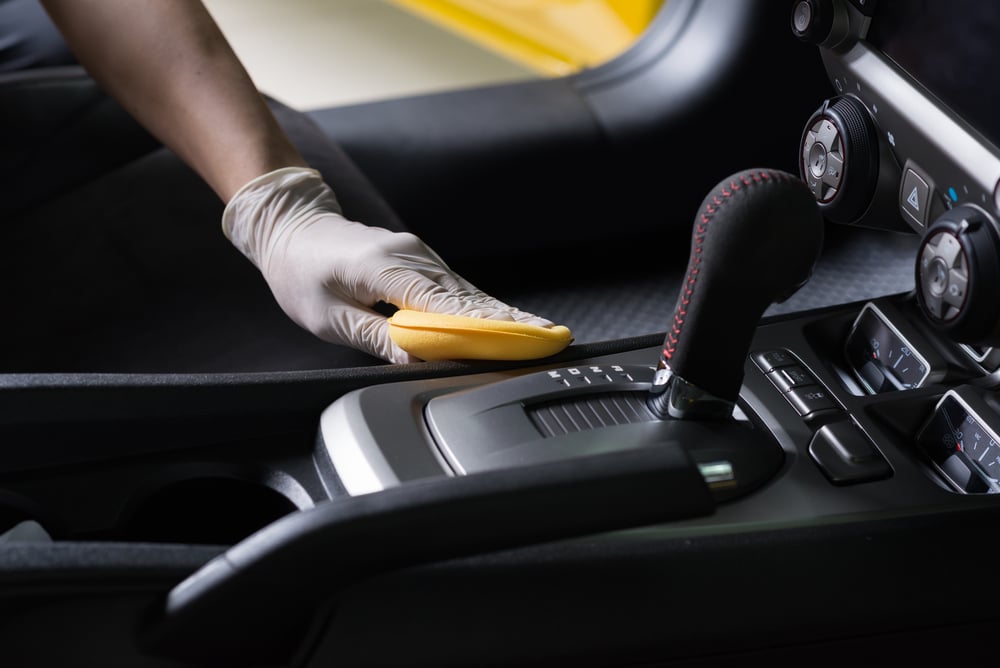
Use a damp microfiber towel for screens and instrument panels. Do not spray liquid directly onto buttons, vents, speakers, or electronic displays.
For textured plastic, a soft brush can remove dust from small grooves. Finish with a low-sheen protectant if needed. A shiny dashboard can reflect sunlight and look unnatural in photos.
Remove odors safely
Find the source before masking the smell. Check food spills, wet carpets, ashtrays, air filters, pet areas, and the trunk.
Ventilate the car and clean the affected surface. Avoid using a strong fragrance to cover smoke or mold. Buyers may see that as an attempt to hide a problem. If the odor remains, professional ozone treatment may help, but the car must be empty and the treatment must be performed safely.

Wash the exterior correctly
When learning how to detail a car before selling it, the wash method matters more than expensive products. Poor washing can add swirl marks and fine scratches to the clear coat.
Choose a cool, shaded location. Do not wash hot paint or let soap dry on the surface. Rinse the car first to remove loose grit.
A safe wash process looks like this:
Rinse the wheels and tires.
Clean the wheels with a separate brush and towel.
Rinse the vehicle from top to bottom.
Apply car wash soap with a clean mitt.
Work one small section at a time.
Rinse the mitt often.
Rinse the full vehicle well.
Dry with clean microfiber towels.
Wash the roof, windows, hood, upper doors, and trunk before the lower panels. The lower panels usually hold more grit. Never press hard against the paint when dirt does not come off easily. Add more soap or rinse the area again.
Use the two-bucket method when possible. One bucket holds soapy water, and the other holds clean rinse water. Dip the mitt into the rinse bucket after each section. This reduces the amount of grit transferred back onto the paint.
Clean the door jambs, trunk opening, fuel door, and the area behind the license plates. These spots often make a strong difference because buyers notice them when they inspect the vehicle.
Decontaminate and improve the paint
A clean-looking car may still have bonded pollution on the paint. Run your fingertips over a clean, dry panel inside a thin plastic bag. If the surface feels rough, it may need decontamination.
Use an automotive clay bar or clay mitt with plenty of lubricant. Work gently in small sections. Stop if the surface becomes dry or if the clay picks up heavy dirt.
Clay can remove:
• Industrial fallout
• Rail dust
• Overspray
• Tree residue
• Road film
Clay does not repair scratches or restore missing clear coat. It only removes bonded material from the surface. After claying, wash or wipe the vehicle as the product instructions recommend.
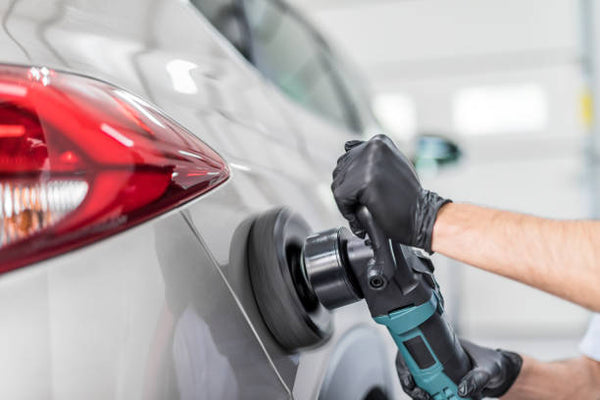
Light polishing can reduce the appearance of mild swirls and dullness. If you use a machine polisher, practice on a small area first. Aggressive polishing can remove clear coat, especially on edges and body lines.
For most sellers, a light cleaner polish or one-step polish is safer than a heavy correction. The goal is to make the car look clean and cared for, not to chase every defect.

Protect the paint without overdoing it
After washing and polishing, apply a spray wax, liquid wax, or paint sealant. Protection can add gloss and help the car stay cleaner during the selling period.
Apply the product in thin layers. Follow the label for drying and removal times. Use a clean microfiber towel and turn it often to avoid spreading residue.
Avoid applying wax to:
• Matte paint
• Textured plastic
• Rubber seals
• Unpainted trim
• Windshield glass, unless the product is made for glass
Some products can leave white residue in cracks and around emblems. Use a soft brush or cotton swab to remove residue before taking photos.
A ceramic coating is usually unnecessary for a vehicle you plan to sell soon. It can cost more than the appearance benefit it provides, and professional application may require paint preparation. A simple sealant is often the more practical choice.
Detail the wheels, tires, lights, and trim
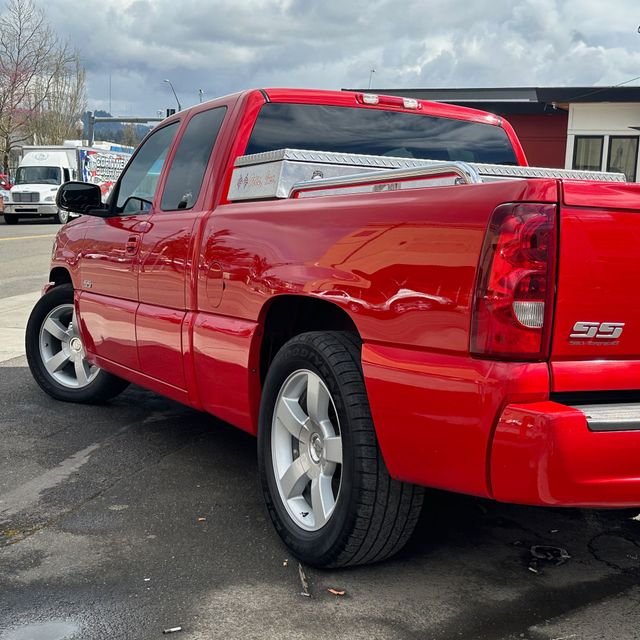
Clean wheels can change the entire appearance of a car. Brake dust makes a vehicle look neglected, even when the paint is clean.
Rinse each wheel first. Use a wheel cleaner that matches the wheel’s finish, and never let the product dry. Use a separate brush for the wheel face, spokes, lug nuts, and inner barrel.
Clean the tires with a tire brush until the foam is no longer dark. Rinse thoroughly. Apply a water-based tire dressing for a clean, satin finish.
Avoid very glossy tire products. They can sling onto the paint while driving and may make the tires look oily. Keep dressing away from the tread and braking surfaces.
Clean headlights and taillights with a plastic-safe cleaner. If the lenses are heavily cloudy, a proper restoration kit may improve them. Follow the kit directions and protect restored lenses from future UV damage.
Wipe exterior trim and rubber seals with a suitable cleaner. Do not use cooking oil or other household products. They may attract dust, damage rubber, or create an uneven finish.

Clean the glass for better photos and test drives
Clear glass makes a car feel newer and improves visibility during a test drive. Clean the inside and outside of every window, including the rear glass and mirrors.
Use a glass-safe towel that does not leave lint. Spray the cleaner onto the towel when working near dashboards, door panels, and electronics. Wipe in one direction on the inside and another direction on the outside. This makes it easier to find streaks.
Pay attention to:
• Fingerprints
• Film on the windshield
• Smudges near the rearview mirror
• Dirt around window seals
• Pet nose marks
• Water spots
Do not apply ordinary household glass cleaner to tinted windows unless the label says it is safe for automotive film. Some products contain ammonia, which can damage certain tint films over time.

Fix small presentation issues
Detailing is more than washing. Small repairs can make the car easier to evaluate.
Replace burned-out bulbs if the repair is simple and safe. Inflate tires to the pressure listed on the driver’s door label, not the number printed on the tire sidewall. Remove old stickers and clean license plates.
Check that:
• The windshield washer fluid is filled
• The wipers work properly
• The floor mats are in place
• The trunk is empty
• The spare tire and tools are organized
• The fuel door opens
• The doors and windows work
• The warning lights are understood
Do not reset warning lights just to make the dashboard look clean. If a warning light is active, explain it and arrange a repair or inspection when possible.
You can also replace inexpensive missing items, such as a lost valve stem cap or broken cup holder insert. Do not spend heavily on cosmetic parts unless the repair clearly improves the car’s value.
Prepare the car for photos and showings
Good photos can bring more serious buyers. Photograph the car after detailing it, preferably in soft daylight. Early morning or late afternoon often gives better light than strong midday sun.
Park in a clean, open area. Keep the background simple. Turn the wheels slightly so the wheel faces are visible, and take photos from a natural height.
Include clear images of:
• Front, rear, and both sides
• Wheels and tires
• Interior and dashboard
• Seats and carpets
• Trunk and engine bay
• Odometer
• Any damage or wear
Honest photos reduce wasted time. If there is a scratch, dent, rust spot, or torn seat, show it clearly. A buyer who arrives and finds a surprise may lose trust immediately.
Before a test drive, wipe down touch points such as the steering wheel, door handles, shifter, and center console. Keep cleaning supplies out of sight and remove personal items from the cabin.
Should you detail the engine bay?
A clean engine bay can look appealing, but aggressive cleaning can create problems. Modern engine compartments contain electrical connectors, sensors, exposed filters, and delicate components.
Remove loose leaves and dust with a soft brush or vacuum. Wipe accessible plastic covers and painted areas with a damp towel. Avoid soaking the alternator, fuse boxes, ignition parts, and connectors.
Do not use engine dressing to create a wet shine. An oily engine bay can attract dust and may make buyers wonder whether you are hiding leaks.
If the engine bay has heavy oil or coolant residue, find the source. Cleaning the area without fixing the leak can make the issue more noticeable during inspection. Mechanical honesty matters more than visual shine.
Common mistakes to avoid
The wrong products or rushed methods can reduce the value of your work. These mistakes are common when people detail a car before selling it.
• Using one dirty towel on every surface
• Washing in direct sunlight
• Scrubbing paint with a rough sponge
• Applying tire dressing to the tread
• Using oily products on the steering wheel
• Soaking seats and carpets
• Spraying cleaner onto electronic screens
• Covering smoke or mold with strong fragrance
• Polishing aggressively without testing
• Hiding scratches instead of disclosing them
• Cleaning an engine bay with excessive water
• Leaving wax residue around trim and emblems
One lesson I have seen repeatedly is that restraint produces better results. A clean, natural finish looks trustworthy. A greasy dashboard, wet tire shine, and heavy air freshener can make a buyer more suspicious, not less.
If you are unsure about a product, use less of it and test a hidden area. A small clean section tells you more than a full application made in a hurry.
When professional detailing makes sense
Professional detailing may be worthwhile when the car has heavy stains, pet hair, smoke odor, paint overspray, oxidation, or neglected wheels. It can also save time if you have limited equipment or need the car ready quickly.
Ask for a clear estimate before approving the work. A basic interior and exterior detail may be enough. You may not need paint correction, ceramic coating, engine detailing, or premium odor treatment.
Compare the detailing cost with the vehicle’s likely selling price. Spending $1,000 on cosmetic work for a low-value car may not return that amount. A modest clean, vacuum, glass treatment, and wash can often deliver most of the visible benefit.
Professional work also has limits. A detailer cannot guarantee removal of every stain or scratch. Ask what the service includes, what it cannot fix, and whether the products are safe for your vehicle’s surfaces.
A practical one-day detailing plan
If you need to detail a car before selling it in one day, follow this order.
Morning
• Remove personal items and trash
• Inspect the vehicle
• Vacuum the interior
• Clean seats, carpets, plastics, and glass
• Let damp areas dry
Midday
• Rinse and wash the exterior
• Clean the wheels and tires
• Clean door jambs and hidden edges
• Dry the paint with microfiber towels
Afternoon
• Clay rough paint if needed
• Apply light polish or cleaner wax
• Protect the paint
• Dress the tires and clean the trim
• Check lights, tire pressure, and wipers
Final review
• Remove residue from emblems and cracks
• Check for streaks in the glass
• Make sure the cabin smells neutral
• Take clear photos
• Disclose damage in the listing
Do not rush the drying stage. Moisture trapped in carpets, seams, or door pockets can create an odor after the car is closed overnight.
How much can detailing affect the selling price?
Detailing does not guarantee a specific price increase. The final price depends on location, mileage, service records, vehicle condition, demand, and comparable listings.
Still, a clean car may attract more attention and reduce buyer objections. It can also help the vehicle compete with similar cars that have been poorly presented.
Think of detailing as preparation, not a magic repair. It improves the car’s presentation and can make the selling process smoother. Mechanical maintenance, accurate records, fair pricing, and honest communication usually matter more than a perfect shine.
A useful approach is to spend first on high-impact items:
• Remove strong odors
• Clean the interior deeply
• Improve visibility through clean glass
• Wash the paint and wheels
• Repair inexpensive safety or function issues
• Take honest, well-lit photos
Frequently Asked Questions About How to Detail a Car Before Selling It
What is the best order to detail a car before selling it?
Start by removing personal items and inspecting the vehicle. Clean the interior, wash the exterior, decontaminate or polish the paint if needed, protect the surfaces, and finish with glass, tires, photos, and a final inspection.
Should I wax my car before selling it?
Yes, a light wax or paint sealant can improve gloss and help protect the paint during showings. Use a product that matches the vehicle’s finish, and remove all residue from trim and cracks.
Can detailing remove scratches before I sell my car?
Light surface marks may improve with a mild polish, but deep scratches usually need paint repair. Do not use aggressive polishing unless you understand clear coat limits or have professional help.
How do I remove smoke or pet odors from a car?
First remove the source by cleaning upholstery, carpets, vents, and hidden storage areas. Ventilation and professional odor treatment may help, but strong fragrance should not be used to hide smoke, mold, or water damage.
Should I clean the engine bay before selling the car?
You can gently remove loose dirt and wipe safe, accessible surfaces. Avoid soaking electrical parts, and never use engine dressing to hide oil or coolant leaks.
Is professional detailing worth the cost before selling?
It can be worthwhile if the car has deep stains, pet hair, severe odor, or neglected paint. For a normal used car, a careful do-it-yourself interior cleaning and exterior wash may provide most of the visible improvement.
How long before selling should I detail the car?
Detail it shortly before taking photos and showing it to buyers. If you detail too early, dust, rain, and new stains can reduce the effect.
Conclusion
The best way to detail a car before selling it is to work from the inside out, use safe products, and focus on clean, natural results. Vacuum and clean the cabin, wash the exterior with care, improve the paint only as needed, clean the glass and wheels, and inspect every small detail before photographing the vehicle.
Do not try to hide damage or mechanical problems. A well-presented car earns attention, while honest condition reports earn trust. Follow this process, price the vehicle fairly, and invite buyers to inspect it with confidence.