

Clean, lightly abrade, and protect faded exterior plastic trim with a suitable water-based or solvent-based restorer.
Faded plastic trim can make a well-kept car look old, but most dull bumpers, mirror housings, cowl panels, and wheel-arch moldings can be improved at home. Learning how to restore plastic trim on car exterior starts with identifying the plastic, removing embedded dirt, choosing a safe product, and applying thin, even coats. This guide explains the process step by step, including what works, what fails, and when replacement is the better choice.
Why Exterior Plastic Trim Fades
Exterior plastic trim fades mainly because of sunlight, heat, road salt, harsh cleaners, and repeated washing. Ultraviolet light breaks down the surface oils and pigments in unpainted plastic. As those materials leave the surface, the trim turns gray, chalky, or blotchy.
Black plastic trim is often made from polypropylene, polyethylene, ABS, or a similar blend. These materials are strong and flexible, but they are not immune to weather damage. Plastic also becomes more porous over time, so it can hold dust and chemical residue.
The most common causes of faded car trim include:
• UV exposure from direct sunlight
• Automatic car wash chemicals
• Strong degreasers and tire cleaners
• Road salt and winter grime
• Silicone products that dry unevenly
• Heat from the engine bay or exhaust system
• Physical wear from brushes, towels, and shoes
In my detailing experience, many trim pieces are not permanently ruined. They are simply coated with years of oxidation and grime. However, deeply cracked or bleached plastic may not return to its original color with a simple dressing.

Check the Trim Before You Restore It
Before learning how to restore plastic trim on car exterior, inspect the part closely. A quick check helps you select the right method and prevents damage.
Run a clean fingertip across the trim. If it feels rough, the surface may have oxidation or embedded dirt. If it feels smooth but looks gray, a trim restorer may be enough.
Look for these conditions:
• Light fading: The plastic looks dull but has an even surface.
• Heavy oxidation: The surface looks chalky, patchy, or powdery.
• White residue: Old wax or polish may have dried on the trim.
• Cracks: Splits and deep lines usually cannot be repaired with a dressing.
• Peeling: A factory coating may be failing, especially on textured parts.
• Paint transfer: Another vehicle may have left color on the plastic.
You should also determine whether the trim is bare plastic, painted plastic, or rubber. A product made for unpainted plastic may stain painted surfaces. Always test a small hidden area first, such as the underside of a bumper lip.
If the trim is soft rubber, use a rubber-safe protectant. If it is painted or clear-coated, treat it like painted bodywork rather than raw plastic.

Gather the Right Tools and Products
The best results come from preparation, not from using the strongest chemical. You need only a few basic items to restore plastic trim on car exterior.
Recommended supplies include:
• Car wash soap
• Two buckets or a rinseless wash solution
• Soft microfiber towels
• A soft detailing brush
• An old toothbrush for narrow gaps
• All-purpose cleaner diluted according to its label
• Isopropyl alcohol for residue checks
• Masking tape
• A plastic trim restorer or protectant
• Nitrile gloves
• Eye protection
Choose a product based on the condition of the trim. Water-based dressings are easy to use and often leave a natural finish. Solvent-based restorers can create a darker look, but they may attract dust, streak, or affect nearby paint if applied carelessly.
Avoid household oils, cooking oil, motor oil, and shoe polish. These may darken trim for a short time, but they can leave a sticky film and make future cleaning harder. Heat can also cause oily products to run onto the paint.
Use a product that clearly states it is safe for exterior automotive plastic. A reliable label should provide directions, curing time, surface restrictions, and safety information.
Step 1: Wash the Car Trim
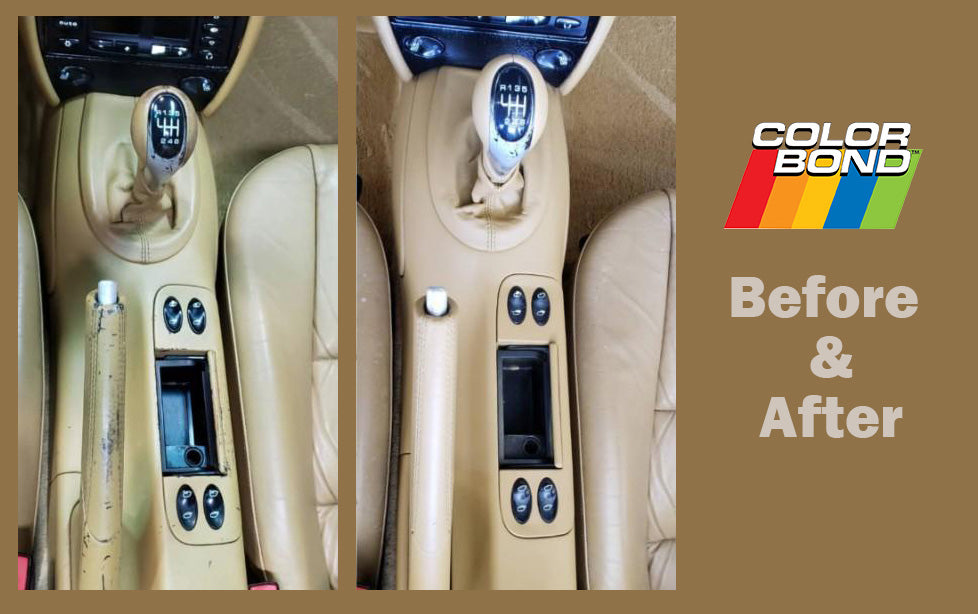
The first step in how to restore plastic trim on car exterior is a thorough wash. Applying a restorer over dirt traps grime beneath the product and creates uneven color.
Park the vehicle in shade. The surface should be cool to the touch. If the trim is hot, soap and cleaner can dry too fast and leave marks.
Follow these steps:
Rinse loose dirt from the trim.
Wash the area with car soap and a microfiber mitt.
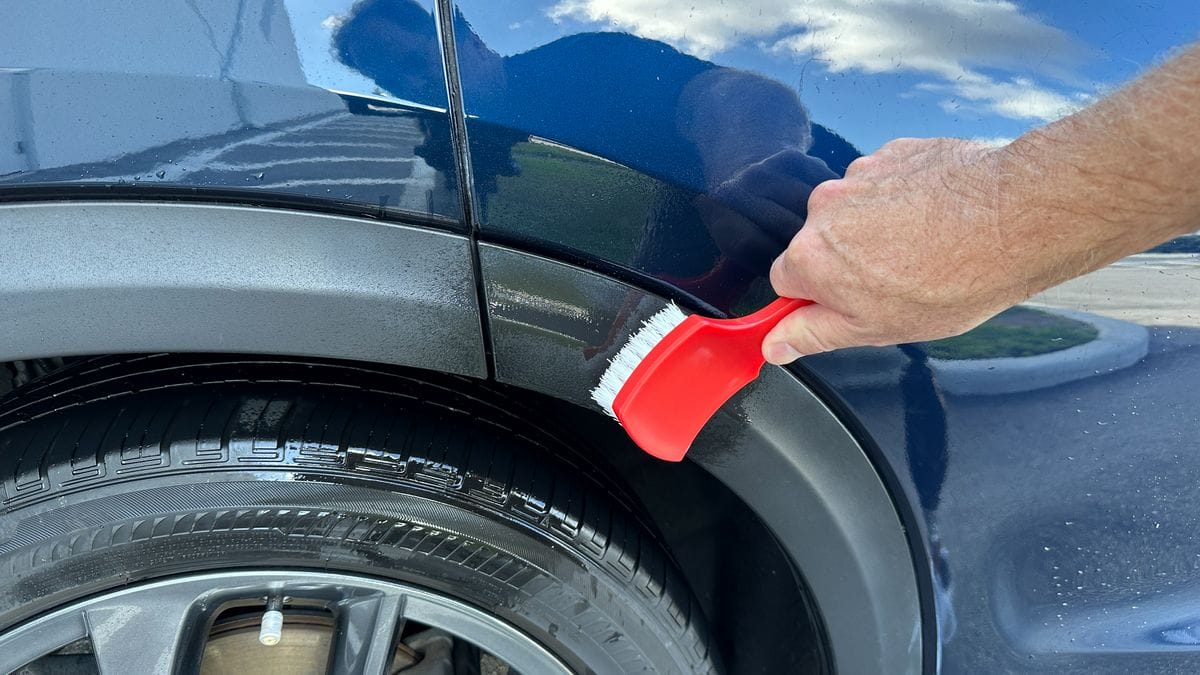
Use a soft brush to clean textured grooves.
Rinse away all soap.
Dry the trim with a clean microfiber towel.
Inspect the surface under good light.
For heavy buildup, use a diluted automotive all-purpose cleaner. Follow the product label closely. Stronger is not always better, and an overly strong cleaner can dry rubber seals or damage nearby finishes.
Be careful around sensors, cameras, emblems, and electrical connectors. Do not force water into gaps around mirrors, door handles, or active grille shutters.

Step 2: Remove Wax, Grease, and Old Dressing
Wax residue often creates white spots on black trim. It can also prevent a new plastic restorer from bonding evenly.
Spray a small amount of diluted cleaner onto a towel or detailing brush rather than flooding the entire panel. Work in small areas. Agitate gently, then wipe the residue away with a clean towel.
For stubborn residue, lightly dampen a microfiber towel with isopropyl alcohol. Test it first in a hidden area. Do not use alcohol on unknown painted, coated, or delicate surfaces without checking compatibility.
A clean trim surface should look evenly dull before restoration. If some areas look shiny and others look dry, old product may still be present.
One mistake I have seen often is skipping this step. The owner applies a dark dressing over old wax, then notices streaks after the first wash. The dressing did not fail; the surface was not clean enough for an even application.
Step 3: Use Light Abrasion for Severe Oxidation
Light abrasion can help when washing does not remove a chalky surface. It is an optional step, not a requirement for every vehicle.
Use a fine automotive plastic polish or a very mild finishing product designed for textured plastic. Apply it by hand with a soft foam applicator. Work gently and inspect often.
Avoid aggressive sanding unless you understand the plastic and plan to refinish it. Coarse sandpaper can flatten texture, create shiny patches, and leave visible scratches. Textured trim is especially difficult to restore after heavy abrasion.
For severe oxidation, wet sanding may be possible, but it usually requires several steps:
• Cleaning
• Fine wet sanding
• Rinsing and drying
• Plastic-specific coating or dye
• Careful curing time
This process can improve the surface, but it is not always the best home repair. If the trim has deep cracks, missing texture, or severe color loss, professional refinishing or replacement may provide a better result.
Step 4: Apply the Plastic Restorer
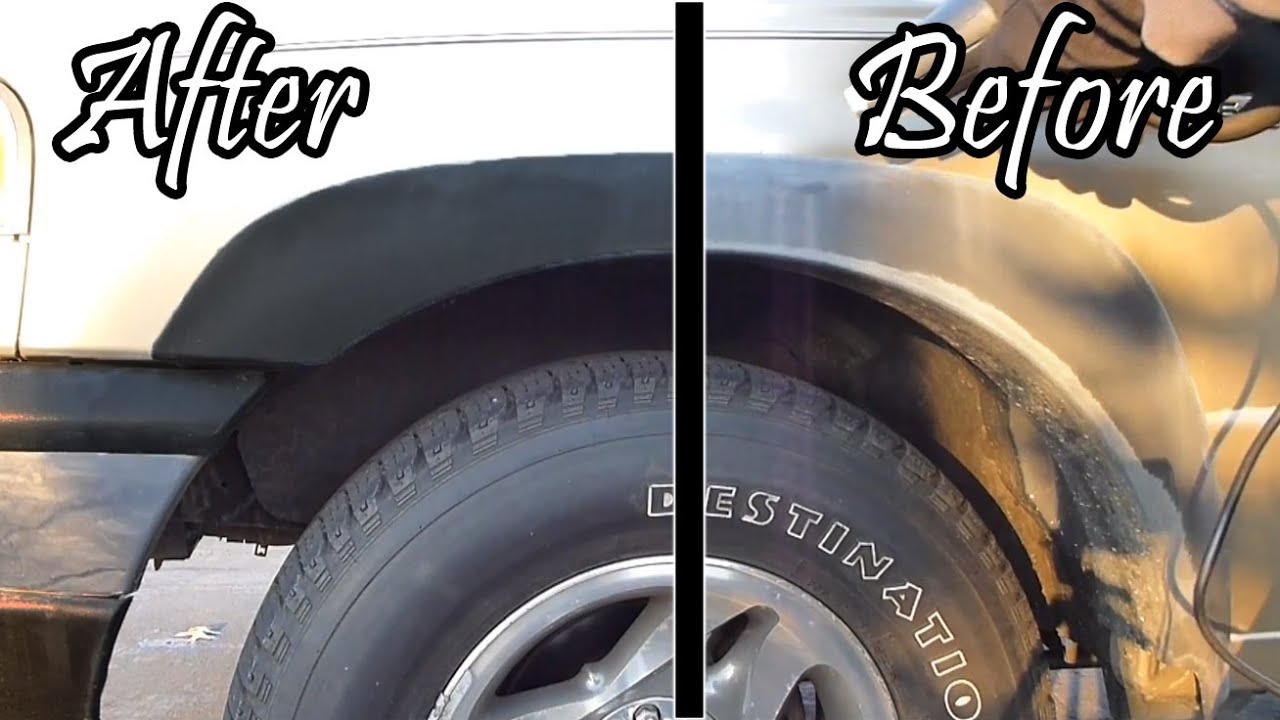
Once the trim is clean and dry, apply the restorer in a thin layer. This is the main stage of how to restore plastic trim on car exterior.
Shake the product if the label requires it. Put a small amount on an applicator pad, then spread it across one section at a time. Use overlapping strokes to cover the texture without flooding the panel.
Keep the following points in mind:
• Apply less product than you think you need.
• Work in small sections.
• Keep the product off glass and painted panels.
• Use masking tape near sharp edges.
• Wipe runs and heavy spots at once.
• Allow the first coat to level before adding another.
A thin coat usually looks more natural and lasts longer than a heavy, glossy layer. Let the product sit for the time stated on its label. Then wipe away excess with a dry microfiber towel.
If the trim still looks uneven after curing, apply a second thin coat. Do not keep adding product to one dark spot. That can create a greasy patch while other areas remain faded.

Step 5: Allow Proper Curing
Curing is the time the product needs to set and form a stable finish. It is not the same as drying on the surface.
Keep the car dry during the recommended curing period. Many products need several hours without rain, washing, or heavy dew. Some coatings need longer.
During curing:
• Avoid touching the trim.
• Do not drive on dusty roads if possible.
• Keep the vehicle out of direct sun when the label recommends it.
• Do not apply tire shine near freshly restored trim.
• Avoid washing the vehicle until the product has set.
If rain is likely, delay the job. Water can create streaks or reduce durability before the product bonds to the plastic.
The final look may change slightly after curing. Some restorers appear very dark at first and settle into a more natural satin finish. Judge the result only after the stated cure time has passed.

Choosing Between a Dressing, Dye, and Coating
Different products solve different levels of plastic damage. Understanding the difference helps you restore plastic trim on car exterior without expecting a temporary dressing to perform like a permanent refinish.
Water-Based Trim Dressing
A water-based dressing is simple and low risk. It can improve color and add light protection, but it may need frequent reapplication.
It works well for:
• Newer vehicles
• Mild fading
• Routine maintenance
• Owners who prefer a natural finish
Solvent-Based Restorer
A solvent-based restorer often creates a darker appearance and may last longer than a basic dressing. However, it can streak, smell strong, or affect nearby surfaces if misused.
Use gloves and ventilation. Follow the label and keep the product away from glass, paint, and soft rubber unless the manufacturer approves it.
Plastic Dye or Coating
A dye or coating is better for severely faded plastic. It can provide a more lasting color change, but surface preparation is critical.
These products may require masking, multiple coats, and longer curing. They are less forgiving than a simple dressing, so practice on a removable or hidden piece when possible.
Common Mistakes to Avoid
Learning how to restore plastic trim on car exterior also means learning what not to do. Many poor results come from rushing the preparation.
Avoid these mistakes:
• Applying product to hot plastic
• Restoring dirty trim
• Using too much dressing
• Ignoring old wax residue
• Spraying directly near paint
• Skipping a hidden-area test
• Washing before the product cures
• Using cooking oil or motor oil
• Sanding textured plastic too aggressively
• Expecting cracked plastic to look new
Do not use a heat gun unless you have training and accept the risks. Heat can darken plastic temporarily, but it may also warp the part, create shiny patches, or speed up future fading. The result can look impressive for a short time and disappointing later.
A product that works on one vehicle may perform differently on another. Plastic type, age, climate, texture, and previous chemical exposure all affect the outcome.
How to Make Restored Trim Last Longer
A restored finish needs simple care. The goal is to reduce the stress that caused the fading in the first place.
Wash exterior trim with mild car soap. Use a soft brush for textured areas, and rinse away cleaner before it dries. Avoid strong degreasers unless the trim has heavy oil or road film.
Apply a UV-protective trim product according to its label. UV protection does not stop all fading, but it can help reduce exposure. Parking in a garage or shaded area also makes a major difference.
For routine care:
• Wash the trim every time you wash the car.
• Remove bird droppings quickly.
• Clean road salt before it dries.
• Wipe away dressing overspray from nearby paint.
• Reapply protection only when the finish becomes dry or uneven.
• Keep silicone-heavy tire products away from exterior trim.
In hot climates, check the trim more often. In areas with snow and road salt, clean the lower bumper and wheel-arch trim during winter.
When Replacement Is Better Than Restoration
Restoration is not always the right answer. Some plastic pieces are too damaged for a reliable cosmetic repair.
Consider replacement when:
• The trim is cracked or broken.
• Mounting clips are missing.
• The texture has been worn smooth.
• The plastic is badly warped.
• A coating is peeling from the surface.
• The part is inexpensive and easy to install.
A professional may be able to sand, dye, or refinish the piece. On older cars, replacement parts may be available through dealers, salvage yards, or reputable aftermarket suppliers.
The best repair is the one that looks even from normal viewing distance and remains safe during driving. A dark temporary finish is not a true repair if the plastic is structurally damaged.
My Practical Lessons From Restoring Car Trim
The biggest lesson is to spend more time cleaning than applying product. Most trim restorers take only a few minutes to spread, but proper cleaning may take much longer.
I once worked on a vehicle with badly spotted door moldings. The owner believed the plastic needed dye. After removing old wax and road film, the original color returned enough that a light water-based protectant produced a clean, factory-like finish.
Another lesson is to avoid chasing a perfect wet-black look. A very glossy finish may look attractive at first, but it can appear unnatural and collect dust. Satin black usually looks closer to the original factory finish.
Finally, always inspect the result in daylight. Garage lighting can hide streaks, missed areas, and product runs. Sunlight shows the truth, much like a high-resolution camera.
Frequently Asked Questions About How to Restore Plastic Trim on Car Exterior
What is the best way to restore faded black plastic trim?
Wash and degrease the trim first, then apply a product made for unpainted automotive plastic. Use thin coats and allow the product to cure fully before washing the car.
Can I restore exterior plastic trim with a heat gun?
A heat gun may darken some faded plastic, but it carries a high risk of warping or creating uneven glossy areas. A dedicated trim restorer, dye, or coating is usually safer and more predictable.
How long does restored plastic trim last?
Durability depends on the product, climate, surface condition, and washing habits. A basic dressing may last weeks, while a quality coating or dye may last months or longer when properly prepared and maintained.
Can I use tire shine on exterior plastic trim?
Some tire products are compatible with plastic, but many are designed for rubber and may streak or attract dust. Use a product specifically labeled for exterior automotive plastic whenever possible.
Why does my plastic trim look streaky after restoration?
Streaks usually come from dirt, old wax, excess product, uneven application, or moisture during curing. Clean the area again, remove residue, and apply a much thinner coat to a cool, dry surface.
Can faded plastic trim be restored permanently?
Most home restorers provide a temporary or semi-permanent improvement rather than a permanent repair. Severely damaged plastic may need professional dyeing, coating, or replacement.
Conclusion
Restoring exterior plastic trim is mainly a preparation job. Clean the surface, remove wax and grease, use light abrasion only when needed, and apply a plastic-safe restorer in thin coats. Keep the vehicle dry while the product cures, then protect the trim with regular washing and UV care.
With patience, even tired gray trim can regain a clean, rich appearance without an expensive body shop visit. Start with one small section, test your product, and build your technique before treating the whole vehicle. If these tips helped, explore more car care guides and share your trim-restoration results in the comments.